
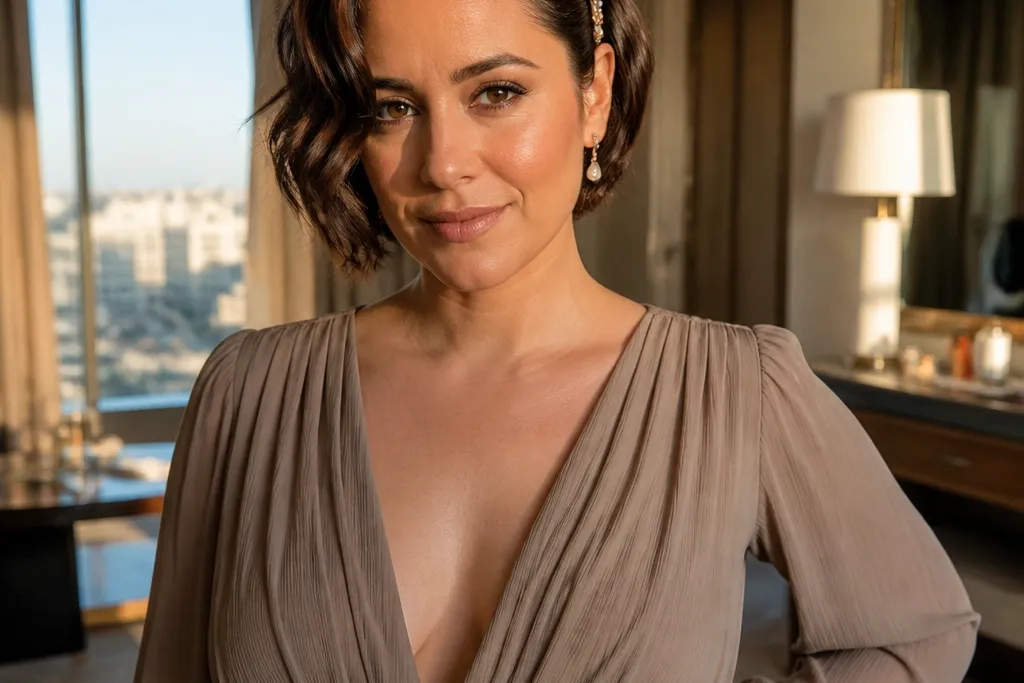

1. Soft Side-Part Waves with Pearl Pin
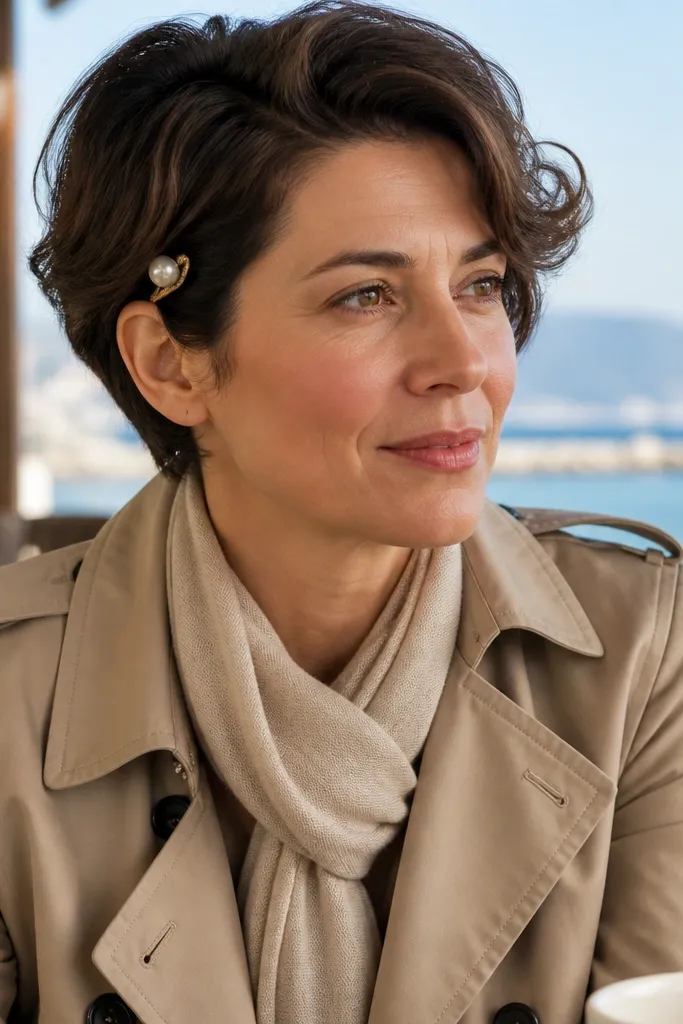
This is the easiest “open and bridal” choice for short hair because the deep side part creates instant structure, even when your length is only to the jaw or above. The waves should be loose and directional — think one sweep over the forehead rather than ringlets. A single pearl pin near the ear makes the look feel wedding-ready without turning it into a heavy headpiece. It photographs well because the side part gives a clean highlight line and the waves catch light as you move. Best for: straight-to-slightly-wavy hair, and brides who want a romantic look with visible earrings.
Quick tipIf you’re worried about frizz in photos, use a tiny amount of smoothing balm on the outer layer only, not throughout your hair.
Start by blow-drying with a side-part set and using a medium-barrel iron only on the top half of the hair, leaving the ends slightly softer. Then sweep the waves to the side and pin the top section lightly with bobby pins at the crown and behind the ear. Finish by placing one pearl pin where your hair naturally separates, then mist lightly with flexible hold hairspray so the waves keep shape. If your hair is fine, add mousse at the roots before heat styling to prevent flatness.
Skip thisDon’t over-tighten the waves — tight curls on very short hair read “helmet” in flash.
2. Textured Pixie with Crystal Barrette Sweep
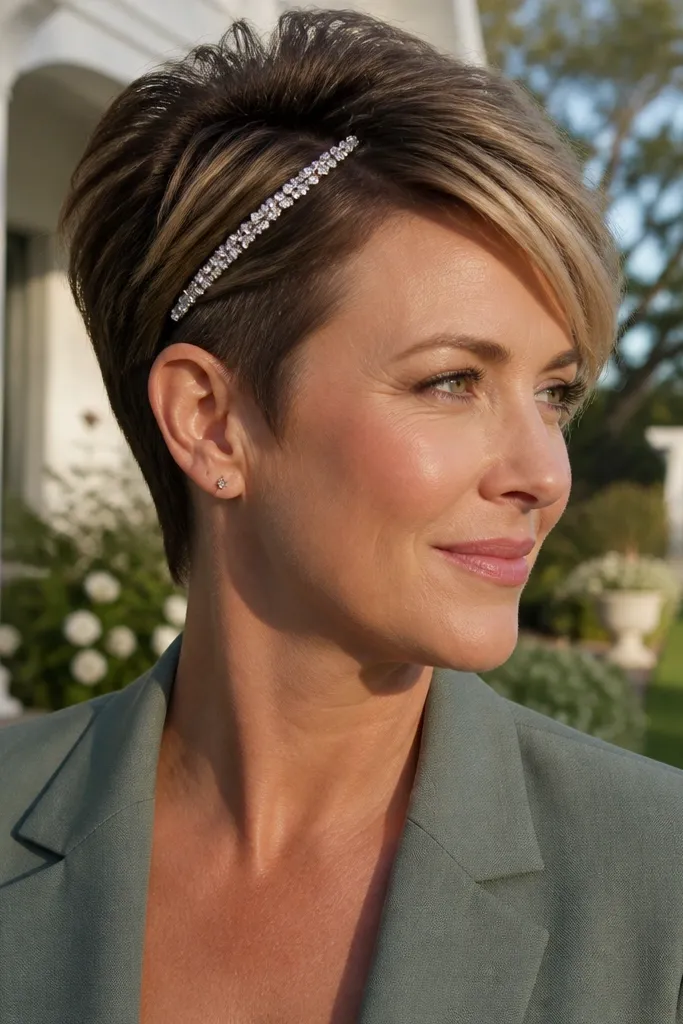
If your hair is a true pixie, this is the look that makes it feel intentional instead of “just styled.” Texture gives you dimension, and a crystal barrette provides a clear focal point while keeping everything open around the face. The best version has volume at the crown and a slightly longer swept side so your features stay framed. It works for both minimal and statement jewelry because the barrette gives bridal sparkle without covering your neckline. Best for: very short hair, modern brides, and anyone who wants a clean, photo-friendly shape.
Quick tipChoose a barrette that matches your metal tone (silver or gold) to keep the look cohesive with rings and jewelry.
Start on damp hair with a root-lifting mousse, then blow-dry with fingers, lifting at the crown and directing the longer side forward. Use a matte paste to separate pieces, then sweep the front section to the side and secure with a crystal barrette just above the ear. Finally, set the crown volume with a light mist of hairspray, then avoid touching it for 10 minutes so it locks in.
Skip thisSkip heavy gel — it flattens pixies and makes them look greasy in flash.
3. Vintage Finger-Wave Short Style
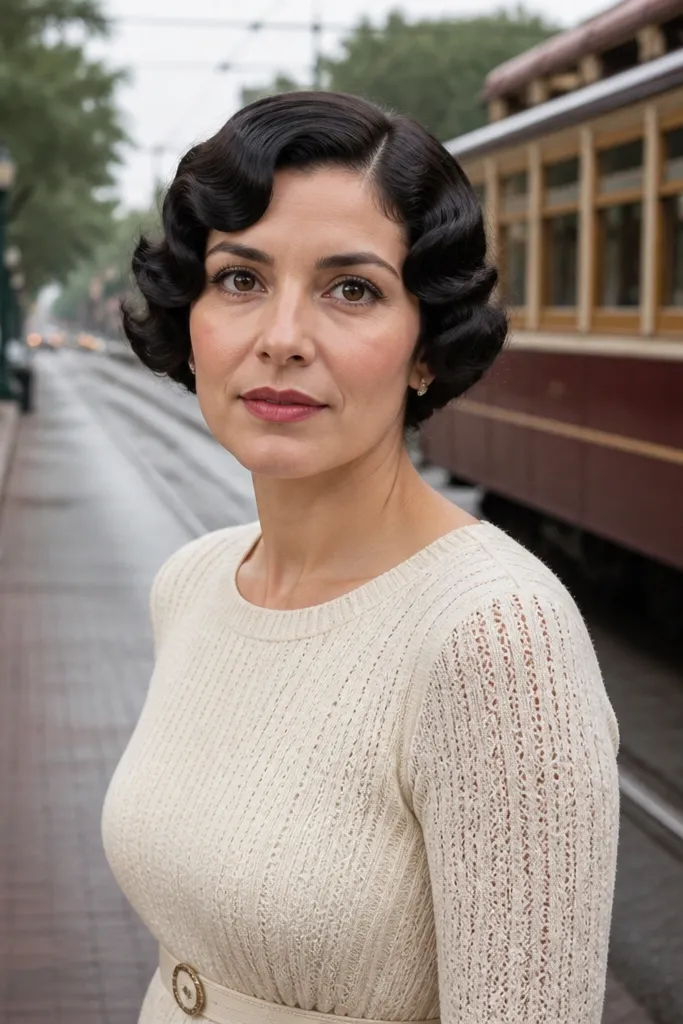
Finger waves on short hair look instantly bridal because they create a graphic pattern that holds up in photos. The wave should be crisp and glossy, not soft and fuzzy — that’s what reads as vintage rather than messy. Keep the waves mostly around the front and sides, since very short lengths need structure closer to the face. This is a strong pick for brides with bold makeup or classic accessories because it gives your look a deliberate, “styled” finish. Best for: straight hair that takes styling easily, and winter weddings where you want a polished look.
Quick tipPlan to style this the day before if you’re time-crunched — finger waves hold better when they cool completely.
Start by applying a strong-hold styling gel to damp hair, then part and comb the front into sections. Use a wave tool or your fingers to create S-shaped finger waves, pinning each wave in place as you go. Let it dry fully (or use a hood dryer), then remove pins and apply a light shine serum to smooth the surface. Set with a firm-hold hairspray so the pattern stays crisp through movement.
Skip thisDon’t use a flexible mist spray while the hair is still warm; it ruins the wave definition.
4. Open Crown Twist with Loose Ends
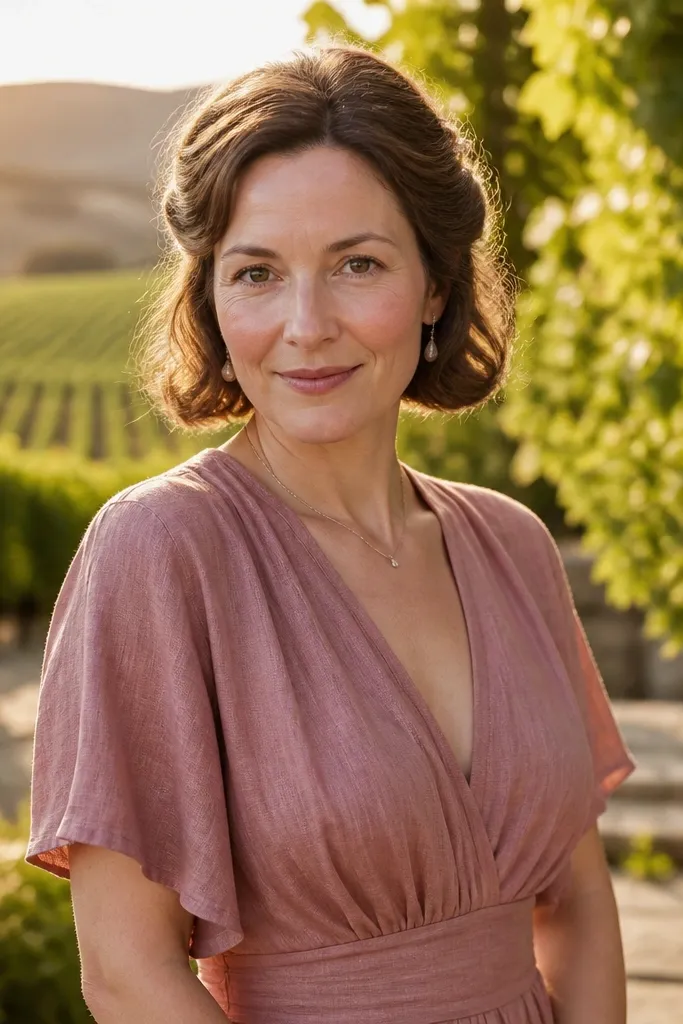
This look gives you the best of both worlds: an open, airy front with a controlled twist at the crown. The twist anchors the style and makes short hair look more “set,” while the loose ends keep the bridal vibe soft. It’s especially flattering if you have a short bob because the twist lifts the top while the ends fall naturally around your cheeks. Add a small comb or rhinestone clip to the twist area so the sparkle is visible when you turn your head. Best for: shoulder-bob lengths, face-framing layers, and veil-friendly styling.
Quick tipIf you wear a veil, anchor the veil to the same pinned zone as the twist so you don’t add extra strain to the sides.
Start by applying a light styling cream and creating a slight off-center part. Take the top sections from left and right, twist them toward the back of your head, and secure with bobby pins in an X pattern. Leave the ends loose, then place a small decorative comb or rhinestone clip on the twist where it meets the pinned area. Finish with a flexible hairspray focused at the crown so the sides stay touchable.
Skip thisSkip a bulky twist — it can swallow short length and make the back look flat.
5. Half-Up Short Bob with Micro Braids
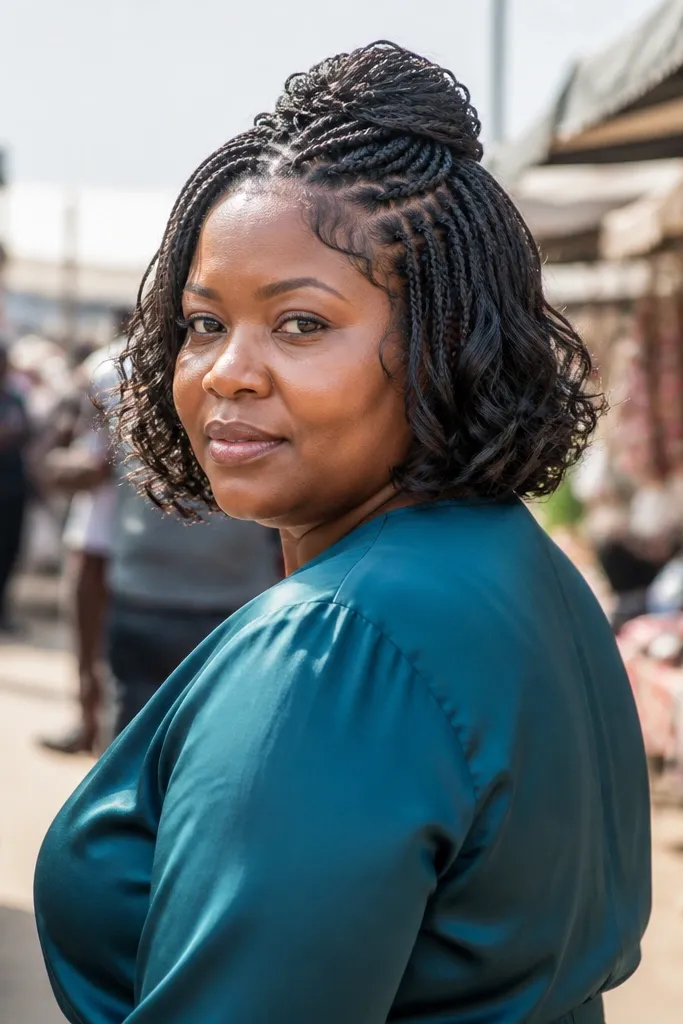
Micro braids on a half-up short style look delicate and intentional, even when your hair is too short for a full braid crown. The half-up section keeps the face open and exposes the neckline, while the open bob still reads as bridal and soft. This is a great option if your hair has layers because the braids can catch those pieces and hold them neatly. Add a tiny pearl or gold clasp at the braid join for a clean finish. Best for: bob haircuts, soft romantic dresses, and brides who want texture without heavy weight.
Start by separating a half-up section from temple to temple and clip the rest back. Braid two thin sections from the front into micro braids, then join them at the back with a small elastic or pins. Let the rest of the bob fall open, then curl only the outer ends with a 3/4-inch iron for a gentle bend. Finish by tucking the braid ends neatly and adding a tiny pearl pin at the join.
Keep braid tension light — tight micro braids can pull short layers and create bumps in photos.
Don’t braid too far back; on short hair it can hide the bob shape and look crowded.
6. Sleek Bob with Side-Clip and Shiny Finish
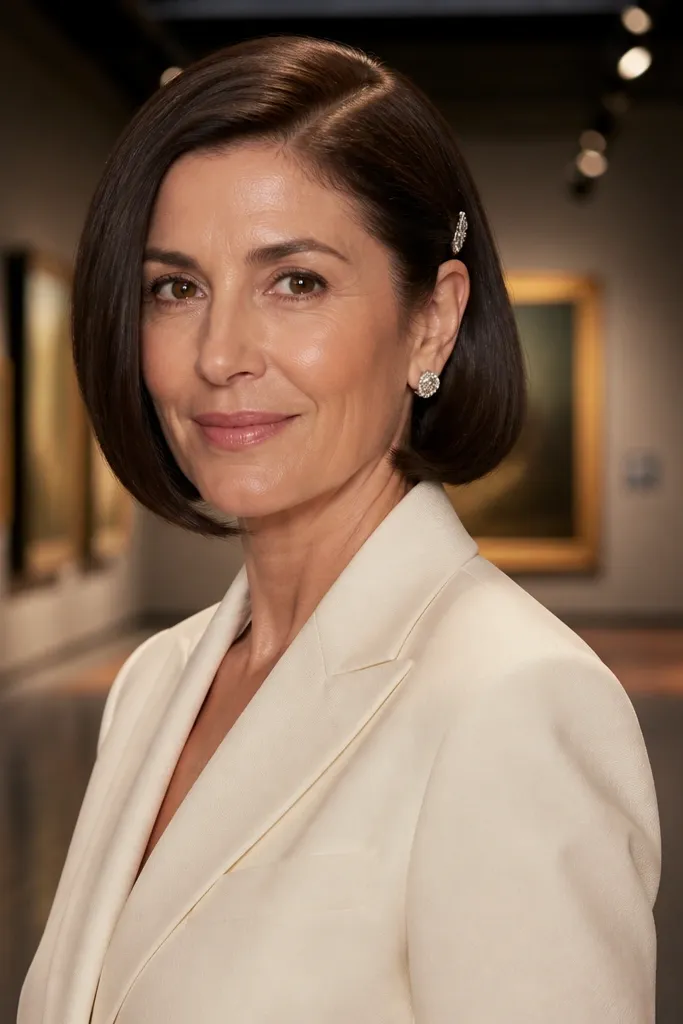
Sleek and open is a bold bridal look because it shows off your cut line and keeps the silhouette clean. A side clip adds the wedding detail without needing extra height or curls. The key is shine and control: the hair should look smooth, not wet, and the ends should sit evenly. This is the smartest pick for brides who dislike curls or who have naturally straight hair that holds its shape. Best for: minimalist dresses, modern ceremonies, and humid weather when you want less frizz.
Start by blow-drying your bob straight with a paddle brush, then apply a heat protectant and use a flat iron only on the top layer for a smooth finish. Part deeply to one side, then secure the front section with a small decorative clip near the jawline. Run a tiny amount of shine serum on the ends and outer layer, then set with a light hairspray so it stays sleek without turning crunchy. If your hair slips, add two bobby pins under the clip for extra hold.
Match the clip metal to your earrings, not your hair color — it reads more intentional in photos.
Skip volumizing mousse — it fights sleek styling and creates flyaways.
7. Loose Hollywood Bend on Short Hair
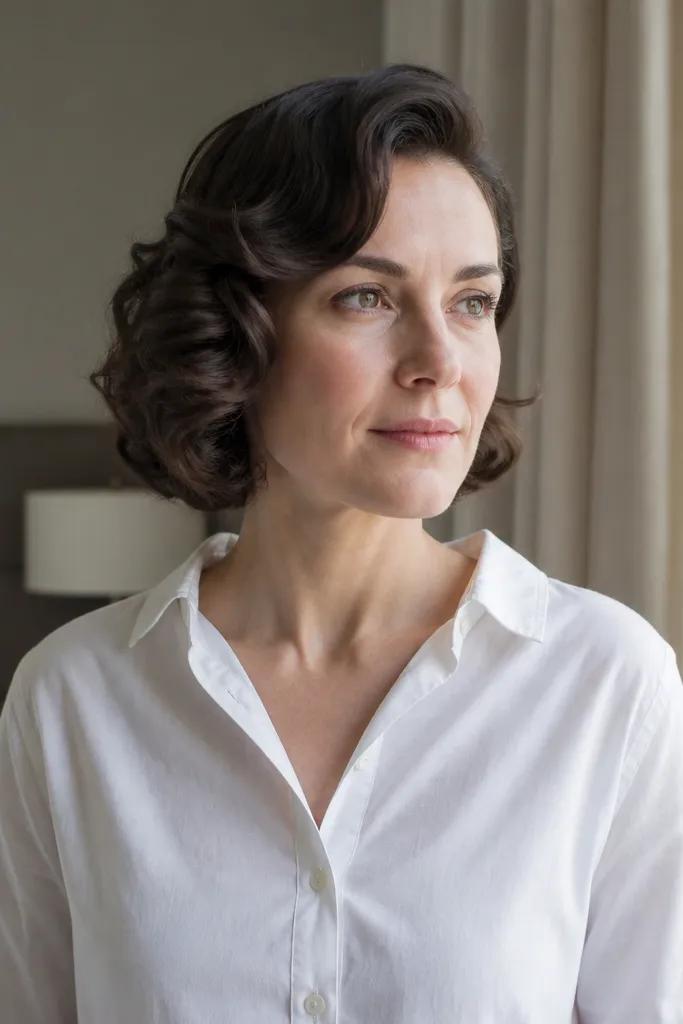
Hollywood bends look glamorous because they create a smooth wave that sits flat and frames the face, even on short lengths. This isn’t tight curl — it’s a controlled bend that shows shine and movement when you turn. The best version keeps the front hair slightly fuller while the sides stay tidy, so the style looks expensive instead of chaotic. Add a thin headband or a few pearl pins around the bend for a bridal feel. Best for: bob and lob cuts, evening receptions, and brides who want a polished, camera-ready look.
Quick tipUse a boar-bristle brush on the top after curling — it turns separate curls into one continuous bend.
Start by blow-drying smooth, then part where you naturally look best. Use a curling iron to create gentle bends: clamp, twist slightly, then release, keeping the curl shape loose. Brush the top lightly to blend, then pin the front bend to one side with bobby pins for a clean silhouette. Finish with a shine spray and a few pearl pins along the wave line.
Skip thisDon’t brush too aggressively — it can erase the bend and make it look flat.
8. Open Side Pony for a Micro Bob
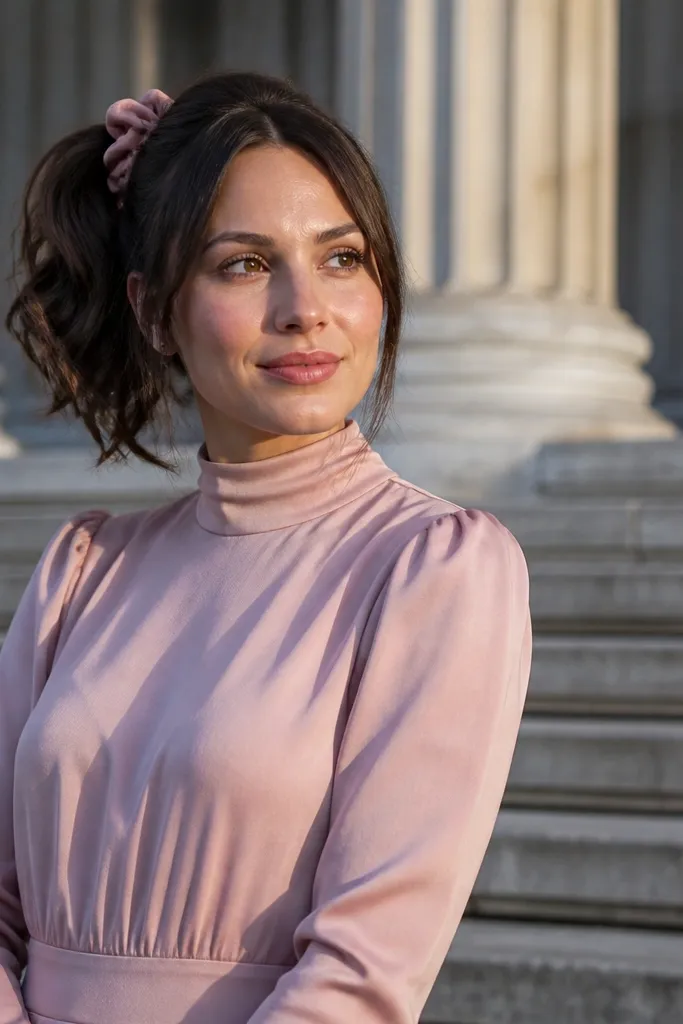
A tiny side pony gives you height and structure while still leaving the style open and bridal. For micro bobs, the trick is to gather just enough hair at the side so the face stays framed — you’re not trying to pull everything back. This style looks great with a ribbon tie or a small satin scrunch that matches your dress color. The open front keeps it from looking too sporty, while the pony tail texture gives movement. Best for: short bobs, brides who want something playful but photo-friendly, and outdoor ceremonies where you need hold.
Quick tipIf your hair is slippery, tease the gathered section lightly at the roots before securing.
Start by adding texture spray to dry hair, then sweep one side back and gather the shortest section at the nape. Secure with a small elastic, then wrap a thin strand around the elastic and pin it down. Curl or bend the front pieces lightly so they frame your cheeks, then finish by tying a satin ribbon around the base or adding a bow clip. Set with hairspray only on the pony and the front edges to keep it from getting stiff.
Skip thisSkip a tight pony — on short hair it pulls the front down and looks heavy.
9. Open Low Bun with Face-Framing Tendrils
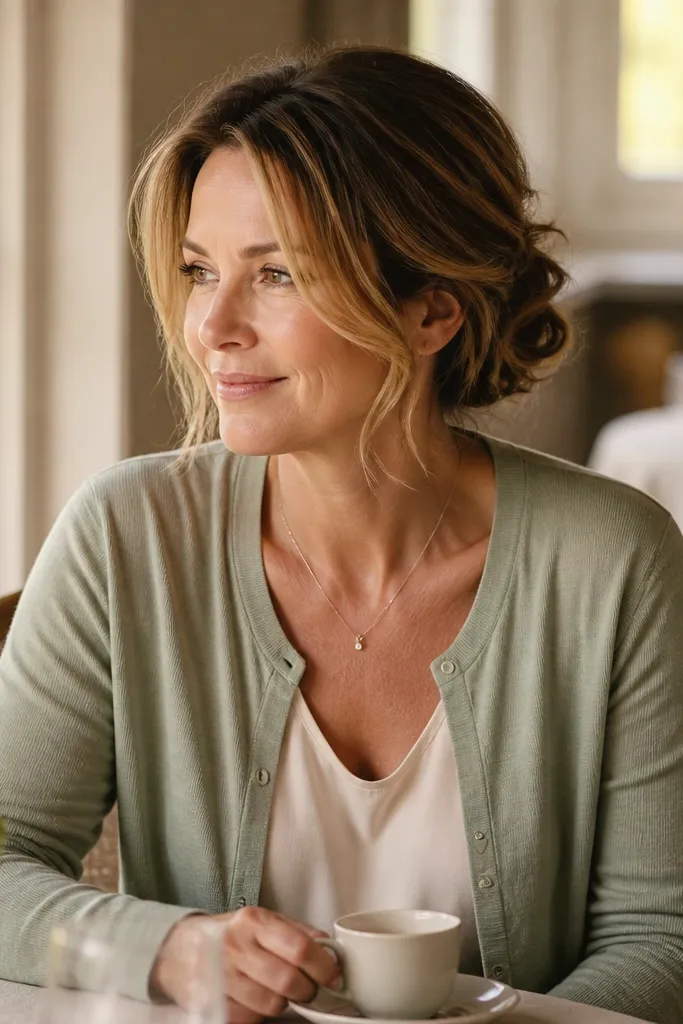
When people say “open,” they think it has to be down. This look keeps the face open and the hair mostly visible while still using the back for a tidy shape. The low bun is small and relaxed, so it doesn’t overwhelm short length, and the tendrils at the front add softness. It’s a strong bridal option if you want your hair to stay put during dancing without losing the open look in photos. Add a pearl cluster clip to the bun area or a delicate comb at the sides. Best for: short bobs, brides who want both security and softness.
Quick tipUse a few U-pins — they hold small buns on short hair better than straight bobby pins alone.
Start by smoothing the top and sides with a light cream, then gather hair into a low section at the back of your head. Twist and pin into a small bun, leaving two front tendrils loose on either side. Curl the tendrils lightly so they frame your jaw, then secure any stray pieces with bobby pins hidden under the bun. Finish with a light hairspray around the bun and tendrils only.
Skip thisDon’t make the bun too high — it can shorten your face in photos.
10. Feathered Bob with Rhinestone Side Comb
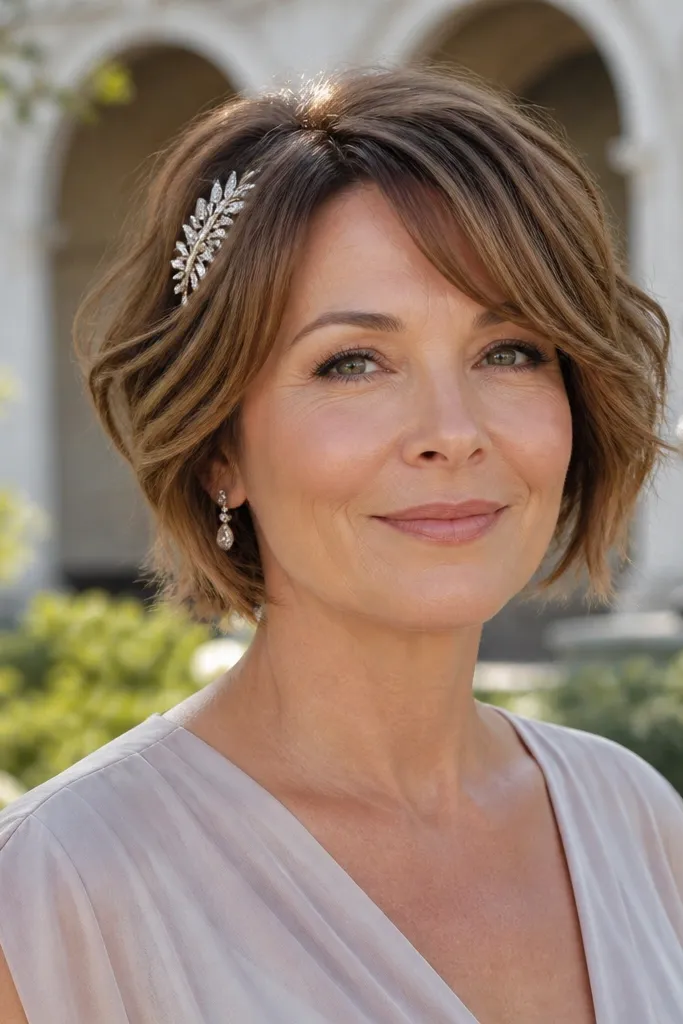
Feathered texture makes short hair look airy, and that’s the whole point for wedding photos: your hair shouldn’t look flat or stuck. The style reads “open” because the layers move away from the face, showing dimension around your cheeks. A rhinestone side comb adds sparkle at the exact spot your eyes land when you pose — the side of the head near the ear. This works especially well if you have a bob with layers that naturally separate. Best for: spring and summer weddings, and brides who want a light, photogenic finish.
Quick tipComb placement matters — set it where your hair naturally parts so it looks built-in, not stuck on.
Start with damp hair and add mousse at the roots, then blow-dry with a round brush just enough to lift and feather the layers. Use a flat iron only on the ends to create gentle outward flicks, not full curls. Place a rhinestone side comb at the side near the temple, then pin any loose bits so it sits firmly. Finish with a soft-hold spray so the feathering stays moveable.
Skip thisSkip heavy oil — it weighs down feathered ends and kills the airiness.
11. Curly Short Hair with Pearl Crown Band
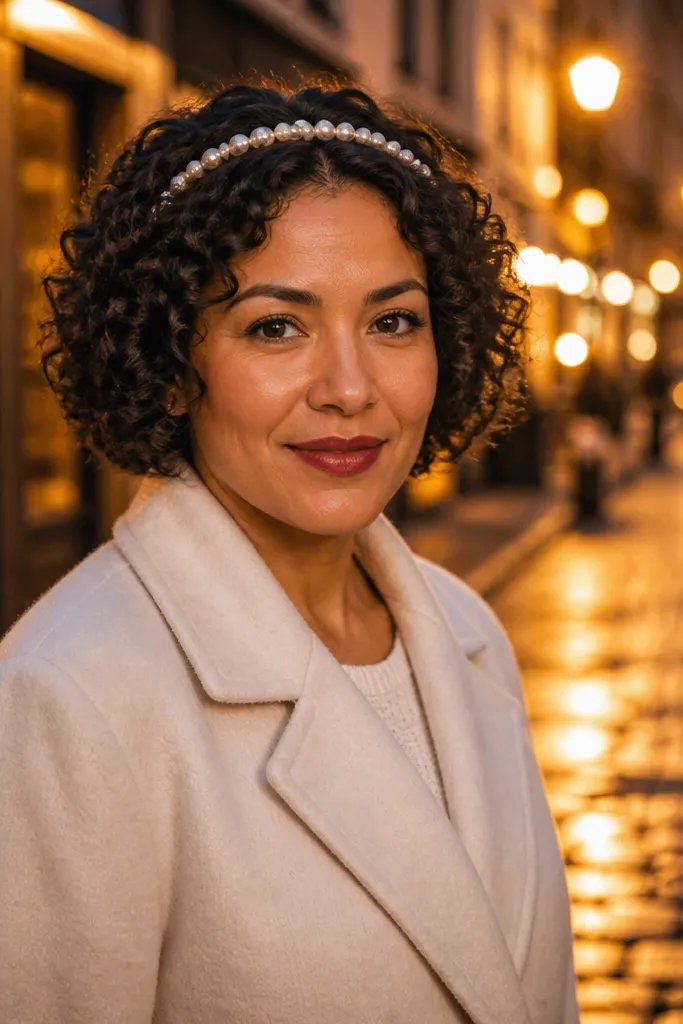
If you have curls, this is the open wedding look that respects your texture. A thin pearl crown band sits across the top, leaving the curls open around your face instead of flattening everything into a style. The curls should stay defined, not crunchy, and the band should be the only headpiece star. This is one of the most photogenic options because curls create natural volume and the pearls add sparkle without needing extra length. Best for: naturally curly hair, humid days, and brides who want an elegant but effortless look.
Quick tipDry completely before placing the band — wet curls compress and can shift the band out of place.
Start by applying curl cream to soaking-wet hair, then scrunch and use a diffuser on low heat until fully dry. Once dry, place the pearl band across the crown and secure with hidden pins at the sides. If your curls frizz, smooth only the outer ring with a tiny bit of gel, then leave the rest as-is for texture. Mist with a light flexible hairspray so curls hold their shape without becoming stiff.
Skip thisDon’t use heavy styling wax — it makes curls look dull and sticky under flash.
12. Glossy Wet-Look Bob with Minimal Clip

Wet-look hair can look bridal when it’s clean and controlled, not messy. The trick is to keep the part sharp and the ends even, so it reads as intentional styling rather than “just out of the shower.” A minimal clip adds just a hint of bridal detail while keeping the silhouette sleek. This look is especially good if your wedding makeup is dramatic — the hair stays glossy and doesn’t compete with your face. Best for: evening ceremonies, straight bobs, and brides who want a modern, editorial vibe.
Quick tipIf you’re taking flash photos, test the shine level with one quick photo — too much gloss can create glare.
Start with damp hair and apply a smoothing gel or gloss product, combing from root to ends to keep it uniform. Use a flat iron lightly if needed to remove bumps, then set the part with a comb. Secure the front or side with a small minimal clip, then add one more thin layer of gloss serum just to the outer surface. Finish with a firm-hold spray so the style stays sleek all night.
Skip thisSkip matte powders — they kill the wet-look effect and make it look dry.
13. Crown Halo Micro Braid on Short Hair
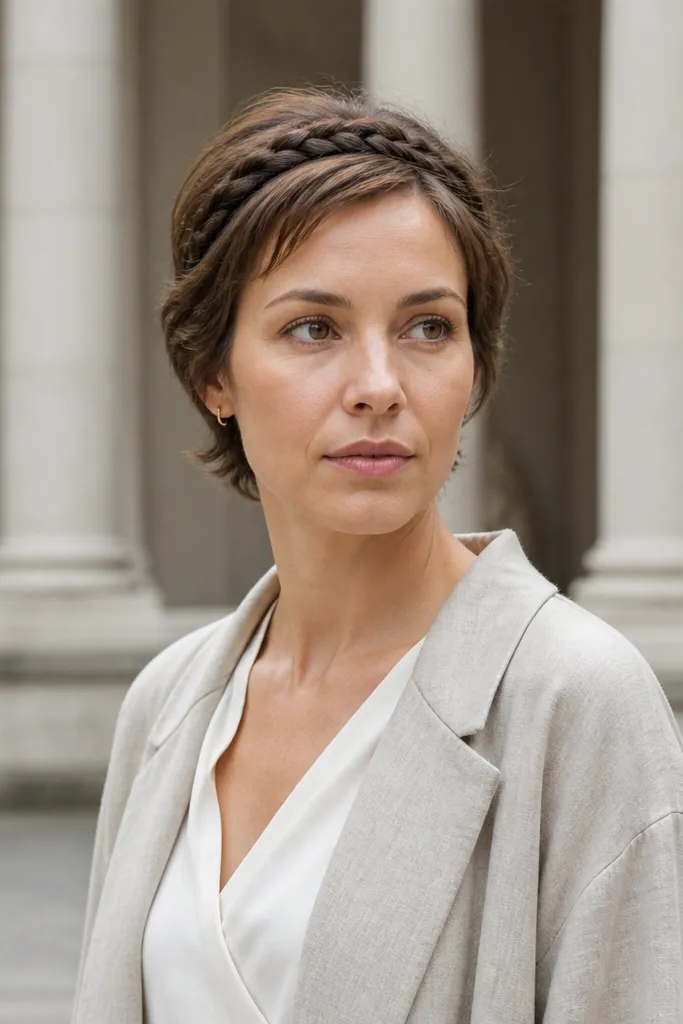
A crown halo micro braid makes short hair look more “done” because it draws a clean line across the top. It also keeps your hair open around the sides, which is what you want for bridal photos — you get shape without hiding your cut. This style is subtle enough for minimal brides and strong enough for brides who want a clear visual feature even if their hair is short. Best for: bobs, lobs, and any cut with enough length at the top to braid small sections.
Quick tipUse a flat pin under the braid so it doesn’t poke through when you move your head.
Start by parting slightly off-center and sectioning a thin band of hair across the crown. Braid each side into a tight micro braid, then connect them at the top with pins, keeping the braid line smooth. Leave the rest of the hair down and add a light curl to the ends if they’re straight. Set with hairspray around the braid only so the rest stays natural and open.
Skip thisDon’t braid too thick — wide braid sections look bulky on short hair.
14. Open Bow Hair Clip with Soft Waves
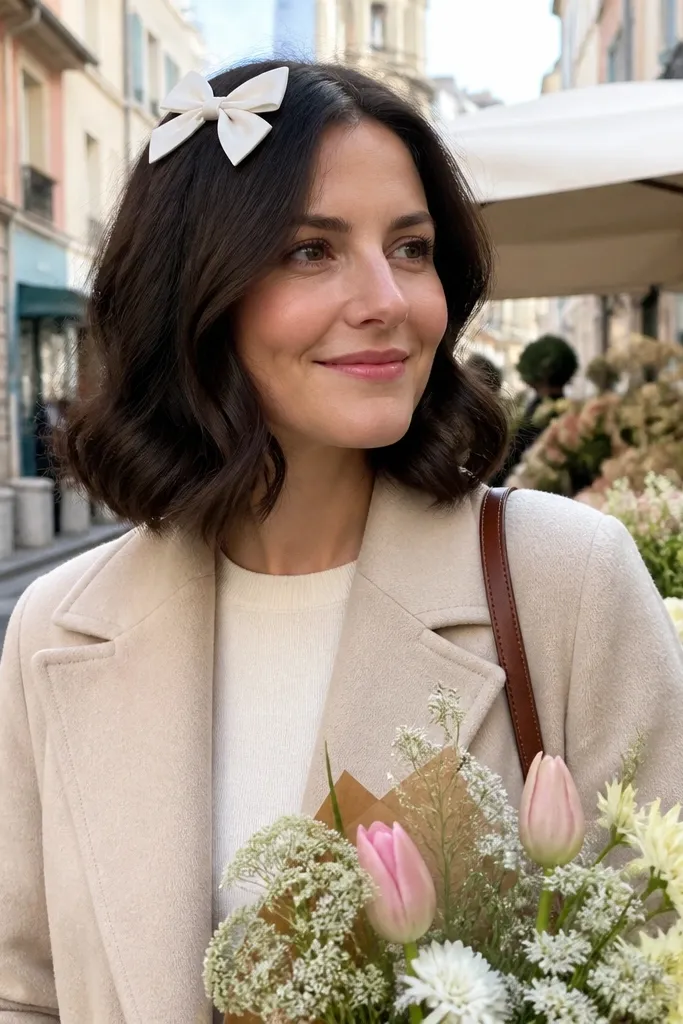
This look is sweet without being childish because the bow sits on the crown area and the waves do the heavy lifting for sophistication. Soft waves keep the hair open around your face, while the bow clip gives a clear bridal detail that shows in pictures. It works best when your waves are loose and glossy, not tight and dry. Choose a bow clip with pearls or satin for a wedding-ready finish. Best for: daytime ceremonies, garden settings, and brides who want a cute-but-stylish look.
Start by creating a loose wave pattern with a 1-inch iron, leaving the front pieces slightly longer for framing. Brush the waves lightly so they fall into one soft shape, then position the bow clip at the crown where your hair naturally lifts. Secure the clip with hidden pins if it feels loose. Finish with a light hairspray mist and a tiny dab of shine serum on the outer layer.
Keep the bow small — on short hair, bigger bows can overwhelm the face and hide your cut.
Skip crunchy hairspray — it makes waves look stiff and older in photos.
15. Side-Swept Finger Comb with Rhinestone Studs
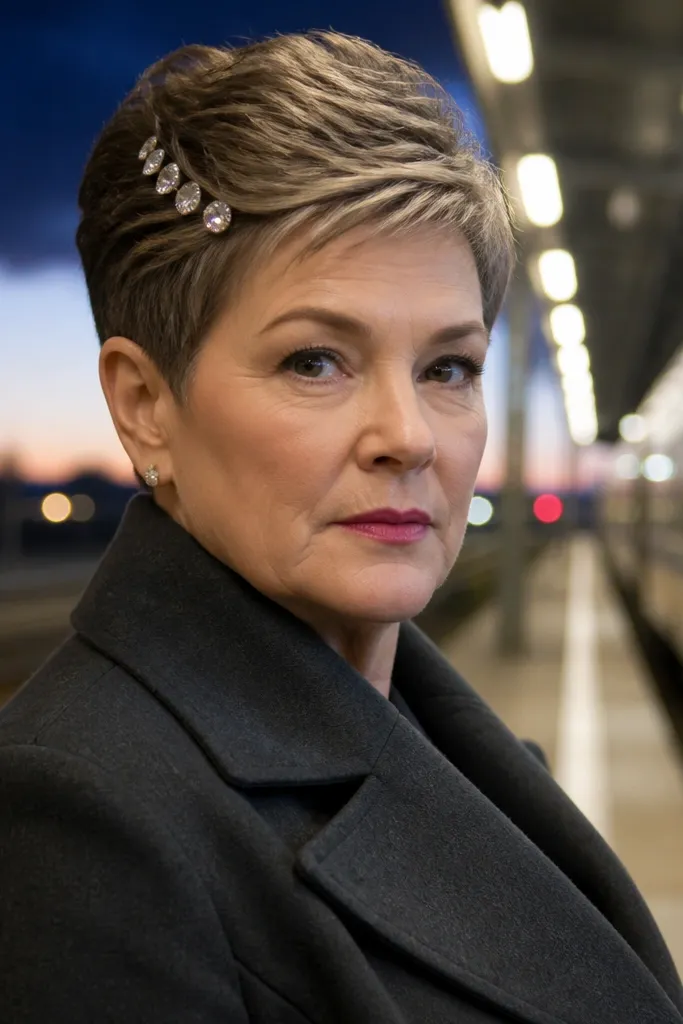
This is a clean, modern open style that still feels bridal because the rhinestones add sparkle exactly where the light hits. The hair is side-swept and finger-combed, creating a controlled texture that looks intentional rather than random. It’s perfect when you want your hair to look styled but you don’t want curls or heavy clips. The rhinestone studs at the temple keep it from feeling too plain, and they look great in close-up portraits. Best for: short bobs and pixies with enough length to sweep to one side.
Start with damp hair and apply a styling mousse, then blow-dry with a side direction and a finger-comb effect at the top. Use a small amount of styling cream to separate and smooth the outer layer, then sweep the front to one side. Place rhinestone studs or a tiny cluster along the temple line and secure with pins if needed. Finish with a flexible hairspray so the sweep stays crisp without getting hard.
If your studs slide, add a thin bobby pin behind the stud and hide it under the swept hair.
Don’t over-texturize the back — keep texture concentrated on the front for a polished look.



