
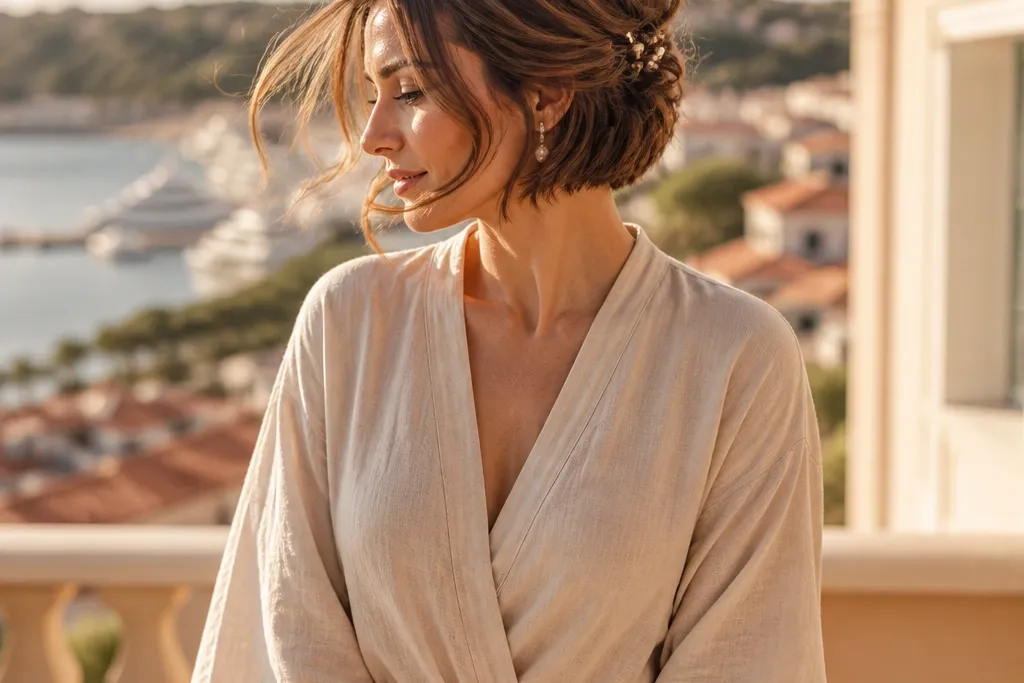
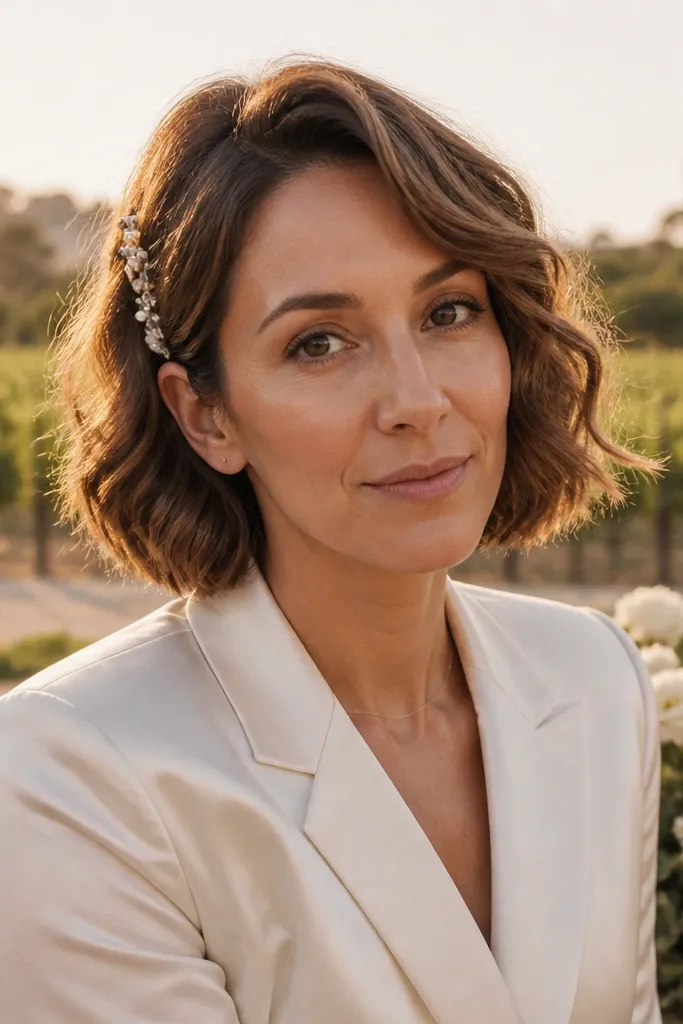
1. Side-Part Pixie with Pearl Pins
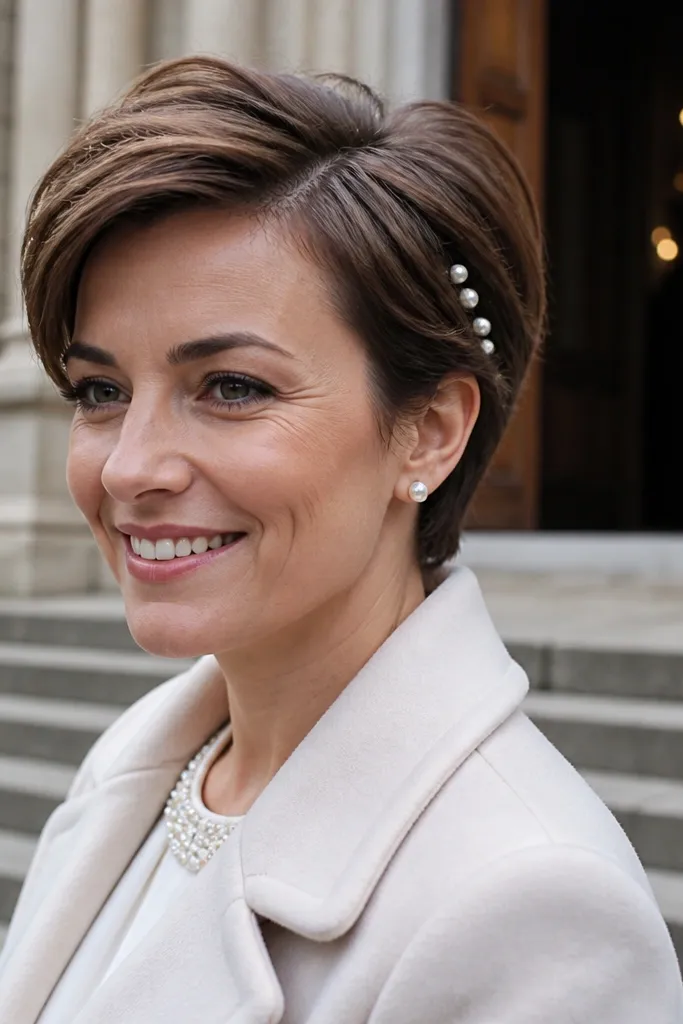
This is the cleanest “dreamy” look for a pixie because it frames your eyes and keeps the top hair from looking flat in photos. The side part creates a diagonal line that looks good from ceremony to reception, and pearl pins add soft sparkle without needing long hair. It suits oval, heart, and round faces because the swept front narrows the cheek area. If you have a shorter fringe, this style makes it look styled on purpose instead of accidental.
Start with dry hair and add dry shampoo or root spray at the part line so your hair has grip. Blow-dry the top and front hair to the side using a small round brush, then set the direction with a cool shot. Finally, pin two to four pearl bobby pins at the front edges, placing them so the pins hide under thicker sections. Finish with a light mist of flexible hold hairspray, then press the hair down gently with your palm for 10 seconds.
Quick tipPin the pearls slightly behind the ear line so they don’t catch on your veil comb.
Skip thisAvoid heavy gel on a pixie top — it can look shiny and stiff in wedding photos.
2. Finger-Wave Bob with Soft Shine Serum
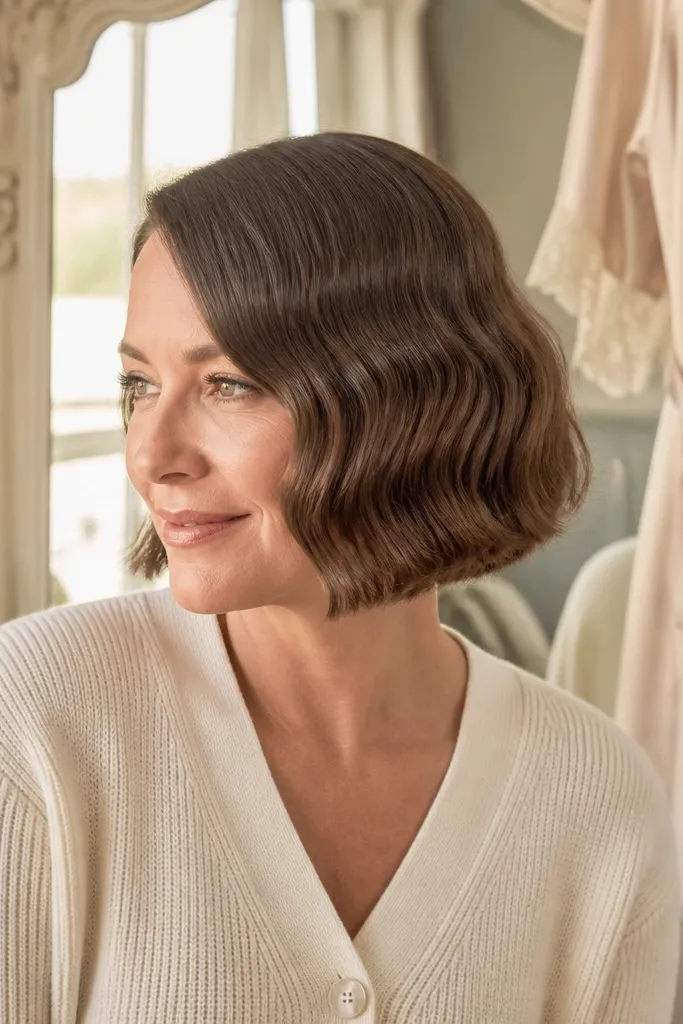
Finger waves on a bob read instantly bridal because they create sculpted texture, not random waves. The key is keeping the waves soft and shallow so your bob still moves, instead of looking like costume styling. This works especially well if your hair is chin to shoulder length, because there’s enough length for wave formation without needing a curling iron all day. It’s also a great choice for formal venues where you want your hair to look polished in every angle.
Start by sectioning your bob into a top and bottom layer, then apply a light mousse to damp hair. Use a comb to create shallow wave ridges and guide each ridge with your fingers, then let it set until fully dry. Once dry, break up any overly tight spots with your fingertips and add a tiny amount of shine serum to the outer layer only. Finally, set with a flexible hold hairspray so the waves keep their shape through photos and dancing.
Quick tipDo the wave pattern slightly off-center so the waves catch light when you turn your head.
Skip thisDon’t comb through the waves after they set — it turns them into loose frizz.
3. Messy Textured Pixie with Crown Lift
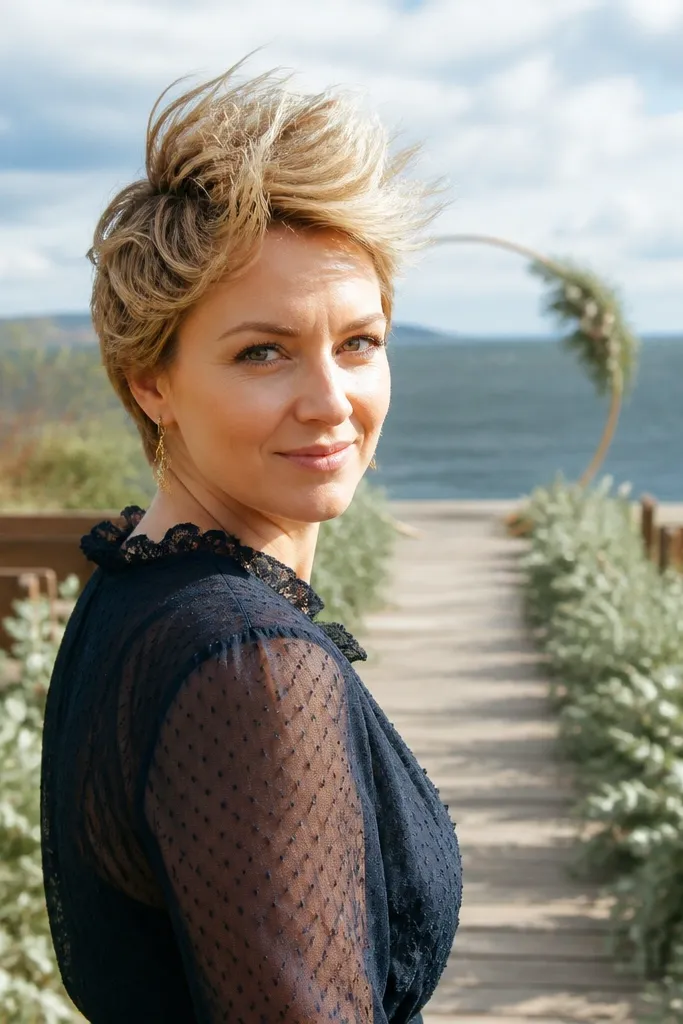
If you want dreamy but not overly formal, crown-lift pixie styling is the move. The lifted crown gives height for photos, while the messy texture keeps it romantic and lived-in. This looks best on pixies and short bobs with uneven lengths because the texture hides transitions. It’s also forgiving for windy outdoor weddings because the volume sits where your hair naturally wants to move.
Start by blow-drying the roots upward for 30-60 seconds, then apply a matte texture powder at the crown. Use a small curling wand only for the front pieces, wrapping away from your face for a soft bend. Next, tousle with your fingers and lift at the crown again, then pin one small section at the back to stop the top from flattening. Finish with matte hairspray so it stays touchable without looking wet.
Quick tipKeep a mini travel hairspray in your clutch and re-lift the crown with your fingertips.
Skip thisAvoid glossy hair products — they show flyaways and product buildup faster.
4. Half-Up Mini Twist on a Short Bob
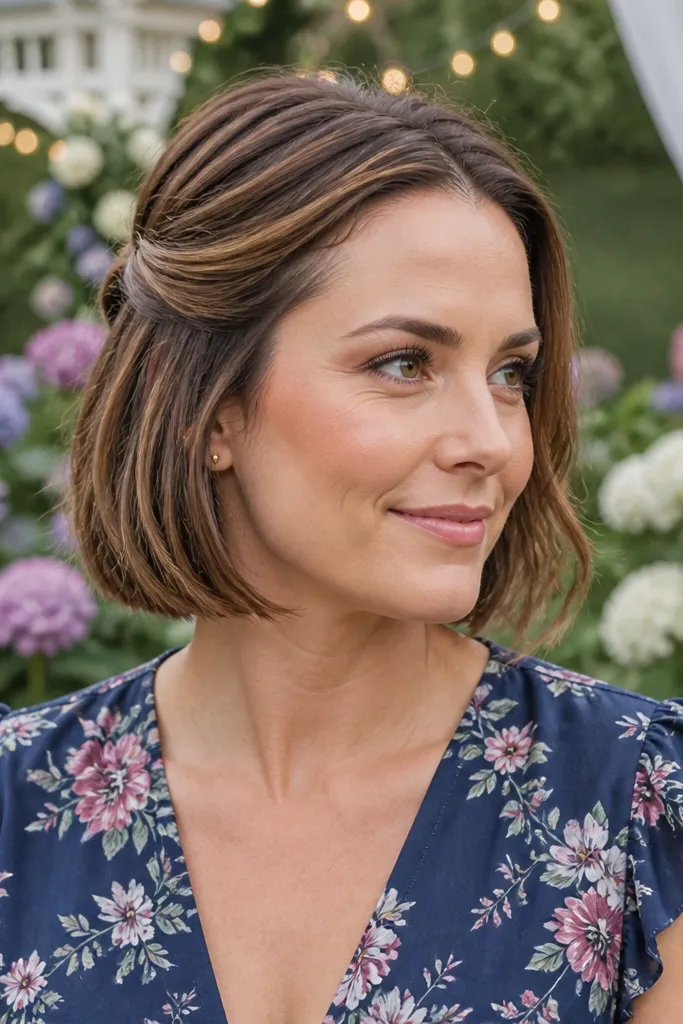
A half-up mini twist makes short hair look like it has length, because it gathers multiple small sections into one focal point. The twist reads romantic in close-ups, and it keeps the front pieces off your face during vows. This is a strong choice for chin-length bobs and lobs because you have enough hair to twist without needing extensions. It also pairs well with delicate earrings since your hair won’t hide the ear entirely.
Start by creating a clean part, then take two small front sections on each side. Twist each side toward the back, then connect them at the center with a cross-pin so it feels secure. Smooth the rest of your bob with a light conditioner leave-in, then add loose waves with a flat iron if you want extra softness. Set the twist with hairspray, then hide the pin ends under the nearest wave piece.
Quick tipPin the twist slightly lower than you think — it looks more natural and lasts longer.
Skip thisSkip one single pin. Short hair pulls out when you only anchor in one spot.
5. Vintage Side Roll with a Barrette
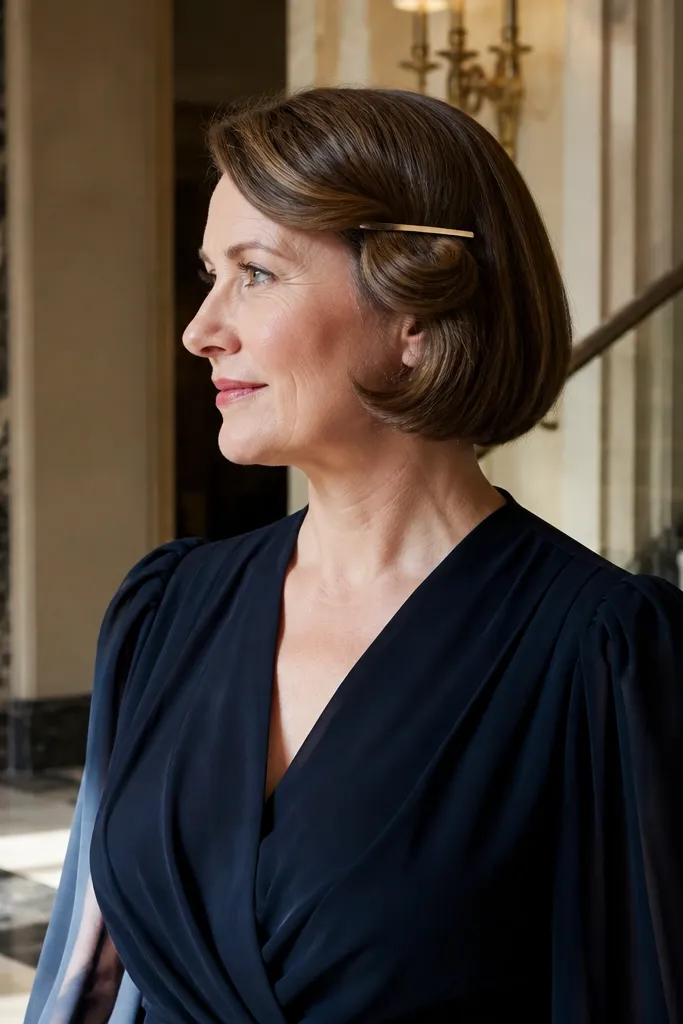
A vintage side roll turns short hair into something photo-ready without needing a full updo. The roll creates a polished curve that looks great under a veil or with a simple headpiece. This style suits short bobs with a clear side part and works well if your hair holds a bend easily. It also makes your cheekbones look sharper in pictures because the roll sits right along the jawline.
Start with damp hair and add a light styling cream to help the bend hold. Create a deep side part, then use a comb to guide the front hair into a roll shape against your scalp. Secure the roll with two bobby pins placed vertically, then place a slim barrette over the pins for a clean finish. Dry fully with a blow-dryer on medium heat, then release any extra tension and mist with flexible hold hairspray.
Quick tipChoose a barrette that matches your metal jewelry — silver with silver, gold with gold.
Skip thisDon’t use a thick clip that spreads the roll — it can flatten the curve and ruin the shape.
6. Sleek Bob with Micro-Braided Front Panel
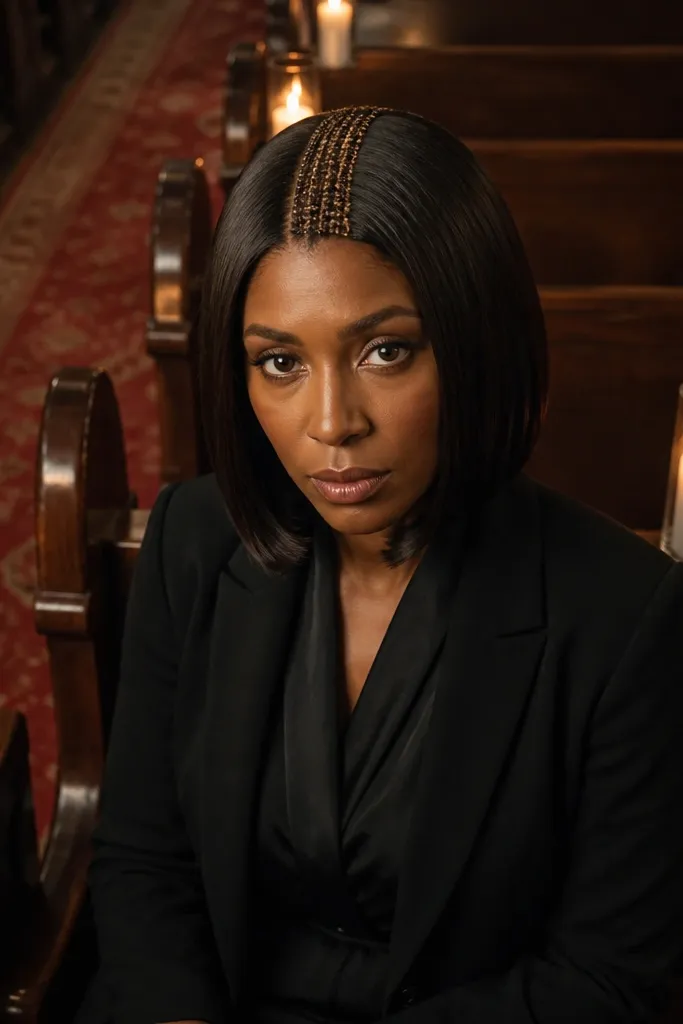
This is for the bride who wants clean and glossy but still wants bridal detail. The micro-braided front panel gives visual interest without adding bulk, and it looks especially dreamy in overhead ceremony photos. It works best on bobs where the front pieces can be sectioned into a narrow braid. It also holds up well because the braid is a built-in anchor for your front hair.
Start by blow-drying your bob straight with a paddle brush, then apply heat protectant and a smoothing cream to the underside. Section a thin strip from the front hairline and braid it tightly, then pin the end under the nearest section. Smooth the rest of the hair down, then mist lightly with shine spray. Finally, check the braid line in a mirror from the side — adjust pin placement so the braid sits centered when you smile.
Quick tipBraid with slightly looser tension than you think so it looks soft, not tight and flat.
Skip thisAvoid over-spraying the braid — it can look crunchy instead of polished.
7. Curled Under Bob with Tucked Back Pieces
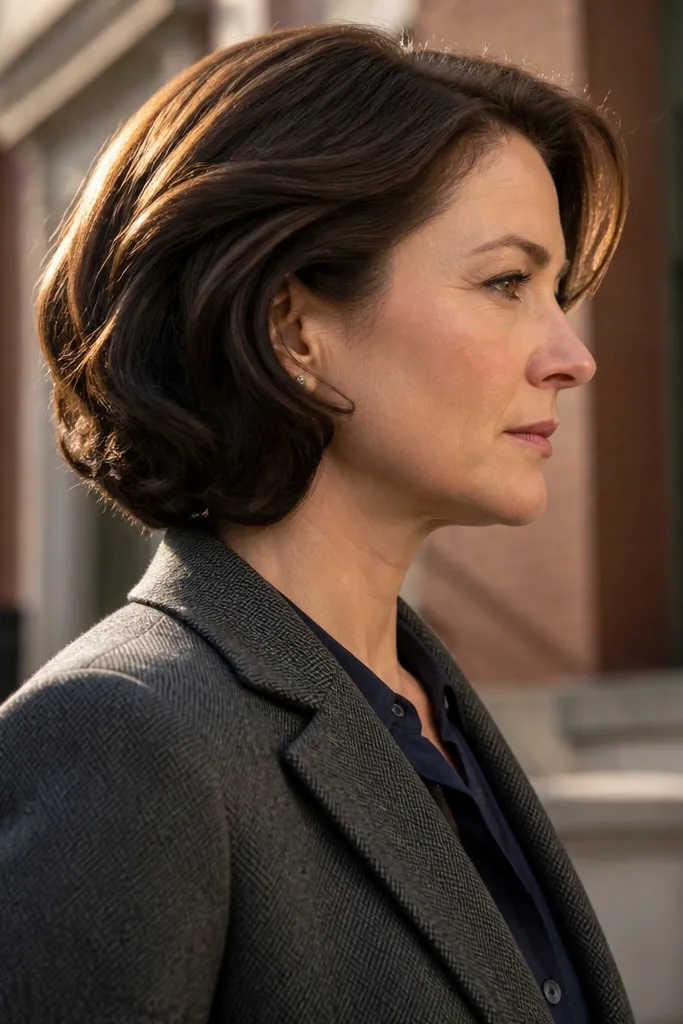
Curled-under bobs have that classic dreamy look because the ends frame your neck and keep your silhouette neat. The tucked back pieces add a little bridal structure, so your hair doesn’t pop out when you turn. This is a great fit for round faces because the tucked sections add vertical lines while the curled ends soften the chin. It also pairs nicely with strapless or off-shoulder dresses since your hair stays controlled behind the neckline.
Start by curling only the ends with a flat iron or small curling iron, then brush the curl lightly for a soft bend. Take two small back sections behind the ears and tuck them under toward the crown, then pin with bobby pins that angle upward. Smooth any flyaways with a tiny amount of styling cream on your fingertips. Finish with medium-hold hairspray, focusing the spray on the pinned tuck areas.
Quick tipPin the tucked sections first, then curl the ends — it stops the curl from getting crushed by pinning.
Skip thisAvoid curling too close to the roots — it can make a short bob look puffy in photos.
8. Low Bunette for Short Hair
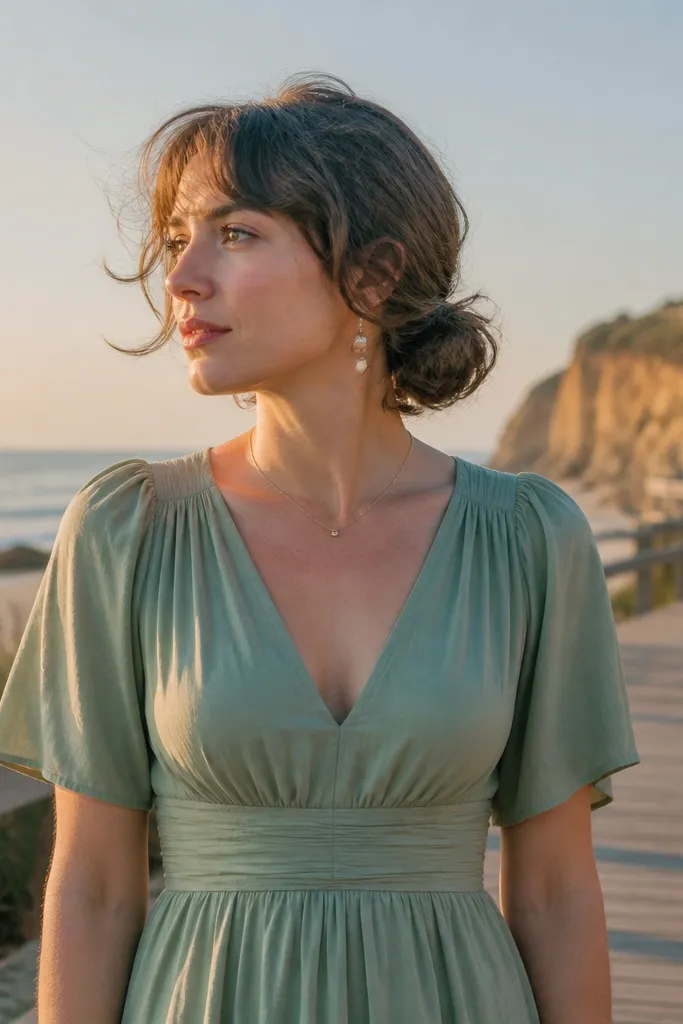
A bunette is a short-hair workaround that still photographs like a real updo. The look is dreamy because it has a soft halo of movement around the face, not a tight helmet. It suits chin-length hair and short bobs, especially if your hair is layered and you can gather ends into a small knot. It’s also a good choice for outdoor weddings because the bun keeps hair off your neck.
Start by adding dry shampoo at the crown and back so hair grips. Gather hair low at the nape, then twist it into a compact knot and secure with bobby pins in a circle. Pull two or three face-framing pieces forward and lightly curl them for softness. Mist with strong-hold hairspray, then press the bun gently with your palm so it stays tight under photos.
Use U-shaped pins for the underside of the bun — they grip short hair better than straight pins.
Skip sleek, wet-looking styling. Matte texture makes short updos hold longer.
9. Pinned Crown Twist with Loose Fringe
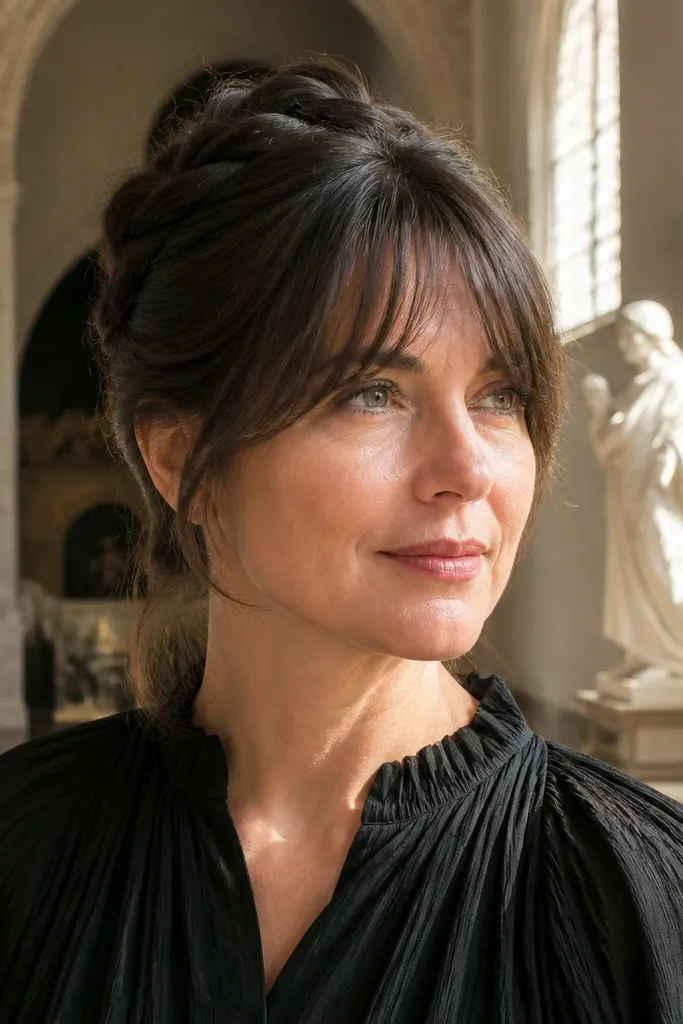
This style gives you that dreamy bridal crown without requiring a full updo. The pinned twist adds structure on top, while the loose fringe keeps your face soft and young in photos. It works well for short hair with a fringe or uneven front pieces, because the loose portion hides any awkward length. If you’re wearing a simple veil, the crown twist also helps the veil sit flatter.
Start by separating your fringe from the rest of the hair and set it aside. Create a twist along the crown by taking small sections from left and right and rolling them toward the back, then pin the twist in place. Leave the fringe untouched except for a quick bend with a blow-dryer or flat iron. Finish by spraying the crown pins lightly and smoothing the top with a soft brush to remove bumps.
Quick tipPin the twist so it sits 1-2 cm behind your hairline, not right on it, for a more natural crown.
Skip thisAvoid twisting too tightly — it can make short hair look stretched and unnatural.
10. Bow-Comb Updo for a Short Pixie
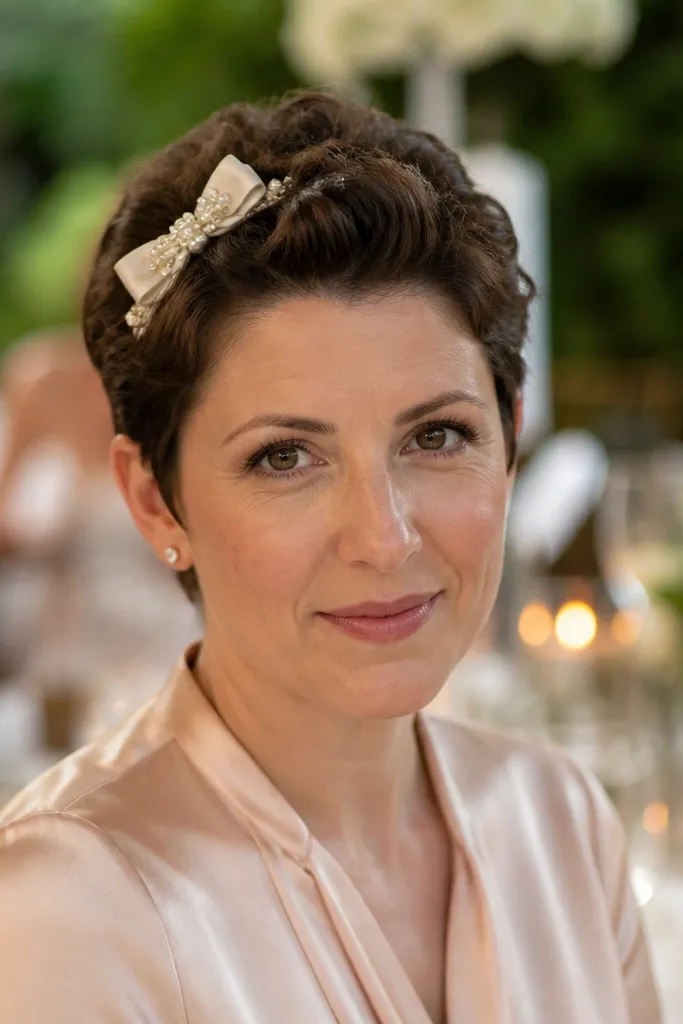
A bow-comb updo is one of the prettiest options for very short hair because the accessory does the heavy lifting. The hair is styled into a small, controlled set near the crown, and the comb pulls the whole look together. This is perfect for pixies that won’t gather into a bun, but still need a bridal focal point. In photos, the bow comb reads romantic and doesn’t require long lengths.
Start with damp hair and apply mousse for hold, then blow-dry the top upward and slightly back. Use a comb to smooth the sides, then pin the top sections together into a small mini knot at the back. Place the bow comb where you want the center of the accessory, then tuck any loose ends under it. Mist with strong-hold hairspray and press the pins for 10 seconds so they settle into the hair.
Quick tipChoose a comb with wide teeth if your hair is fine — it grips without yanking.
Skip thisSkip tiny, weak pins. Short hair needs secure anchoring under the comb.
11. Soft Beach Waves on a Bob with Side Clips
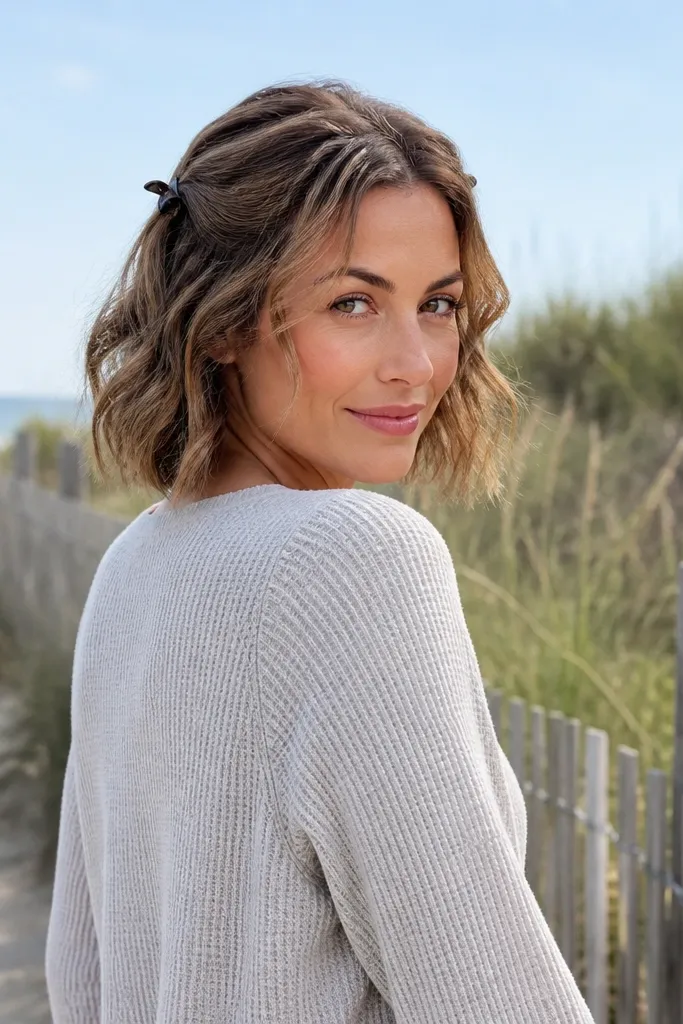
Beach waves can look bridal when they’re controlled at the front. Side clips keep the face-framing pieces where you want them, so your hair doesn’t fall into your eyes during vows and photos. This look is dreamy because it mixes effortless texture with a deliberate shape. It suits bobs and lobs, especially if your hair holds a wave after heat. It also looks great with natural makeup and a simple veil.
Start by curling in alternating directions for the first two inches from the ends, then keep the roots more relaxed. Use a wide-tooth comb to loosen the waves, then add a light sea salt spray only to the mid-lengths. Clip the front pieces back on each side with two matching clips, then adjust until the clips sit at eyebrow height in the mirror. Finish with flexible hold hairspray so the waves stay soft but not flat.
Quick tipIf your hair is straight, curl the ends first and let them cool fully before loosening.
Skip thisAvoid clipping too high. High clips can pull your face shape and show in close-ups.
12. Half-Up Twist Chain with Rhinestone Pin
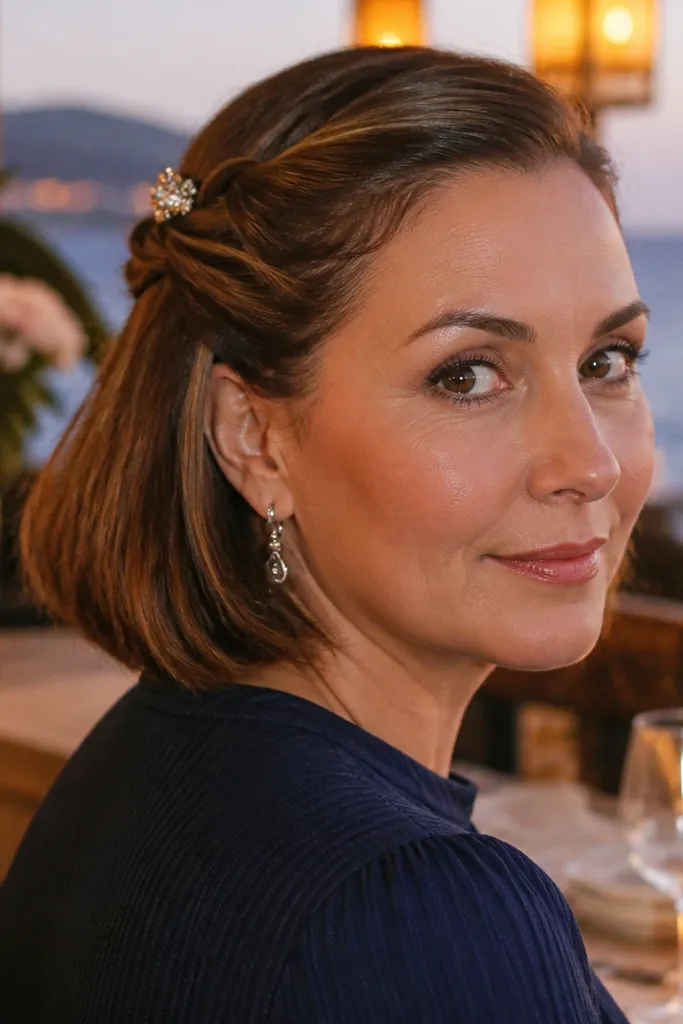
This style looks like jewelry for your hair, and that’s why it photographs so well. The twist chain creates a “woven” look using only your own hair, and the rhinestone pin adds sparkle at the exact focal point. It works on short bobs and chin-length hair where you can twist small sections without losing control. If you want dreamy without going full updo, this is the sweet spot.
Start with a side part and take two small front sections on each side. Twist each section back toward the center, then connect the twists with bobby pins underneath. Place a rhinestone pin at the meeting point so it covers the pin ends and gives a clean focal point. Smooth the rest of your hair with a light serum, then set the twists with hairspray for hold.
Quick tipKeep the rhinestone pin small. A tiny one looks more bridal than a big, heavy crystal.
Skip thisSkip big clumps of product on short twists — they show through as buildup at the meeting point.
13. Velvet Headband with Sleek Short Layers
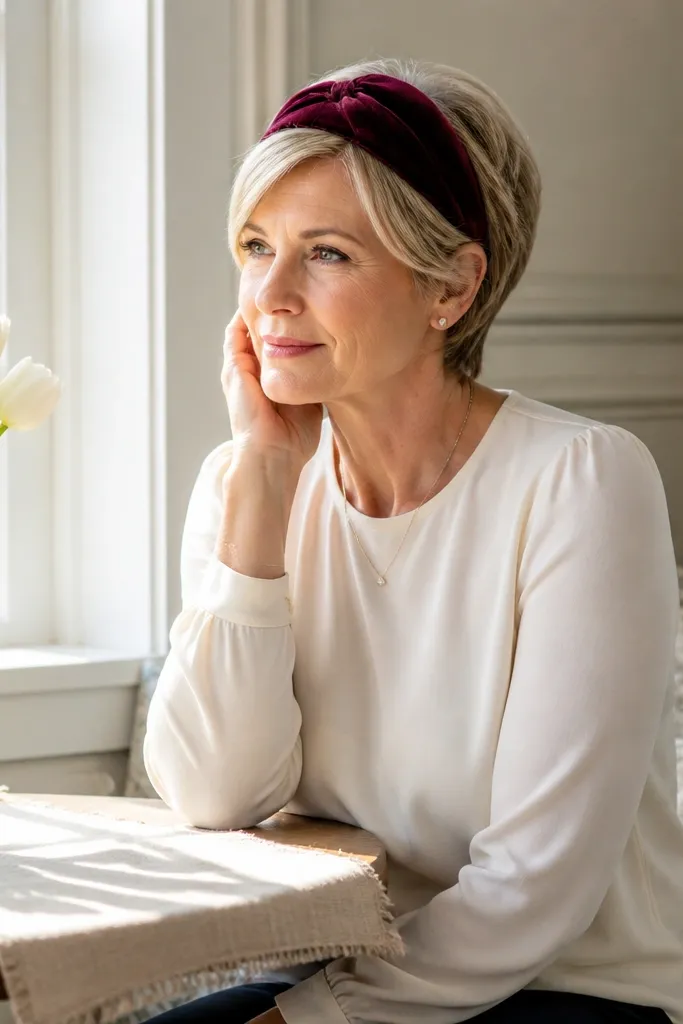
A velvet headband makes short hair look instantly styled, even if your hair is only a few inches long. The soft fabric texture reads romantic and dreamy in photos, especially in indoor lighting. This works best when your short layers are sleek and controlled, because the headband needs a clean base to frame the face. It’s also a smart pick if you want your hair to stay out of your face without pinning every strand.
Start by blow-drying your hair straight or slightly back with a smoothing product, focusing on the top and sides. Place the velvet headband so it sits just above your hairline, then tuck any small front flyaways under the band. If your hair is short enough to slip, add two hidden bobby pins behind the band on each side. Finish with a light hairspray mist across the top only so the band stays in place.
Quick tipChoose a headband width that matches your forehead — medium width looks best on most short-hair cuts.
Skip thisAvoid satin headbands. They slide more than velvet in humidity and after photos.
14. Twist-and-Pin French Roll for a Short Bob
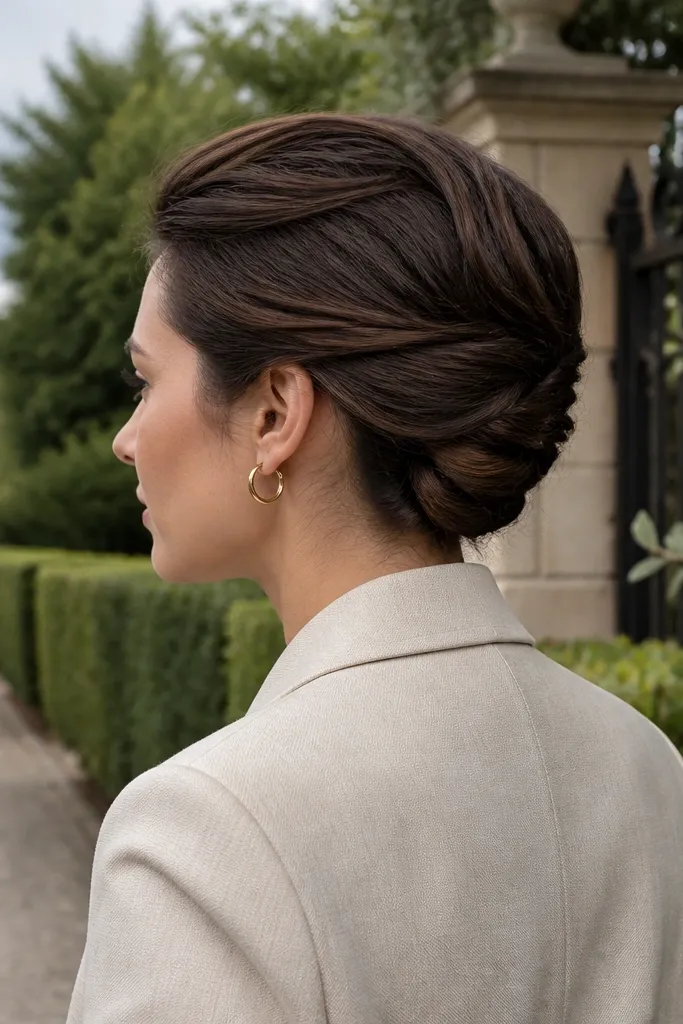
A French roll adapted for short hair looks fancy without looking overdone. The twist-and-pin method creates a roll shape that holds even when you can’t gather long lengths. It’s dreamy because the roll sits low and polished while the top stays slightly lifted for dimension. This style suits bob cuts with enough length around the back to twist into a roll. It also works beautifully with a veil because the roll gives the veil comb a stable base.
Start by blow-drying the back section with lift, then lightly backcomb only at the crown for grip. Twist the back hair upward and inward, then pin the roll in layers using multiple pins around the perimeter. Leave two small side pieces loose and curl them lightly so your face looks soft. Mist with firm-hold hairspray and check the roll from the side to make sure it doesn’t collapse at the nape.
Quick tipIf your hair is slippery, use a tiny amount of styling powder at the twist before pinning.
Skip thisDon’t try to make a tall roll. Short hair looks better with a low, compact shape.
15. Loose Updo with Face-Framing Curls
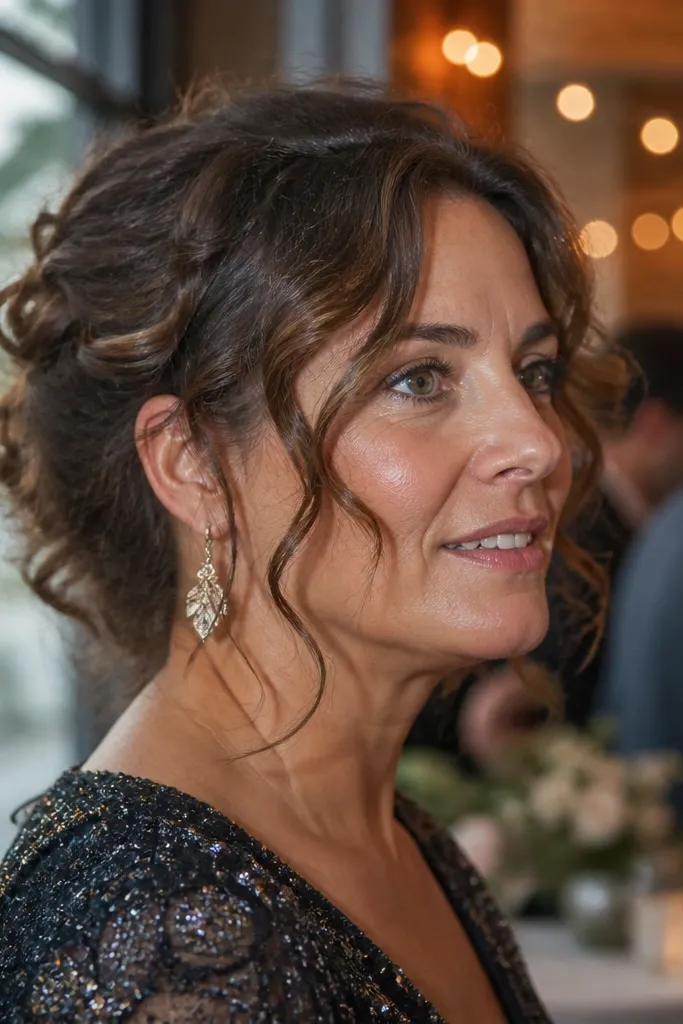
This look is dreamy because it mixes a soft updo with curls that make your face look framed and bright. The updo part keeps hair off your neck, and the face-framing curls add movement when you walk. It’s best for short bobs that can be pinned into a loose knot, but still have enough length to curl the front. If you’re doing a formal wedding with lots of photos, this gives you structure without looking stiff.
Start by curling the front pieces first, then pin the back hair into a loose updo at the crown or just above the nape. Use bobby pins in a cross pattern so the updo stays secure without flattening your curls. Pull the curls forward and adjust them so they land around cheek level. Finish with medium-strong hairspray, then smooth only the outer layer so it looks polished in close-ups.
Quick tipCurl the front pieces after you pin the back, not before, if your curls keep getting crushed by pinning.
Skip thisAvoid tight, high pins. They can make short hair look like it’s being forced upward.



