
1. Low Twisted French Knot with Side Pins
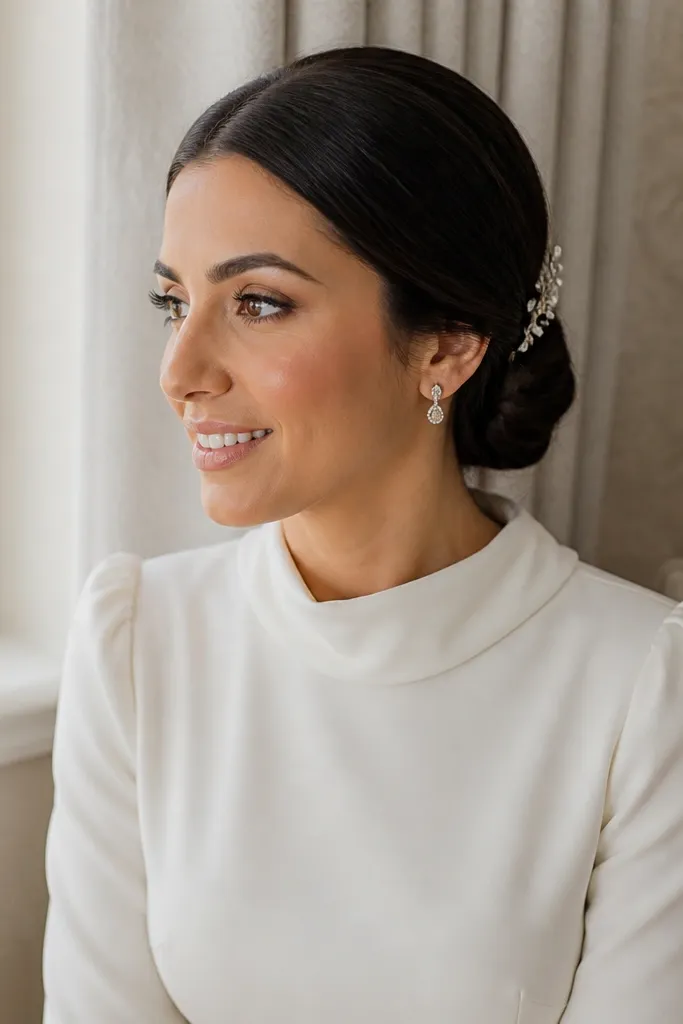
This is my pick for bridesmaid hair that needs to look intentional without feeling tight. The twist hides flyaways because the hair is gathered into one controlled mass at the nape. It photographs clean from the front and still reads “styled” from the side, which matters for ceremony shots and group photos. It also works really well with V-neck and off-shoulder dresses because the neck stays visible and tidy.
Start with dry hair and create a low gather at the nape, then split it into two sections and twist them toward the center. Wrap the twist into a knot, and secure with 4-6 bobby pins angled downward into the base. Finish by pinning one or two loose points along the side so the knot looks sculpted, not round and puffy. For travel, store it in a soft bun cover or hair net to keep the shape; it should be re-usable at the venue.
Pack a mini bobby pin set and a flexible spray so you can tame the top in 60 seconds before photos.
Don’t use a heavy gel finish — it can look wet in photos and show flakes if it dries.
2. Half-Up Rope Braid Crown
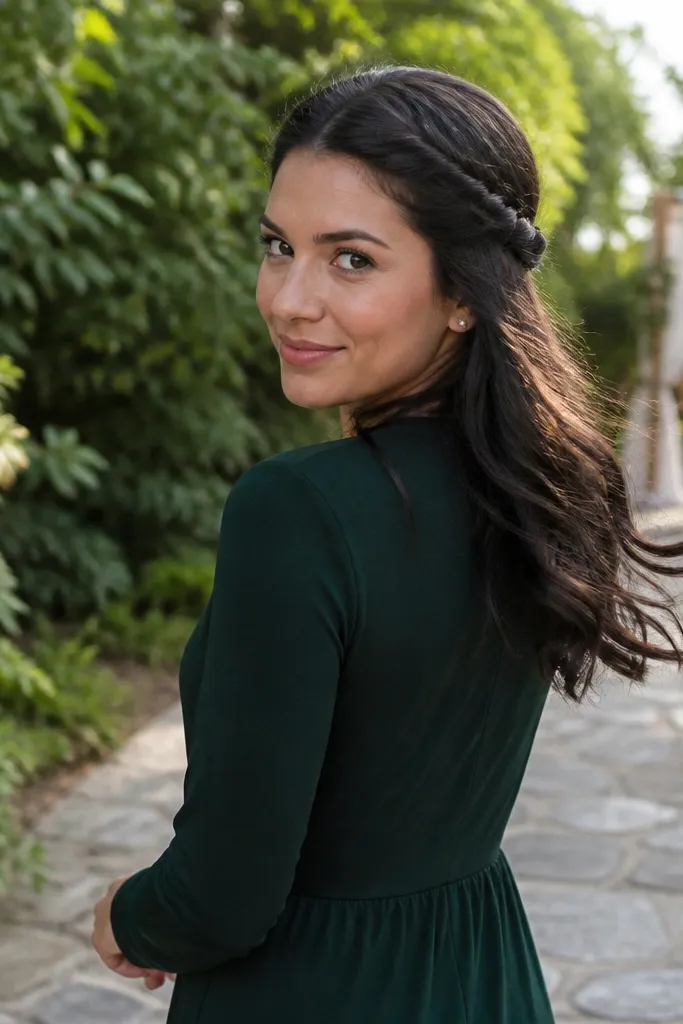
This style is made for weekend timing because it looks complex while staying simple to execute. The rope braid keeps the front controlled and creates a crown effect that frames the face. Below the braid, you get soft movement that looks good in candids and feels less formal than a full updo. Choose it if you want a hairstyle that still works when your hair is slightly wavy from humidity or travel.
Quick tipIf you’ll be outdoors, add one pin behind each ear so the braid doesn’t lift in wind.
Start by sectioning hair into an upper half from just behind the ears, keeping the front smooth. Braid the upper section using a rope technique: two strands, twist, then cross, tightening evenly as you move back. Secure the braid with a small elastic, then pin the braid ends under so it looks like a continuous crown. Finally, loosen the braid slightly with your fingers for a fuller look, and lightly mist the waves below for hold.
Skip thisAvoid braiding with uneven tension — it makes the crown look lumpy in front-facing photos.
3. Sleek Side Part Low Chignon
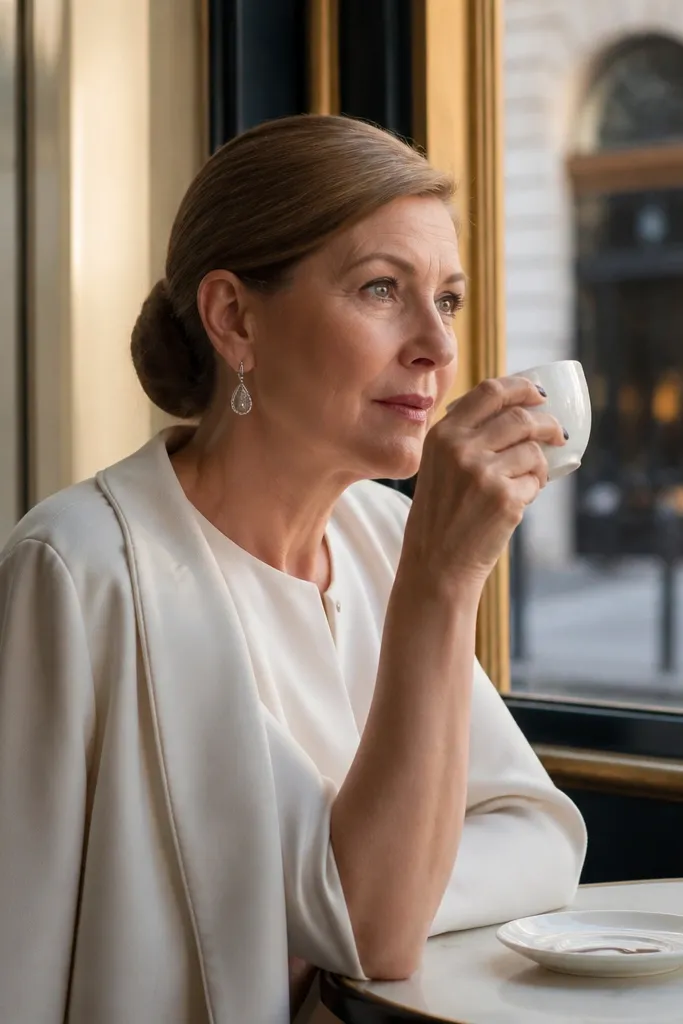
If you want the most “put-together” look with the least hair chaos, this is it. A deep side part gives instant structure, and the low chignon keeps everything off your shoulders for dancing. It’s also forgiving on hair texture — straight, wavy, and even slightly coarse hair can be smoothed with the right prep. This style photographs beautifully under bright lighting because the hairline stays crisp.
Start with a smoothing product on damp hair, then blow-dry while pulling the hair in the direction of your side part. Create a low ponytail at the nape, wrap it into a chignon, and pin around the base using 6-8 bobby pins. Use a fine-tooth comb to polish the side part and the hairline, then mist lightly so it stays smooth without looking stiff. For re-touching, you only need to press the top with a comb and add one extra pin if anything loosens.
Bring a small comb with a tail — it fixes a side part faster than your fingers.
Don’t skip the combing step at the end; messy part lines show up in group photos.
4. Classic Victorian-Inspired Updo with Modern Volume
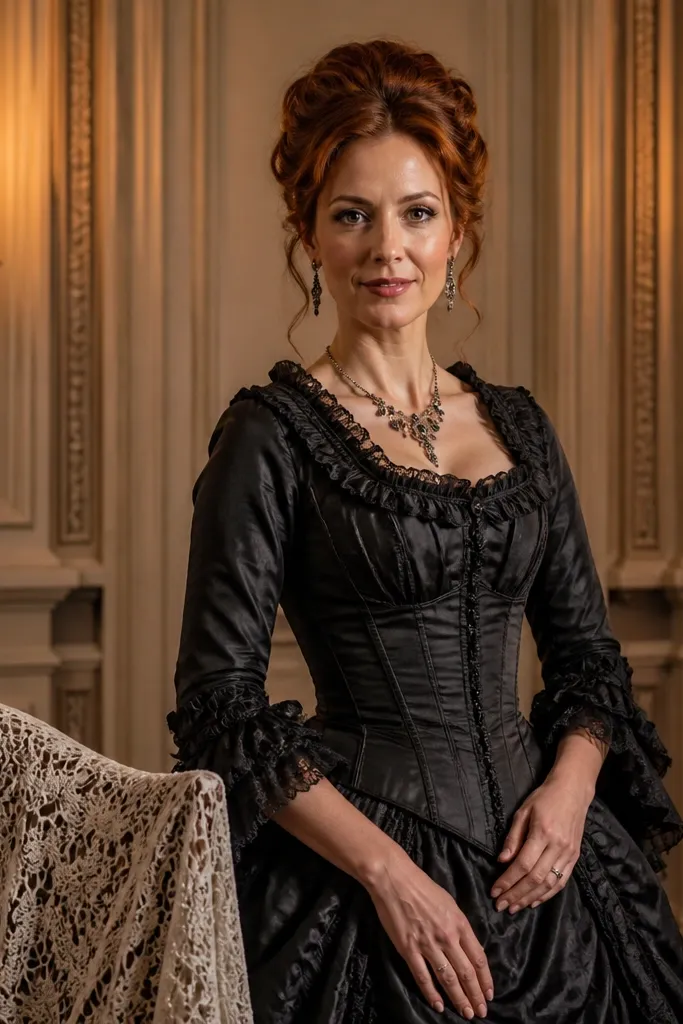
This look feels bridal-adjacent without going full wedding guest glam. The key is controlled height at the crown and pinned waves that look airy rather than heavy. It’s great for formal venues, especially if the dress has lace, sleeves, or high necklines. In photos, it gives you a graceful silhouette and a face-framing shape that holds even when you move around.
Quick tipIf you have fine hair, use a donut bun base under the back roll for instant volume.
Start by teasing only the crown area, not the whole top, then smooth the outer layer so it looks clean. Create two side sections, roll them back in loose waves, and pin them flat against the head. Form the back into a soft roll or bun, then secure with pins in a grid pattern so it doesn’t slide. Finish by setting with hairspray and checking the shape from the sides, not just the front.
Skip thisAvoid teasing the roots aggressively — it can make your hair look dull and frizzy by evening.
5. Twisted Crown Ponytail (Satin-Scrunch Finish)
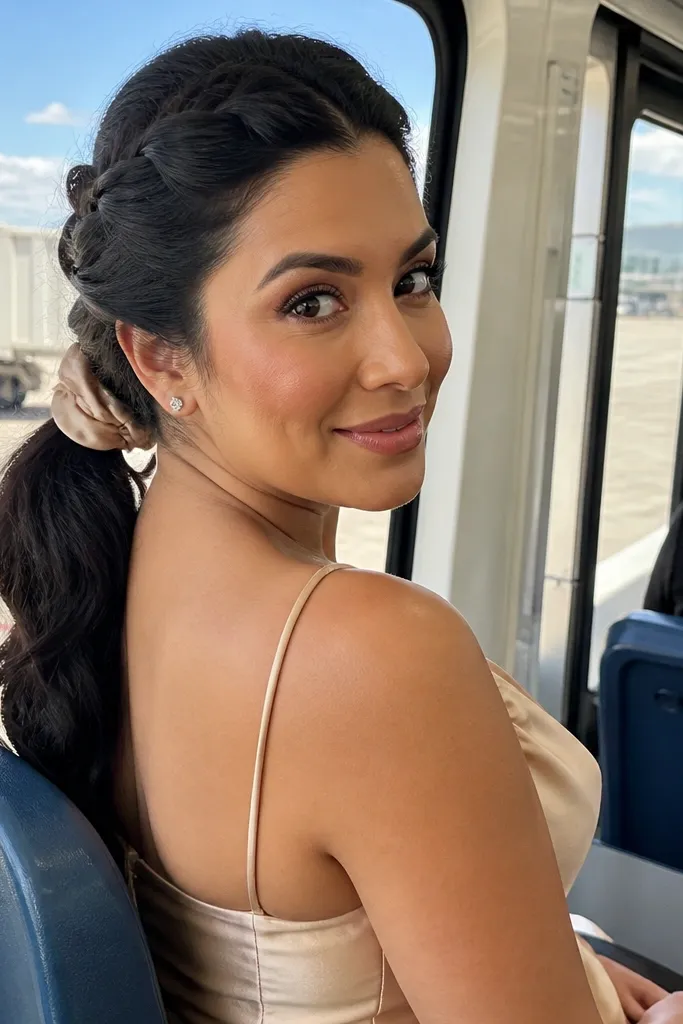
This one is for bridesmaids who want comfort but still need a polished look. The twisted crown keeps the top secure, while the ponytail gives a clean line that looks good in motion. It’s also a lifesaver for thick hair because you can manage bulk by controlling the top and leaving the pony smooth. Pair it with strapless or spaghetti straps so your face stays open and your neckline looks long.
Start with a high or mid-high ponytail, then split a small front section to twist into a band across the top. Wrap the band around the pony base and pin it down on both sides. Secure the pony with a small elastic, then cover it with a satin ribbon or hair wrap, tucking ends under. Smooth the pony with a light pass of heat if needed, then mist the crown and the wrapped base.
Use a small amount of hair wax on flyaways at the crown, not the lengths.
Don’t leave the pony base exposed — it makes the look feel unfinished in close-up photos.
6. Voluminous Bubble Braids Half-Up
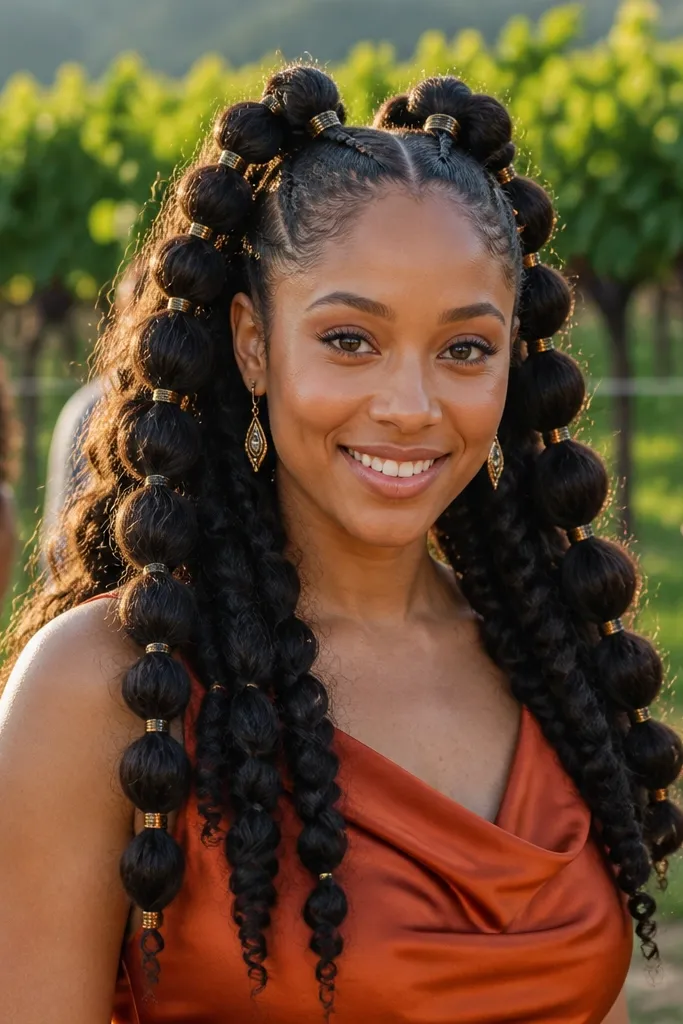
Bubble braids photograph like jewelry for your hair. The spaced segments create a graphic look that stands out in group shots, even if your hair is mostly straight. Half-up keeps it bridal-friendly while still letting your lengths move. This is a smart pick for weekend weather because the braid structure resists frizz better than loose styles.
Quick tipCount your bubbles as you pull — aim for 5-7 for a clean, symmetrical look.
Start by making a half-up section and securing it with a small elastic. Braid the section into a standard three-strand braid, then add additional elastics at even intervals along the braid. Gently pull each bubble outward for volume, working from the bottom up so it stays balanced. Finish with a flexible spray and loosen the bottom lengths with your fingers.
Skip thisAvoid big elastics — they flatten the braid and make the bubbles look heavy.
7. Waterfall Braid into Low Bun
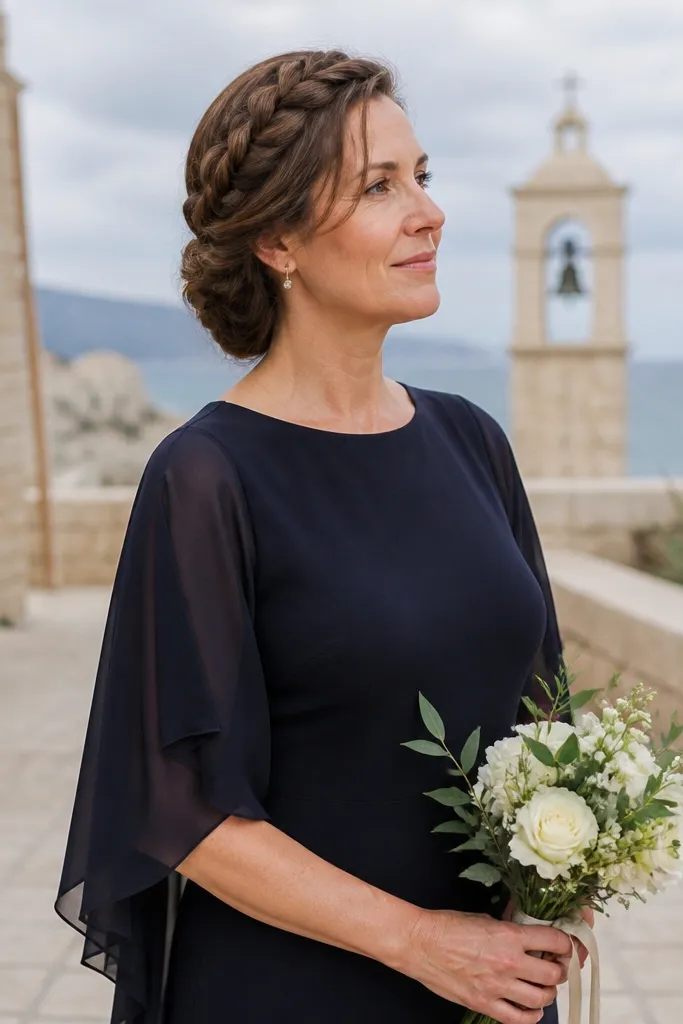
This style looks romantic without getting messy, which is exactly what you want for a weekend itinerary. The waterfall braid creates a ribbon-like effect along the side, then the low bun keeps everything secure for the ceremony and reception. It flatters medium to long hair because the “falls” can be kept glossy and controlled. It’s also great if you want your hair to look like it took time, even when you’re doing it in a busy room.
Start by creating a side part, then take a small top section and begin a waterfall braid: cross strands, but drop one piece each time and replace it with new hair. Continue the braid along the side until it reaches the back of your head, then secure with a pin. Gather the remaining hair into a low bun and pin the bun base tightly. Tuck the braid tail into the bun and smooth the front with a comb.
Use a light serum on the waterfall strands so they look glossy instead of fuzzy.
Don’t make the waterfall too wide; it can look flat in photos when your head turns.
8. Pinned Curtain Bang Waves
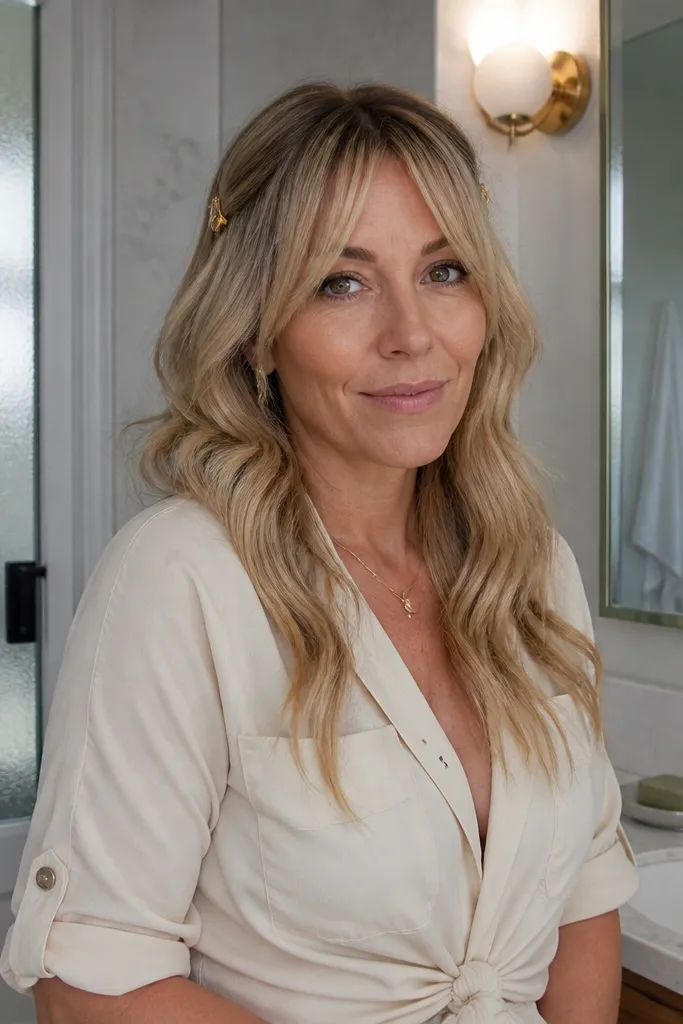
This is the best option when you want your hair down but still need it to stay photo-ready. Curtain bangs frame your face, and the pinned sections near the temples stop the hair from drifting into your cheeks. The waves look natural, but the pin placement keeps them from turning into a frizzy mess by the time the ceremony starts. Choose it for weddings where you’ll be taking a lot of close-up photos and you want your face to stay clear.
Quick tipPack two bobby pins per side — losing one is the most common reason this look falls apart.
Start by creating a center part and blow-drying your front sections with a round brush for smooth curves. Curl the rest of the hair in 1-1.5 inch sections, then let it cool. Twist the outer front pieces slightly and pin them just behind the temples, keeping them symmetrical. Finish by brushing the top lightly for volume control, then mist the waves with flexible hairspray.
Skip thisAvoid pinning too low; it can create a weird ridge under your cheek in front-facing shots.
9. Classic Low Braid with Braided Crown Band
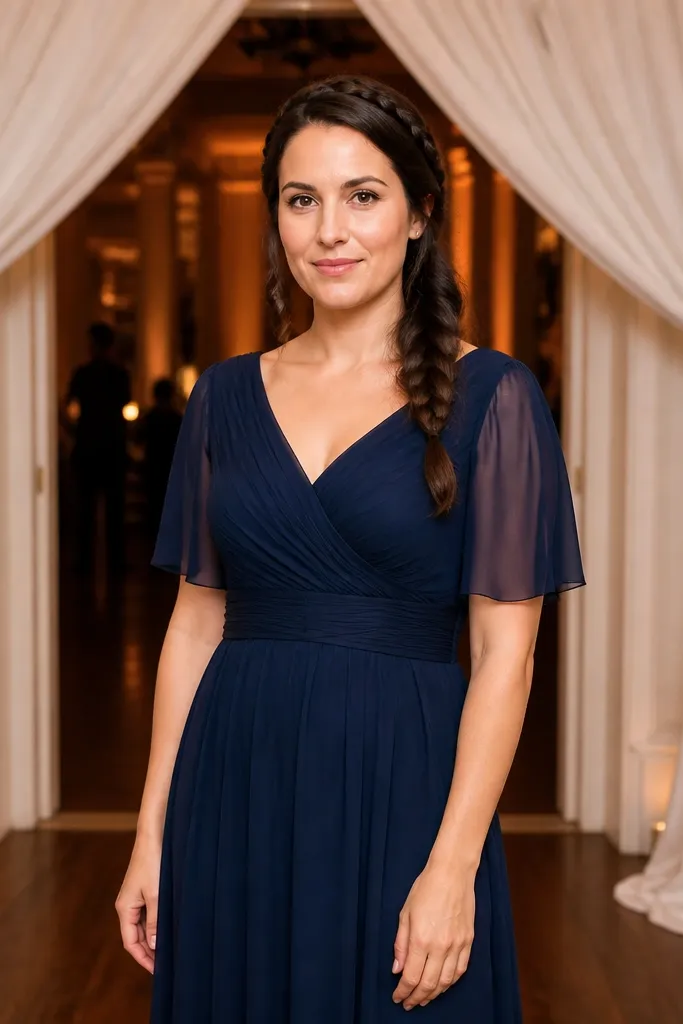
This is a polished weekend style that doesn’t rely on complicated updo shapes. A classic low braid keeps the hair controlled, and the thin braided band adds an elevated, “styled by someone” detail. It looks great with sleeveless dresses and adds structure to photos because the braid reads clearly from the front. It’s also a good choice if your hair is thick enough to braid cleanly and you want it to stay neat through wind.
Start by smoothing hair into a low ponytail at the nape, then braid it into a standard three-strand braid. Create a second thin braid from a small front section, then wrap it across the top like a headband. Pin the band braid ends into the low braid so the join is hidden. Finish by lightly loosening the low braid for width, then mist the whole style.
Use a comb to keep the part line straight before you braid; it’s visible in photos.
Don’t skip smoothing the sides — flyaways around the braid band look messy fast.
10. Sculpted French Twist with a Side Sweep
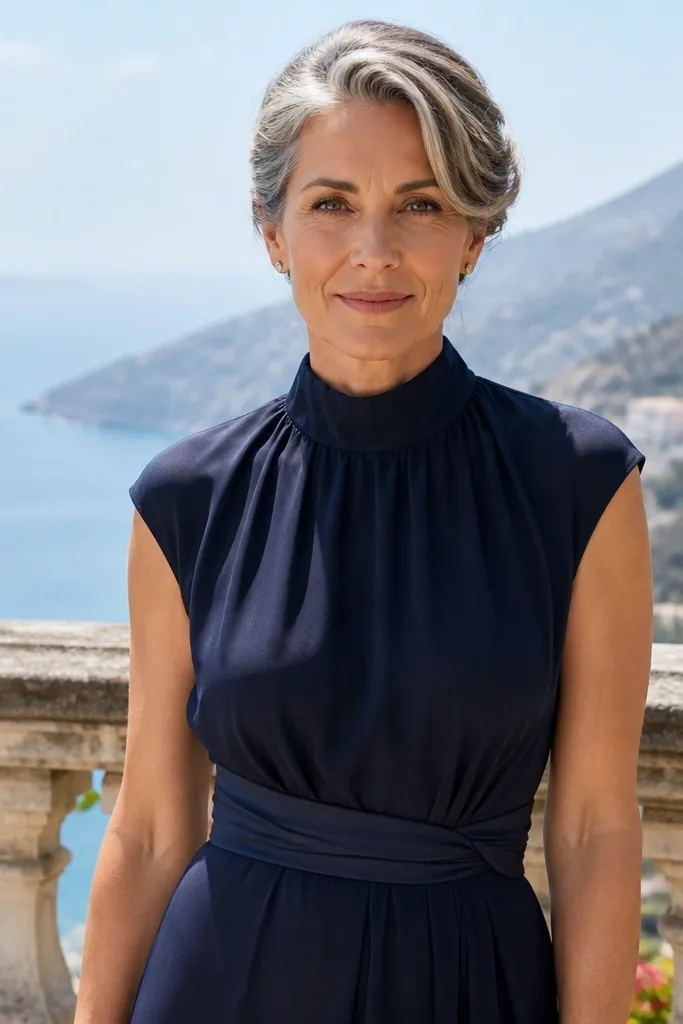
A French twist is the weekend-friendly upgrade from “messy bun” energy. The sculpted twist gives you a clean silhouette and keeps hair off your neck, which matters if the venue is hot. A side sweep adds softness and makes it feel less severe. This is one of the most flattering looks for bridesmaid hair because it opens the face and neck while still looking formal.
Quick tipIf your hair is slippery, use a tiny amount of dry shampoo at the roots before styling.
Start with slightly damp hair and add a smoothing cream to the top and sides. Comb everything to one side, then twist the hair around itself upward, pinning as you go. Keep the twist snug at the root and secure with pins that go down into the head. Finish with a light hairspray and use a comb to polish the side sweep so it looks intentional, not tucked by accident.
Skip thisAvoid making the twist too high; it can pull at the scalp and loosen during the reception.
11. Messy-Polished Braided Bun with Loose Face Framing
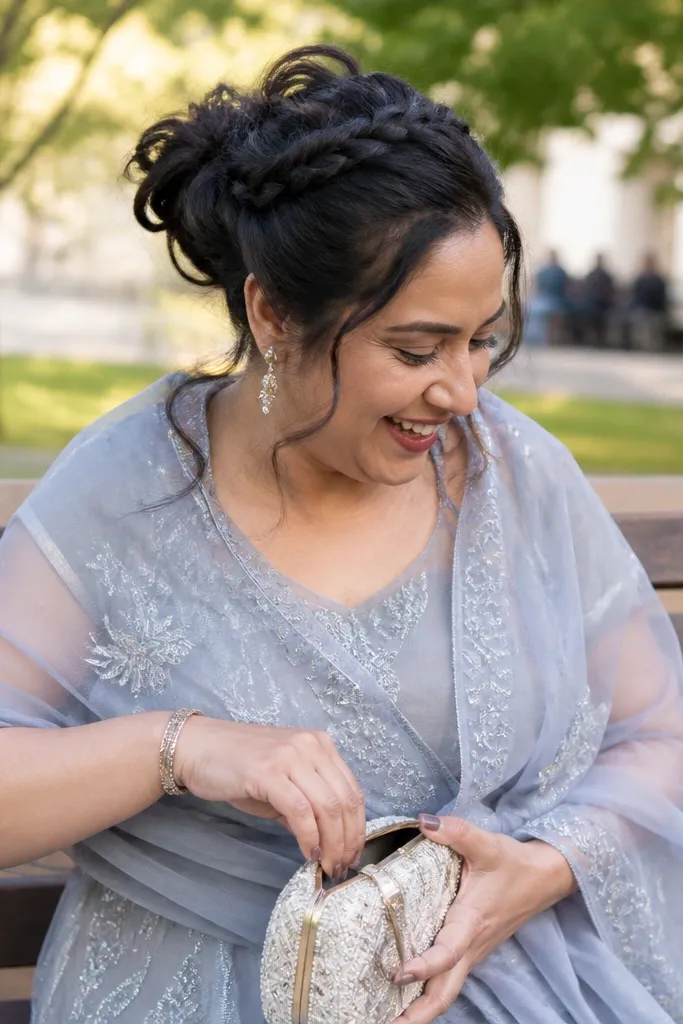
This is the “looks relaxed but isn’t” hairstyle that works for outdoor weekends. The braided bun gives structure, while the controlled mess makes it look effortless in movement. Face-framing strands keep it romantic and soften the bun so it doesn’t look like you did a rush job in a bathroom. It’s a strong choice for bridesmaids who want texture and volume without sacrificing hold.
Start by braiding two sections of hair into loose braids, then wrap them into a bun at the back or slightly off-center. Pin the braids into place with multiple bobby pins so the bun doesn’t slide. Pull a few strands free around the face and at the sides, then curl them lightly if they need shape. Finish with flexible hairspray and check the silhouette from the side to make sure it looks balanced.
Bring a mini hair spray and a comb — you’ll fix the face-framing strands faster than redoing the bun.
Avoid over-loosening the bun before pinning; it can collapse and look flat.
12. Side-Swept Dutch Braid into Low Pony
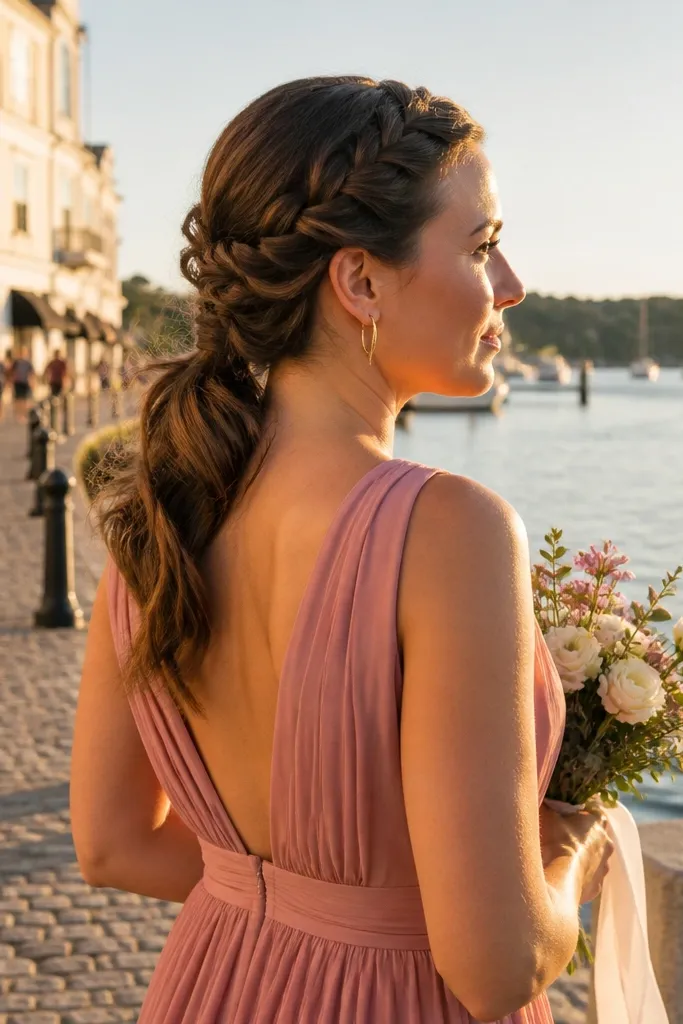
This hairstyle gives you braid drama without committing to a full updo. The Dutch braid (stitched under, not over) creates a raised texture that pops in photos, and the low pony keeps it comfortable for long days. It works especially well when you have medium hair length and want your hair to look styled but not trapped. If you’re wearing statement earrings, this is a great way to keep your hair off the ear area while still looking polished.
Start with a deep side part and begin a Dutch braid along the side, adding hair as you move toward the back. Secure the braid with a small elastic, then combine the remaining hair into a low ponytail. Smooth the pony with a brush and secure with a second elastic to keep the braid base tidy. Finish with hairspray on the braid and a light shine on the pony.
Keep the braid tight at the start and looser at the end for a natural curve in photos.
Don’t braid too far down — it can shorten the visual length of your hair in pictures.
13. Satin Ribbon Bow Half-Up Twist
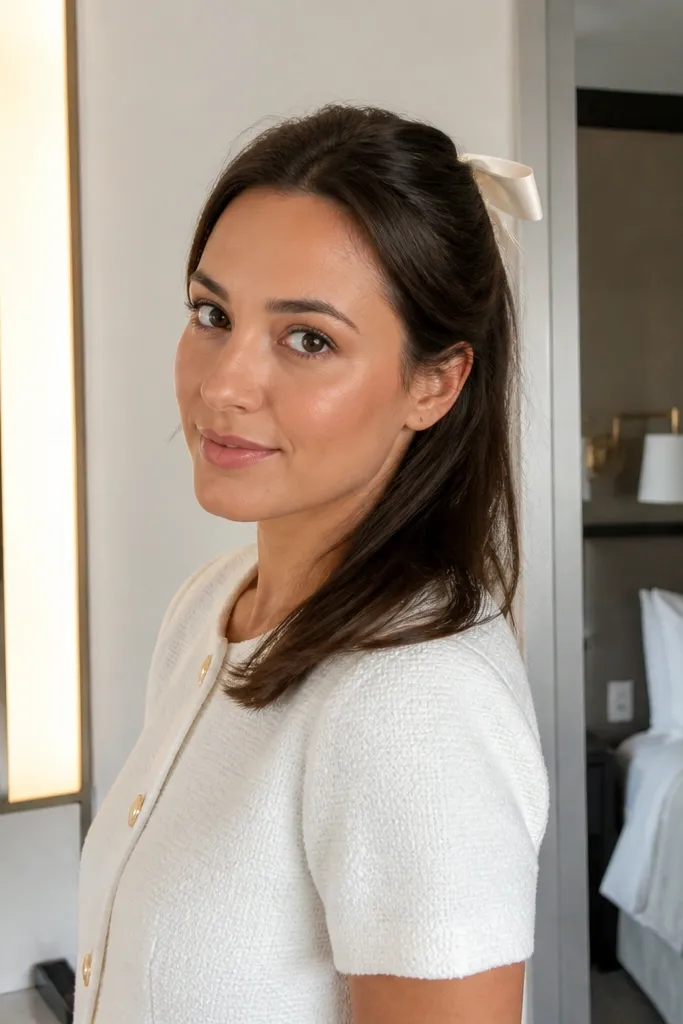
This is the bridesmaid hairstyle that reads cute in person and looks intentional in photos. The half-up twist keeps hair out of your face, and the satin ribbon bow adds a clean, graphic finish that matches most wedding palettes. It’s great for short-to-medium hair because you can build the look around a half-up section without needing a lot of length. Choose it when you want something sweet but still polished.
Start by sectioning the top half and twisting it back into a low half-up knot, securing with bobby pins. Leave a small loop of hair or a short wrap point at the center where the bow will sit. Tie a satin ribbon into a bow and anchor it with a pin through the knot so it doesn’t slide. Finish by smoothing the front with a comb and misting the twist.
Match ribbon width to your hair thickness: 1/2-inch for fine hair, 3/4-inch for thicker hair.
Avoid slippery ribbon that won’t hold knots — it can droop during photos.
14. High Chignon with Faux Crown Clip
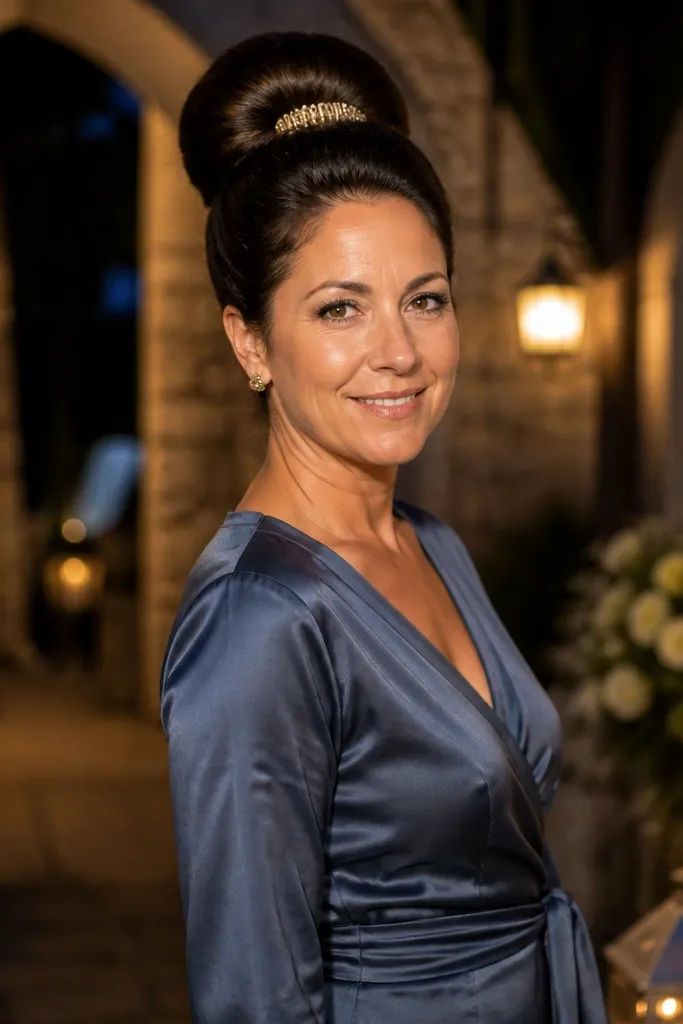
A high chignon gives you lift and face framing, which is exactly what makes it pop in wedding portraits. The crown clip effect is created with pins arranged like a small “barrel” at the top — it looks like you styled a special accessory even if you didn’t. This is a strong pick for bridesmaids with medium-thick hair who want something sleek but not too formal. It also photographs well from above because the crown area stays tidy.
Start with a high ponytail, then wrap into a chignon at the crown and pin the base tightly. Use 2-4 bobby pins to form a small pinned shape at the top-front, like a clip edge, and hide the ends under the bun. Smooth the outer hair with a brush, then lightly mist the whole style. If your hair is fine, add a small bump of teasing at the crown before pinning to keep it from looking flat.
Bring one extra clip or pin — the crown area is the first place that loosens.
Don’t skip smoothing the outer layer; stray hairs at the crown look messy fast.
15. Low Wavy Updo with Hidden Elastic Rings
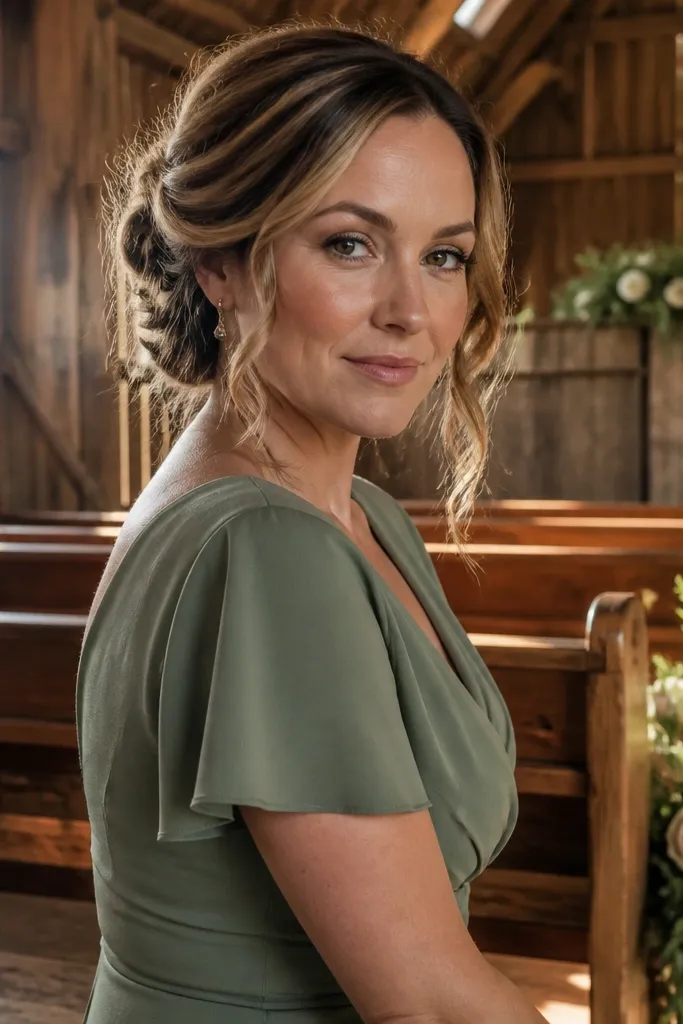
This is the style for bridesmaids who want soft waves but also need hold. The hidden elastic rings keep each wavy section in place, so the updo stays lifted and doesn’t collapse into a messy bun by late evening. It looks romantic and photo-friendly because the waves are spaced and visible instead of mashed together. This works especially well on medium-long hair that holds a wave curl.
Start by curling hair in 1-inch sections, then brush out gently for a soft wave. Gather hair into a low base, and secure with small elastics around the sections to form ring-like segments while you pin. Tuck and pin each ring so the wave pattern stays defined, using 6-10 bobby pins depending on thickness. Finish with flexible hairspray and check the wave spacing from the front.
If you’re traveling, keep hair dry and cool — warm curls collapse faster once you hit humidity.
Avoid using a single elastic and hoping — one anchor doesn’t control wave shape all day.



