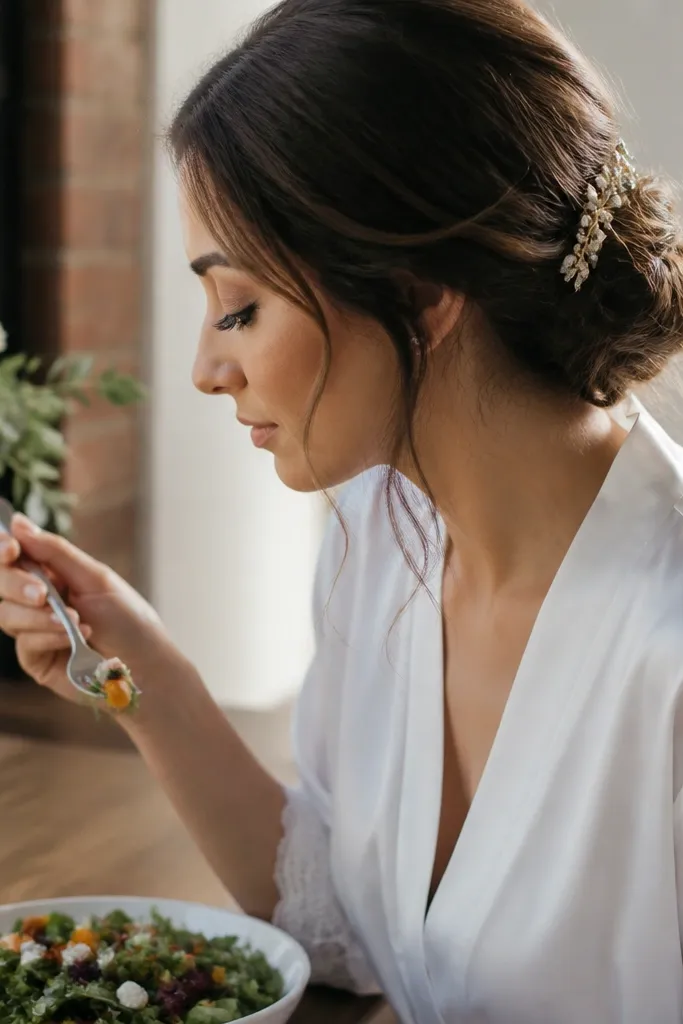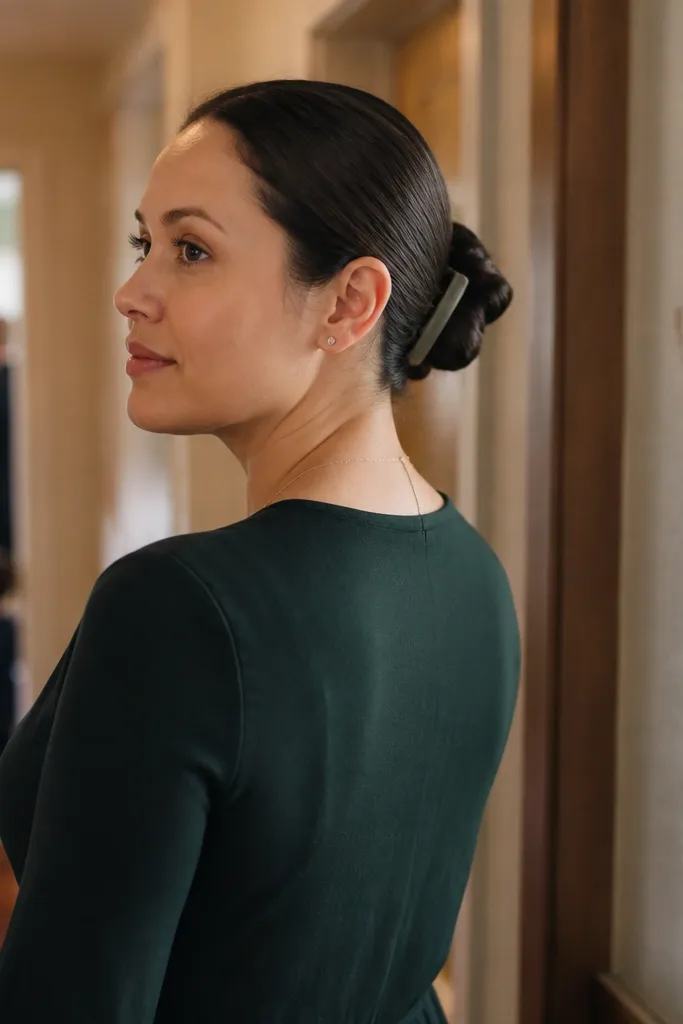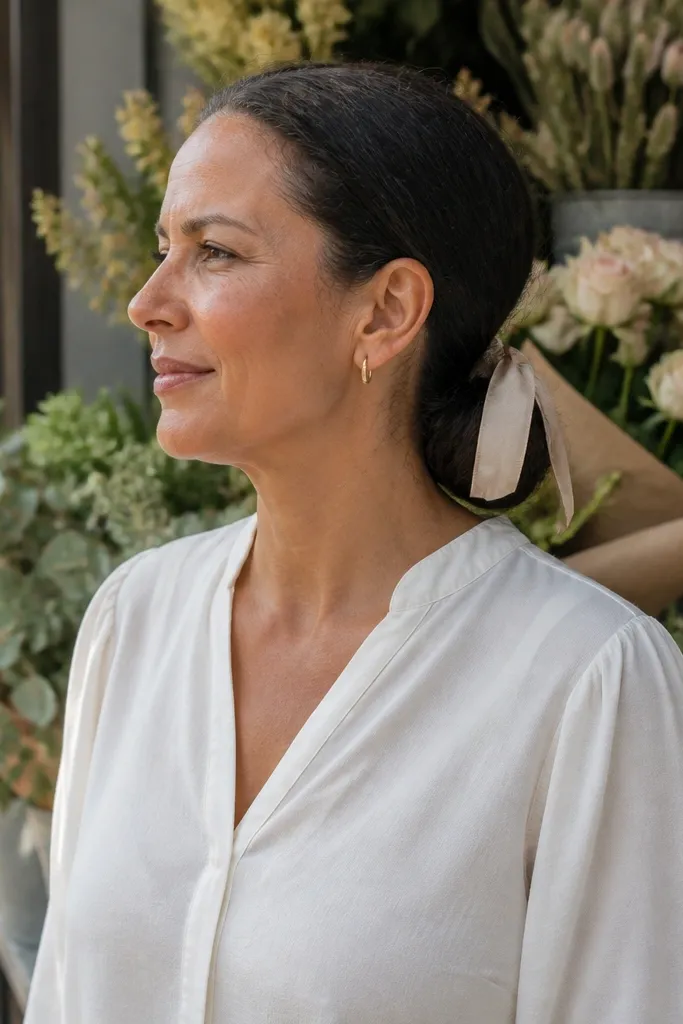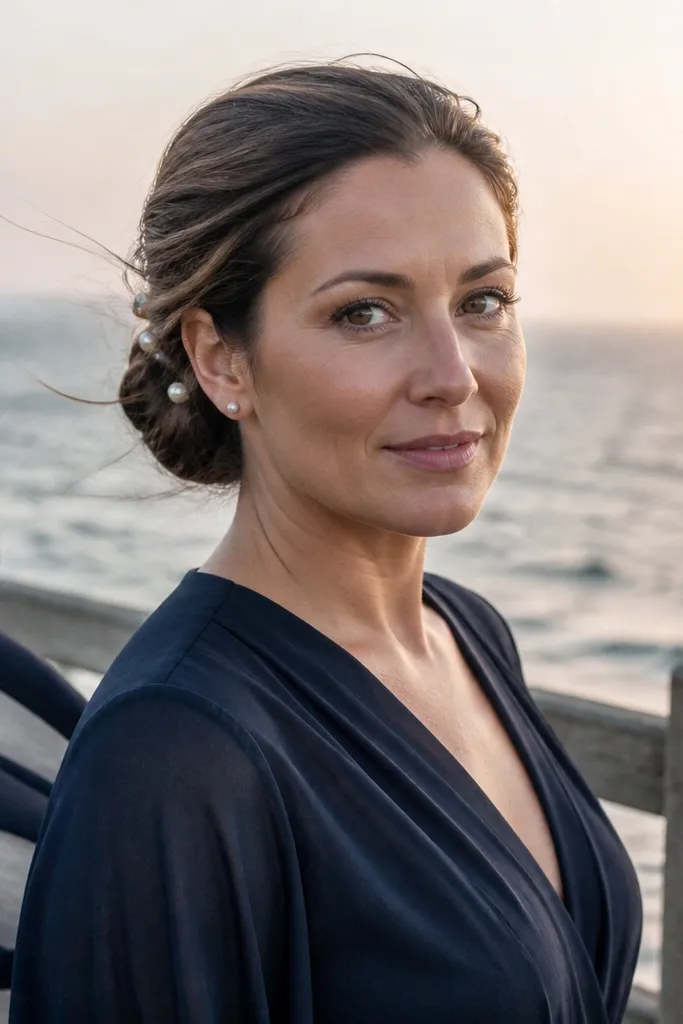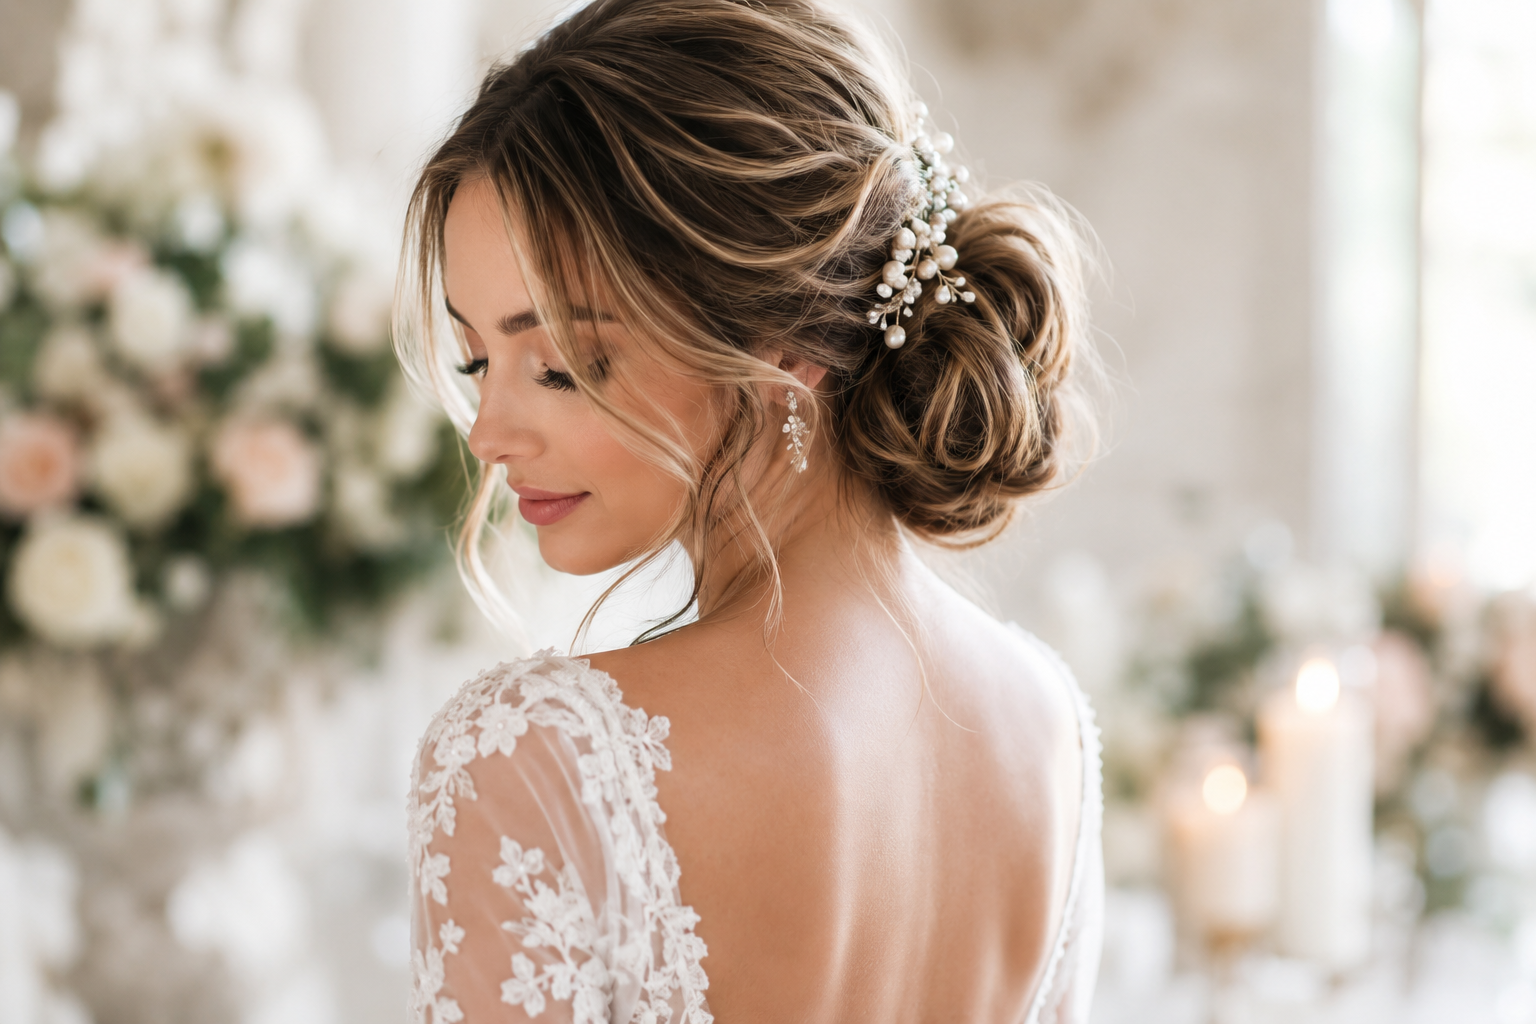
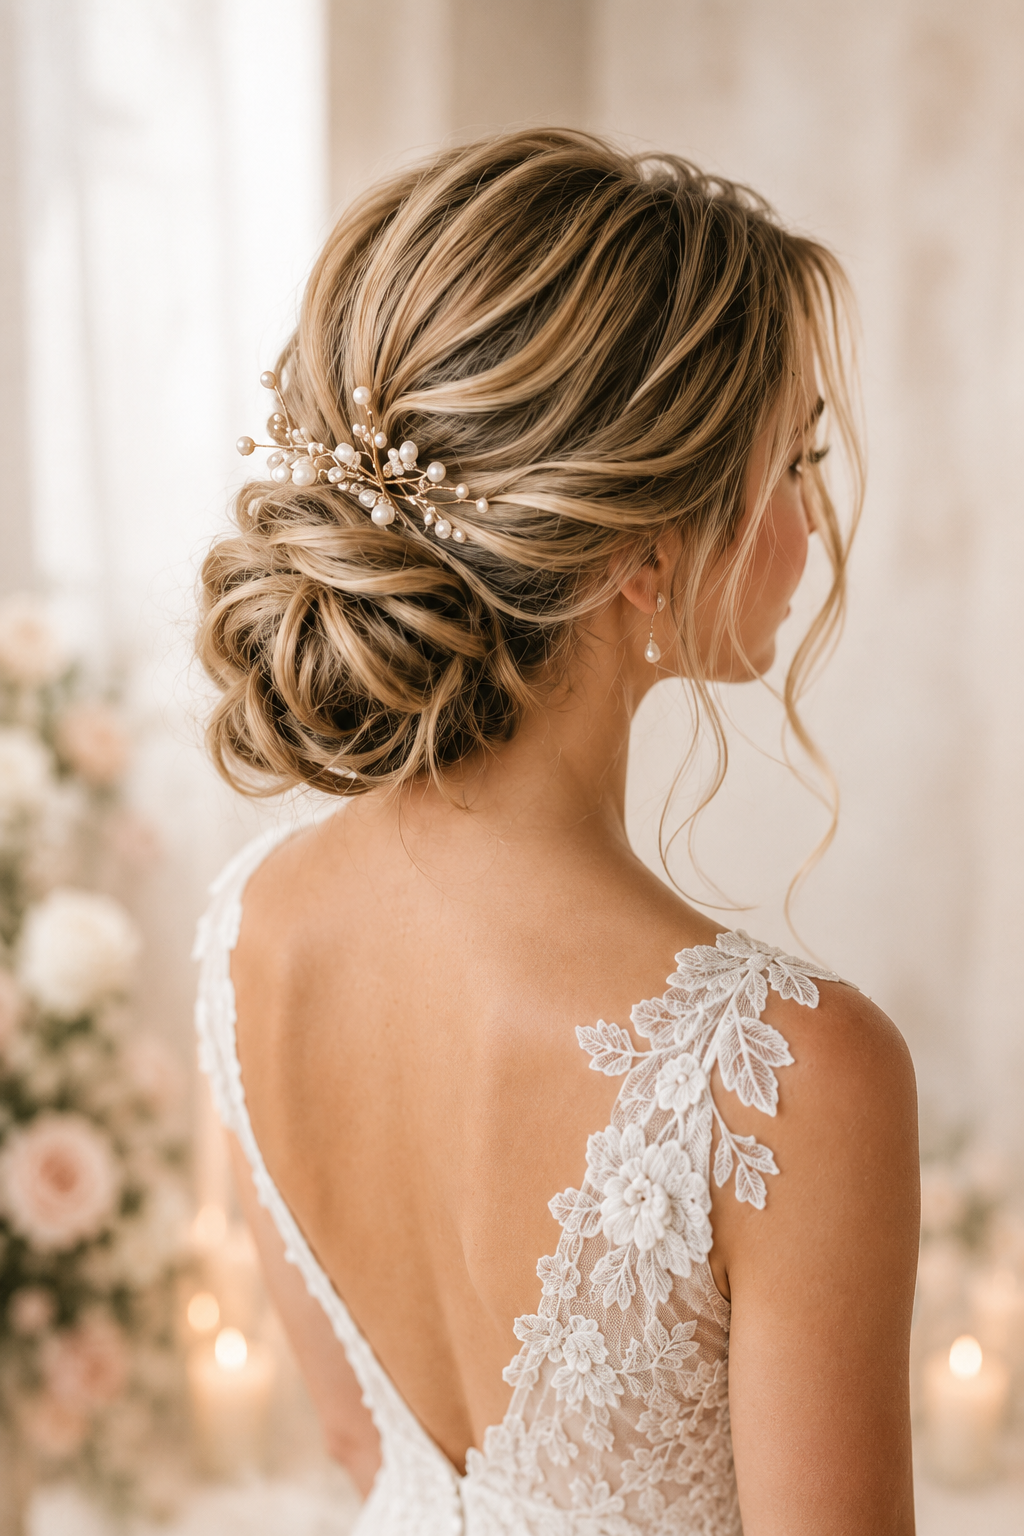
1. Satin-Scrunch Loose Low Bun with Face-Framing Waves
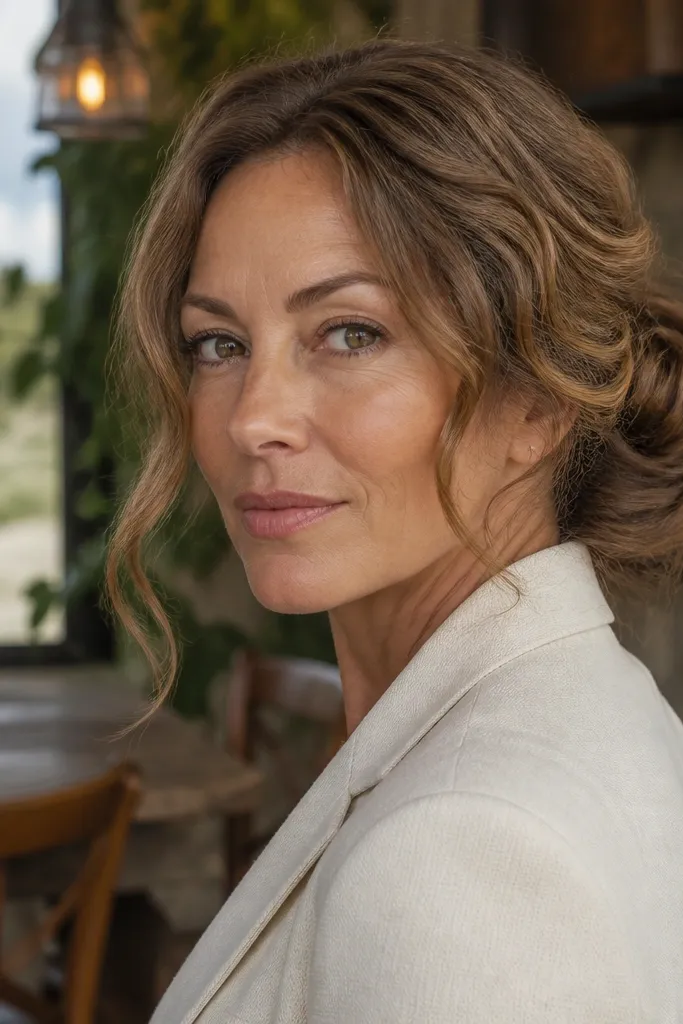
This look is romantic because the bun feels “made,” not sculpted. The scrunched texture gives natural volume at the crown, so the bun looks full even on thinner hair. Face-framing waves blur the edges of the bun, which makes it photograph flattering from side angles and close-ups. It suits weddings with soft makeup and flowing fabrics like chiffon or satin, especially in spring and early fall when the air isn’t brutally dry. If your hair holds waves better than curls, this is the low-bun style that looks like you effortlessly woke up beautiful.
Start by adding texture to the mid-lengths and ends with dry shampoo or texturizing spray, then brush through so it doesn’t look powdery. Twist the hair into a low section bun using a sock or donut only for shape, then remove the donut and let the bun stay slightly loose. Pin the base in a crisscross pattern, then tug lightly on the scrunched top for lift. Finish with a flexible hold spray, and set the face-framing strands with a 1-inch curling wand before pinning them back loosely.
Quick tipPack a small travel hairspray that says “flexible hold” so your face-framing pieces don’t turn crunchy.
Skip thisSkipping texture at the ends makes the bun look flat within an hour.
2. Velvet Pinch Low Bun with Micro-Loops
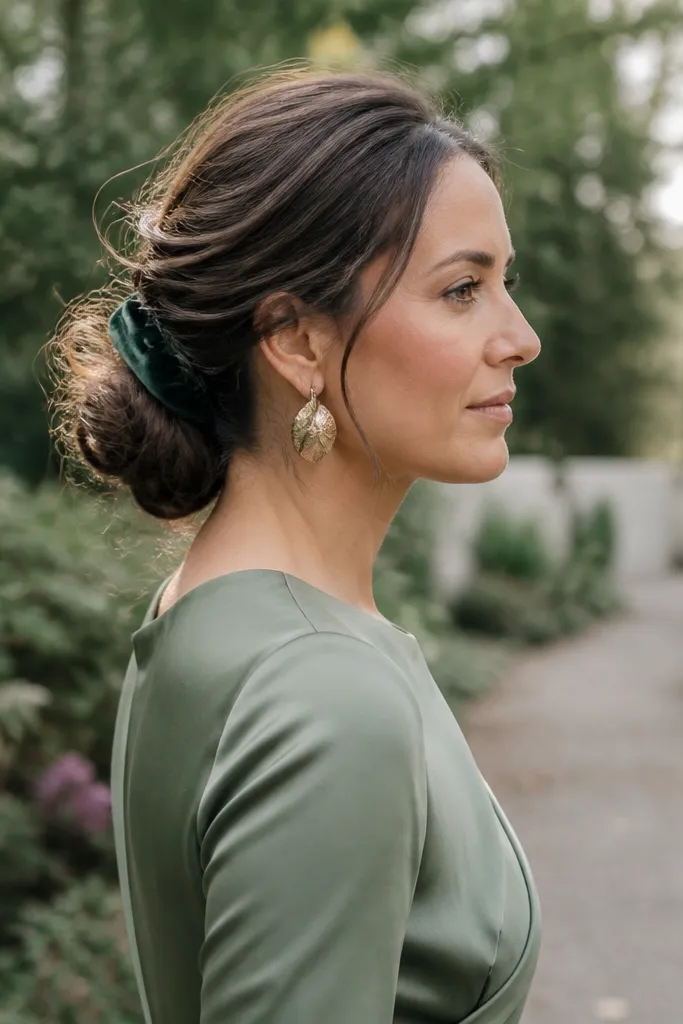
Micro-loops make a loose bun feel intentional. Instead of one big twist, you create small, controlled wraps that catch light and look romantic in photos. The pinch at the base keeps it from collapsing while the loops stay airy. This suits brides who want something soft but not messy, especially with structured dresses and clean eyeliner. It also photographs well in low light because the loop texture creates dimension rather than shine.
Start with damp-to-dry hair that has a light styling cream on the ends, then rough-dry to keep volume. Divide the low section into 3 parts, twist each into a mini loop, and secure with pins close to the nape. Pin the loops so they overlap slightly, then tug one loop at a time to create a consistent “velvet pinch” look. Finish by misting the mid-lengths only, then lightly brush the outer surface so it looks soft, not sticky.
Quick tipBring a small pack of 2-inch pins for the loops so you don’t have to fight short pins at the nape.
Skip thisMaking the loops too tight creates a tight bun that loses the romantic looseness.
3. Tucked Loose Low Bun with Hidden Elastic Knot
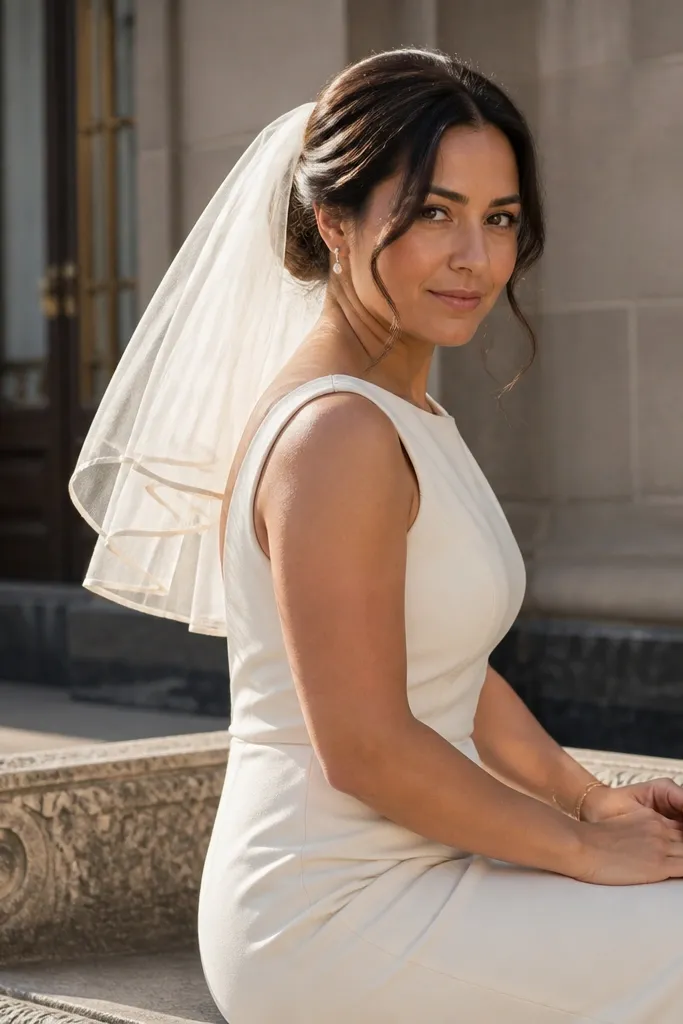
This is the “looks effortless, stays put” option. The hidden elastic knot is the anchor, so the bun stays loose on top without sliding out at the bottom. The tucked finish gives a clean silhouette, which makes it ideal if you’re wearing a fitted gown or a sleek veil. It also works for medium hair because the knot holds the shape better than a pure twist. If you hate visible pins, this is a good choice because you can tuck flyaways under the outer wrap.
Start by tying the low section with a small clear elastic, then twist the ponytail into a rope and wrap around the elastic for the knot effect. Secure the knot with longer pins that go through the elastic base, not just the hair. Tuck the outer ends under the bun so the top looks smooth and slightly airy. Finish with a light mist and use a comb handle to lift a few strands at the crown for that romantic “loose but not sloppy” look.
Pack 1 clear elastic pack; it’s the difference between a bun that holds and one that unravels.
Trying to pin a loose bun without anchoring to an elastic leads to slipping by the reception.
4. Low Bun with Rolled Rope Sides and Loose Center
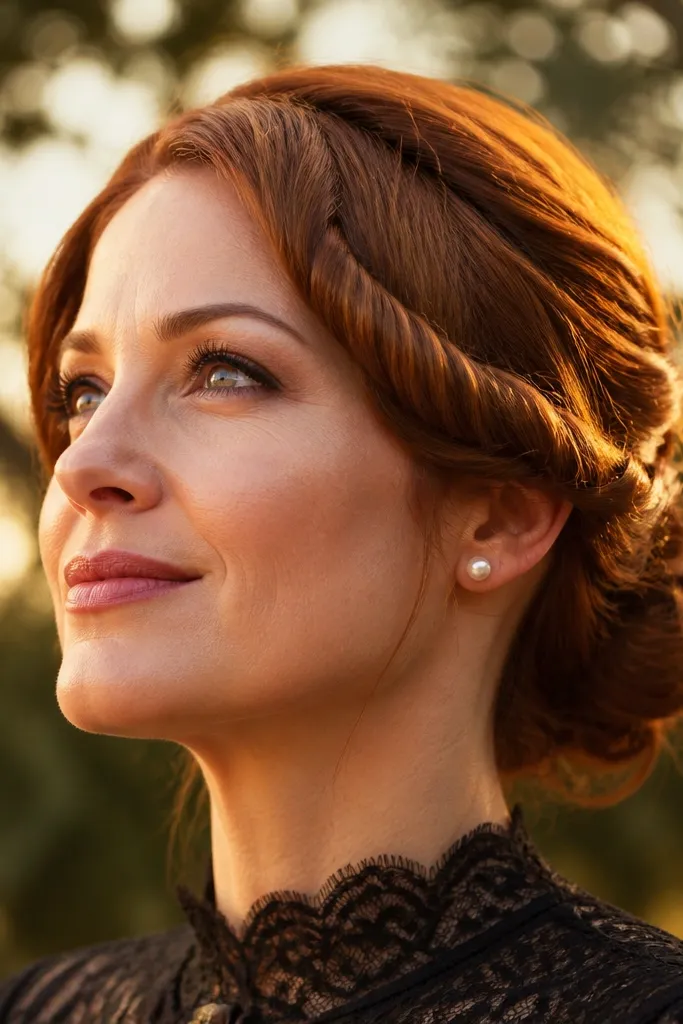
Rolled rope sides frame the face and add structure, while the center stays loose for romance. The rope texture reads well in pictures because it creates lines that draw attention to your cheekbones. This suits brides with oval or heart face shapes, since the side ropes visually balance the face. It also looks great with off-shoulder necklines and statement earrings. If you want a low bun that feels styled even when it’s relaxed, this is a strong pick.
Start by parting slightly off-center and smoothing the top with a tiny bit of serum on dry hair. Take two narrow sections from each side, roll them into rope twists, and pin them low toward the bun base. Build the center bun by twisting the remaining hair loosely and wrapping around a small donut or sock to keep volume. Pin through the rope twists into the bun, then mist the center only so the rope keeps definition.
Bring a rat-tail comb for clean side sections; uneven ropes show up in close-ups.
Over-spraying the ropes makes them look stiff and kills the airy vibe.
5. Messy-Pretty Loose Low Bun with Crown Lift
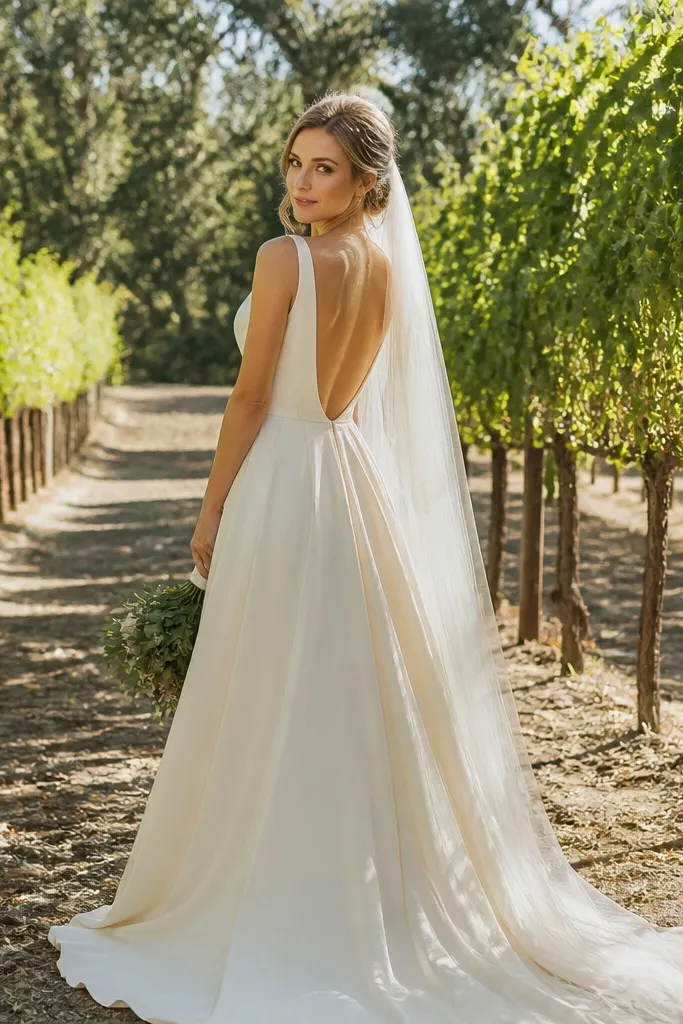
This look is romantic because it’s intentionally undone, but the crown lift keeps it flattering. The bun sits low, yet the top has movement, so it doesn’t look heavy or flat against the back of your dress. It’s perfect for outdoor weddings where you’ll be moving a lot, since the hairstyle is forgiving when it gets a little wind-tousled. It also pairs well with airy veils and boho hair accessories. If your hair is naturally wavy, this style looks extra effortless without needing tight curling.
Start by teasing the crown lightly at the roots and then smoothing the top layer so it looks soft. Twist the hair into a low bun with minimal wrapping, leaving some strands loose on purpose. Use pins to secure the base in two directions, then gently tug the bun edges outward for that messy-pretty volume. Finish with a flexible hold spray and avoid saturating the teased area so it keeps lift.
Quick tipPack a travel brush and a small comb for quick crown smoothing during photos.
Skip thisTeasing the entire head instead of just the crown — that makes the bun look uneven.
6. Low Bun with Braided Halo Edge
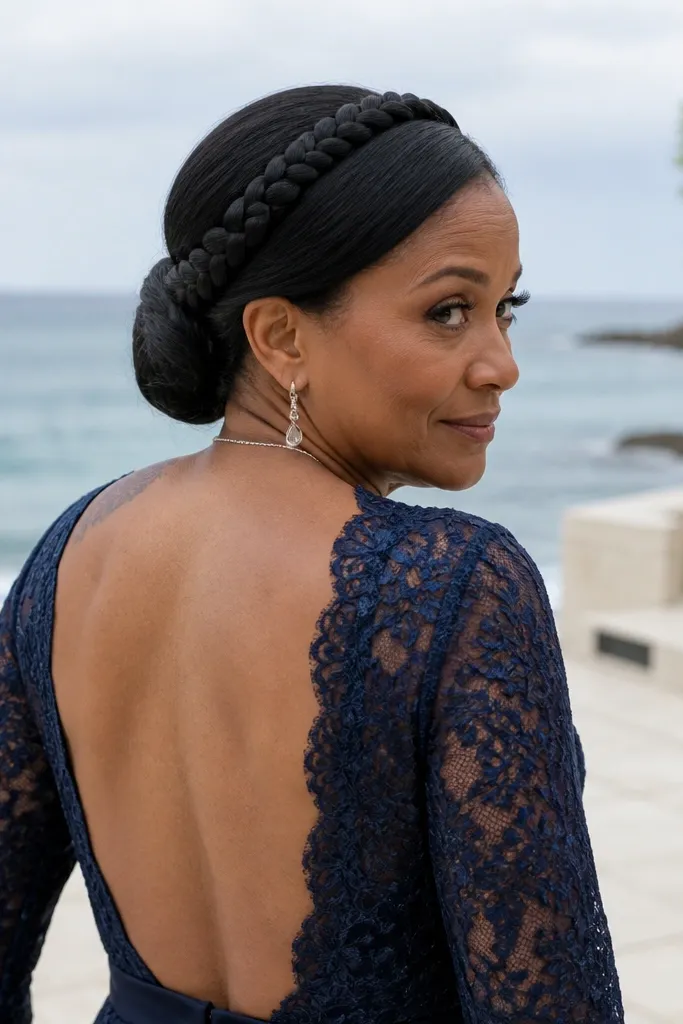
A braided halo edge makes the bun look romantic and framed without needing a full braid. It creates a visible border that photographs beautifully from the back, especially with a lace or open-back dress. This works best on medium to long hair because the braid needs enough length to wrap around the low section. If you’re wearing a veil, the braid can help you hide the veil comb line by covering it with texture. It’s also a great choice for brides who want softness but prefer a tidier finish than a messy bun.
Start by sectioning a thin band around the lower hairline and braid it loosely. Tie the remaining hair into a low bun base, then wrap the braid around the bun circumference like a halo and pin it in place. Add a small amount of tug to the braid for thickness, then pin the ends underneath the bun for a clean finish. Mist the braid lightly so it keeps shape, and leave the rest of the bun flexible.
Bring small clear elastics for the braid — they prevent bulky knots under pins.
Braiding too tight at the halo — it looks rigid instead of romantic.
7. Twisted Low Bun with Pearl-Studded Pin Line
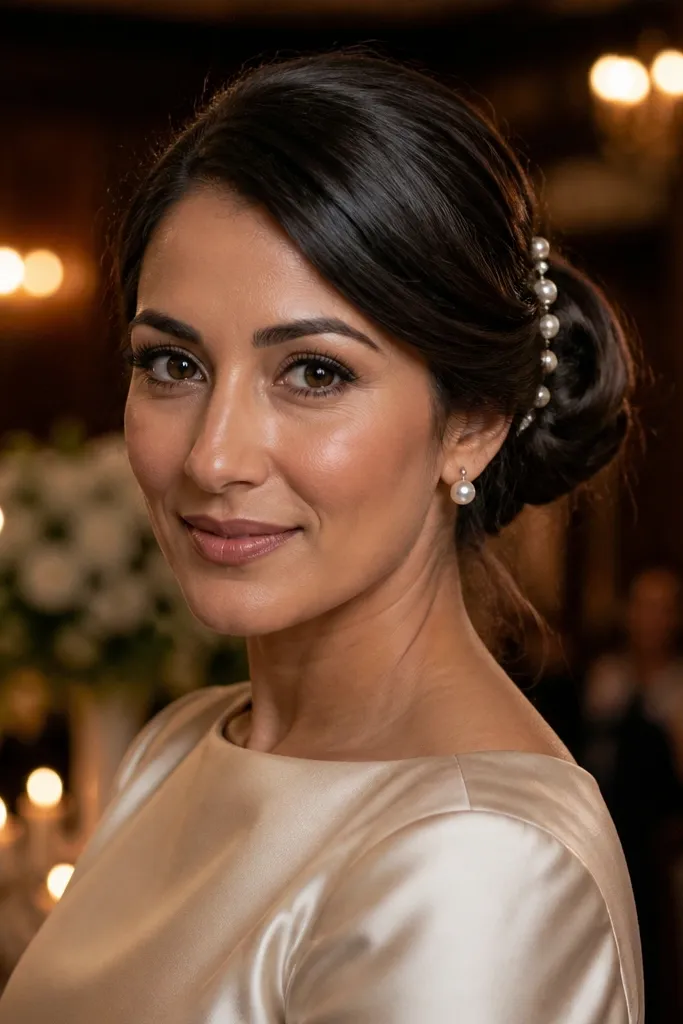
This is glamorous-romantic without looking overdone. The twisted bun gives a clean base, and the pearl-studded pin line adds sparkle exactly where the camera catches it. It suits classic gowns, satin fabrics, and bridal looks with pearl earrings. The best part is that the pearls distract from any tiny flyaways, so the hairstyle stays photogenic even after the ceremony. If you want a low bun that reads “special” in photos, this is one of the safest bets.
Start by twisting the low section into a rope-like bun, then secure with pins that sit slightly under the surface. Place pearl pins in a diagonal line from one side of the bun toward the back, spacing them evenly so they look intentional. Tuck the outer ends under and pin them so the pearls can stay the visual focus. Finish with a light mist and avoid spraying directly onto the pearl pins to prevent tackiness.
Quick tipPack your pearl pins in a small pill box so they don’t tangle in your travel bag.
Skip thisUsing too many pins — you’ll create bumps that show through lace or thin fabric.
8. Sleek Low Bun with Loose Wrap Ends
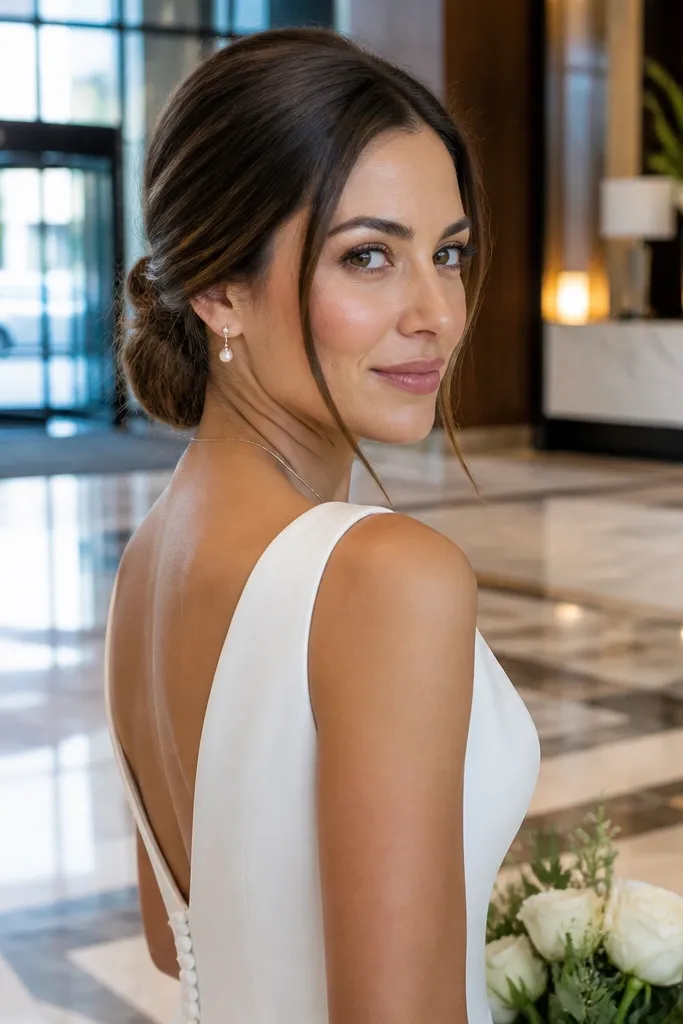
This one is romantic because it mixes polish and softness. The bun core is sleek, but you intentionally leave wrap ends loose so it looks airy rather than rigid. It’s a great option for brides who want a low bun that pairs with a clean veil and a smooth dress bodice. The loose ends also create texture that shows up in close-up photos without making the hairstyle look messy. If you have thick hair, this style looks especially good because you can keep the center smooth while letting the ends relax.
Start by smoothing the hair with a light smoothing cream on dry hair and brushing the top tight. Tie into a low ponytail, then wrap into a bun with pins for a sleek foundation. Leave the last 1-2 inches of the wrap ends loose and pin only the base so the ends float. Finish with a shine-friendly spray on the sleek core, then mist lightly over the loose ends.
Quick tipPack a mini hair straightener or hot tool wipes if you need last-minute smoothing.
Skip thisSkipping smoothing products — slick buns look shiny in a bad way when hair is frizzy.
9. Low Bun with Hidden Hairband Twist
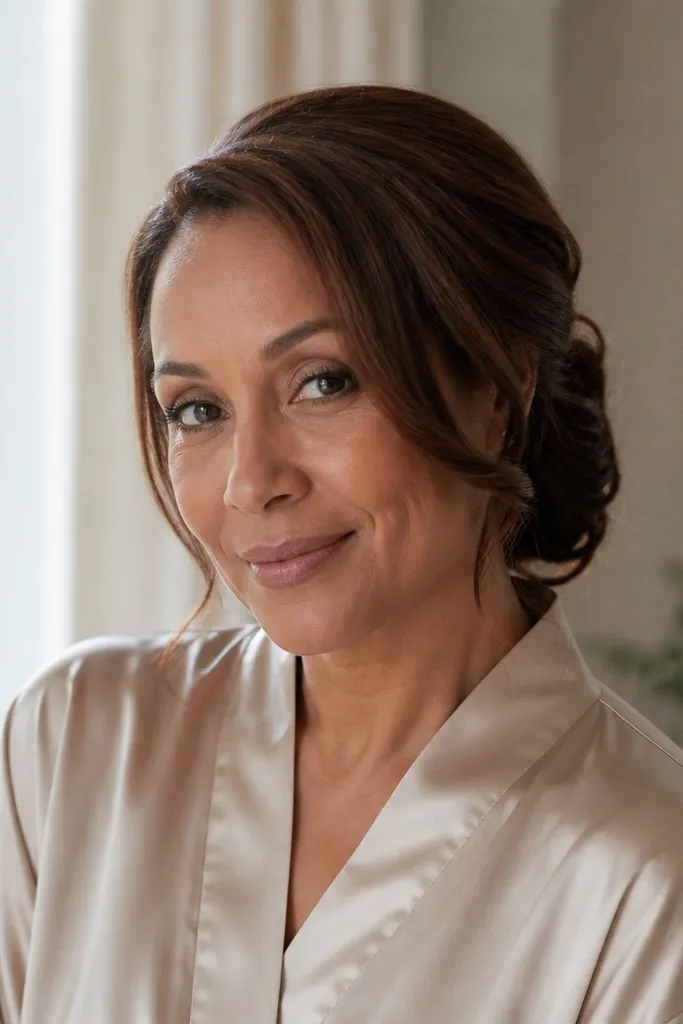
This style is romantic because the twist looks like it’s part of the bun, not an add-on. The hidden hairband creates a subtle band effect that keeps the bun from flattening. It also helps when your hair is slippery, since the band gives extra grip under the outer layer. This is a great pick for brides who want a low bun that stays soft but doesn’t look like it’s falling apart. It pairs well with strapless or halter necklines because it shows clean lines from the back.
Start by creating a small section across the lower hairline, then twist it and wrap it around the base like a hidden headband. Secure it with pins so it sits flat and doesn’t shift. Add the remaining hair into a loose bun around that anchor, then pin through the base into the twist. Tug the outer edges slightly for volume and finish with a flexible hold spray.
Quick tipPack hair clips for holding the anchor section while you pin — it saves time in a tight bathroom setup.
Skip thisPlacing the twist too high on the head — it can interfere with veil comb placement.
10. Braided Low Bun with Loose Tendrils
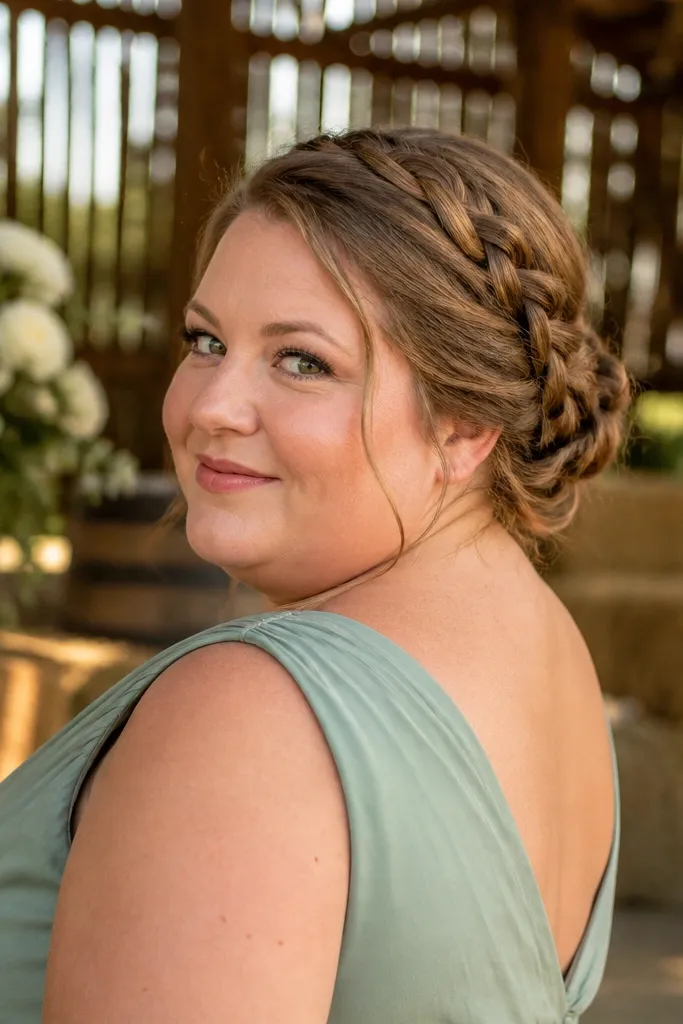
Braids add texture that looks romantic in motion. Loose tendrils make it softer than a fully polished braided bun, so the look doesn’t read too “done.” This suits medium hair with enough length to braid without snapping back. It’s also a strong choice for rustic venues where the photos look best with natural texture. If you like the idea of a bun that looks better as it loosens during the day, this is the one.
Start by braiding the low section into one or two loose braids, leaving the braid slightly airy. Wrap the braid(s) into a low bun and pin the ends underneath. Pull a few strands from the braid for thickness, then leave 2-3 tendrils loose around the face and pin them lightly. Finish with a light mist, focusing on the braid base so it stays secure.
Quick tipPack a small bottle of styling water for tendrils so you can re-shape them right before photos.
Skip thisTight braids — they look too rigid once wrapped into a loose bun.
11. Low Bun with Curled Under Ends and Soft Side Sweep
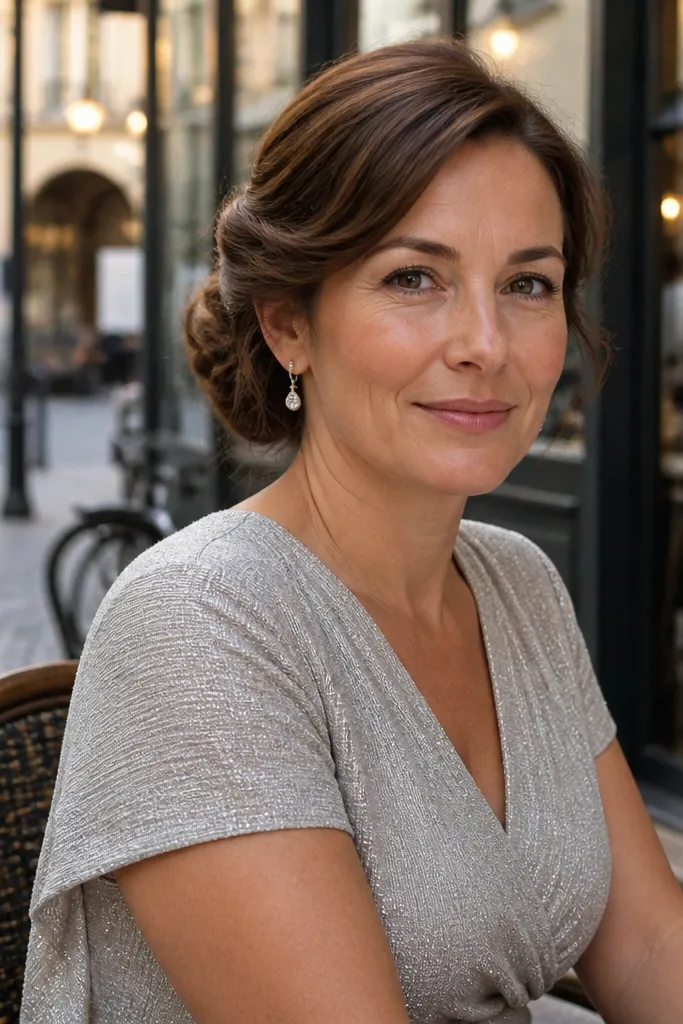
Curled under ends make a low bun feel romantic and feminine, because the ends tuck inward instead of sticking out. A soft side sweep balances the face and creates a gentle frame for earrings and makeup. This works best when you have at least medium length so the under-curl shows. It looks especially good with bridal hair accessories like small pins or a delicate comb. If your hair holds curls well, this look gives you an effortless photo texture without needing heavy teasing.
Start by curling the ends with a 3/4-inch wand, focusing on the last 2-3 inches only. Create a low bun base with a donut or sock if you want extra roundness, then tuck the curled ends under the bun. Pin in a way that keeps the curls visible at the surface, not hidden completely. Sweep one side slightly forward for shape, then mist the bun lightly so the curls keep their direction.
Quick tipPack heat protectant wipes and a small comb — you’ll thank yourself during touch-ups.
Skip thisCurling the whole head — the bun ends should be the hero, not the entire hairstyle.
12. Loose Low Bun with Waterfall Braid Accent
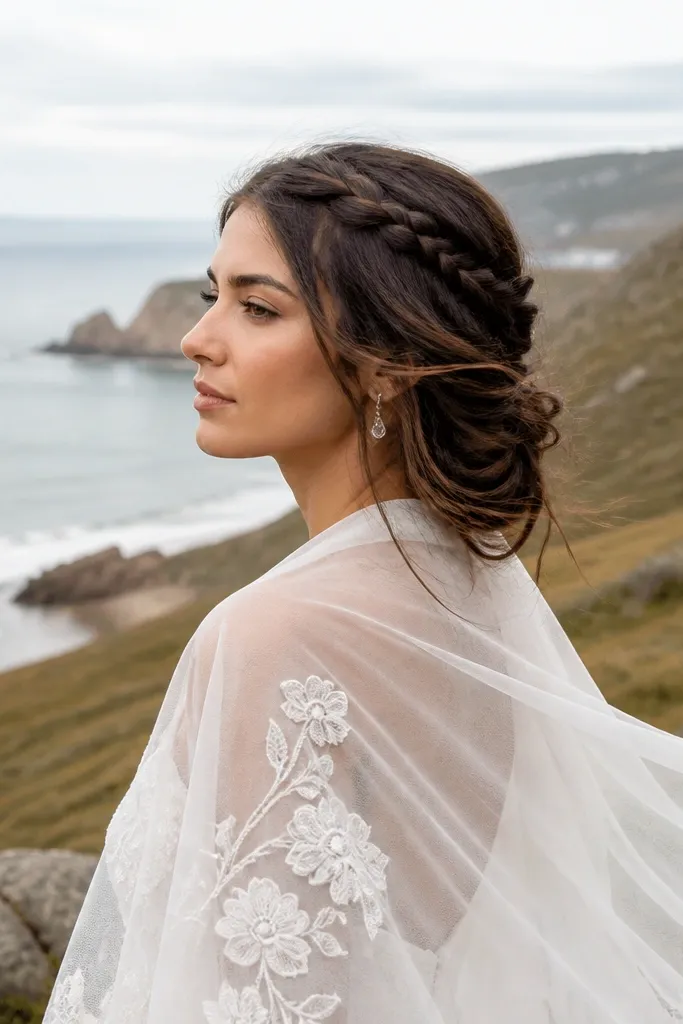
A waterfall braid accent adds romance without turning the whole style into a full braid. It creates a “falling” texture that looks delicate in photos, especially with soft lighting and a veil. This is a great choice for brides who want a low bun but also want something visible from the side and front. It’s also forgiving for hair that’s not super long, since the waterfall can be small and strategic. The bun stays loose and airy while the braid gives structure.
Start by sectioning a narrow front piece and create a small waterfall braid on one side, letting strands drop every few passes. Secure the braid end with a tiny elastic. Build the low bun around the rest of the hair, then pin the braid end into the bun base so it hides the join. Finish by lightly tugging the bun edges and misting only the braid so it looks airy.
Bring an extra tiny elastic pack — waterfall braids can loosen if the ends aren’t secured.
Pinning the braid too high — it can show awkward gaps when your veil sits.
13. Low Bun with Twisted Crown and Loose Back
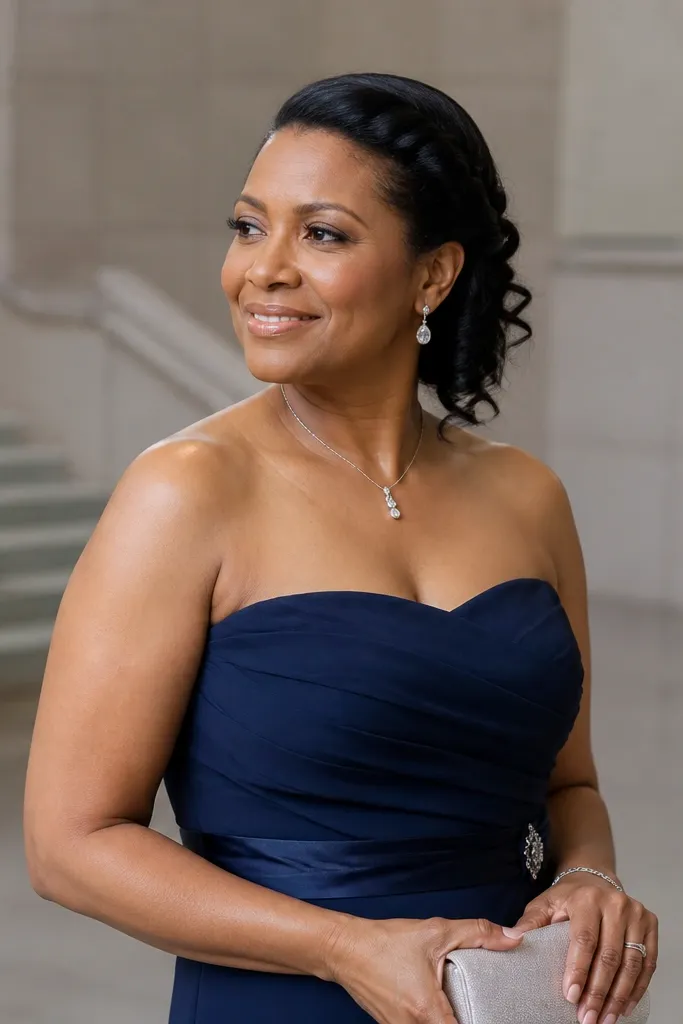
A twisted crown keeps the top smooth and pretty, while the back bun stays loose and romantic. This is a smart pick if you get flyaways around the crown or you want the hairstyle to look intentional from every angle. The crown twist also helps hide where your pins anchor the bun. It pairs well with strapless gowns and clean updos because the front stays polished. If your hair is fine, the twist adds structure without needing heavy teasing.
Start by separating a small crown section and twisting it backward, then pin it in place at the top of the low bun. Create the low bun with a loose wrap, leaving the outer layer slightly undone. Pin the bun base through the twist so the crown anchor and bun anchor work together. Tuck any remaining flyaways under the twisted layer and finish with a flexible hold spray.
Quick tipPack a few small duckbill clips for holding the crown section while you pin the back.
Skip thisLeaving the crown untamed — the look turns messy in a way that doesn’t photograph well.
14. Low Bun with Bow-Like Wrap at the Nape
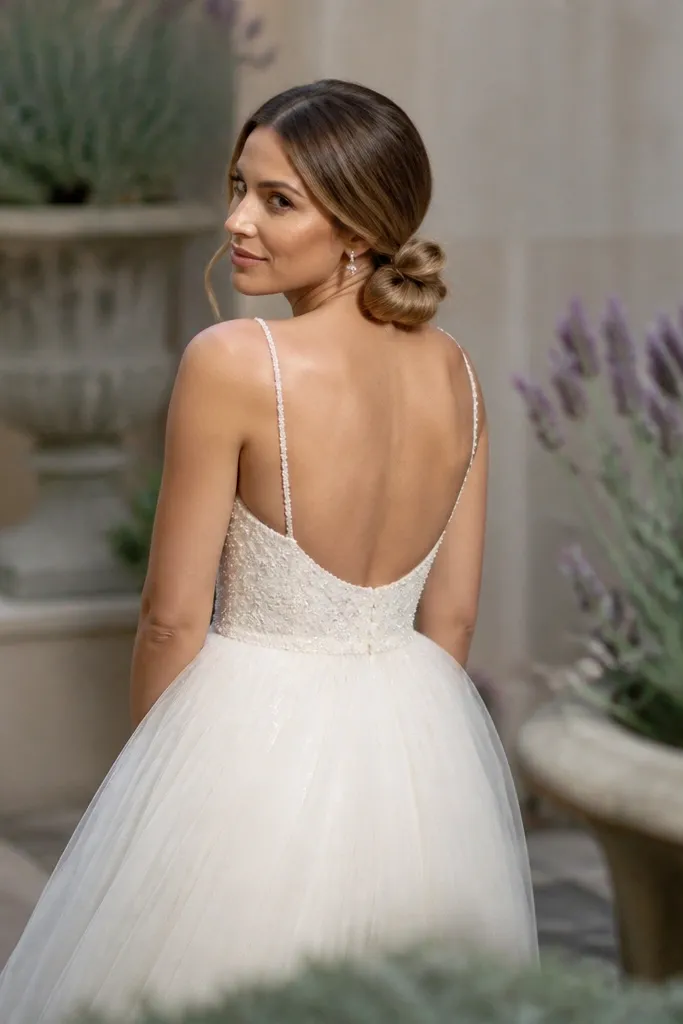
This style reads romantic because it adds a bow detail without using fabric. The “bow” comes from a looped wrap at the nape, and it looks great in back photos and candid moments. It’s ideal for brides who want a playful bridal touch but still want a grown-up low bun. Works best on medium to long hair where you can create loops without stretching. If you’re wearing a dress with an interesting back or lace panel, this detail will show.
Start by creating a low ponytail and twisting it into a bun base, leaving a section aside for the bow loop. Wrap the remaining section around your fingers to form two loops, then pin them flat at the nape. Secure the bow loops into the bun so they don’t wobble. Tug the bun edges slightly for a loose finish, then mist lightly around the bow so it stays shaped.
Pack hair pins that match your hair color — mismatched pins ruin the bow effect in photos.
Making the bow loops too big — they can look bulky and shift your bun position.
15. Loose Low Bun with Side Part and Soft Crown Texture
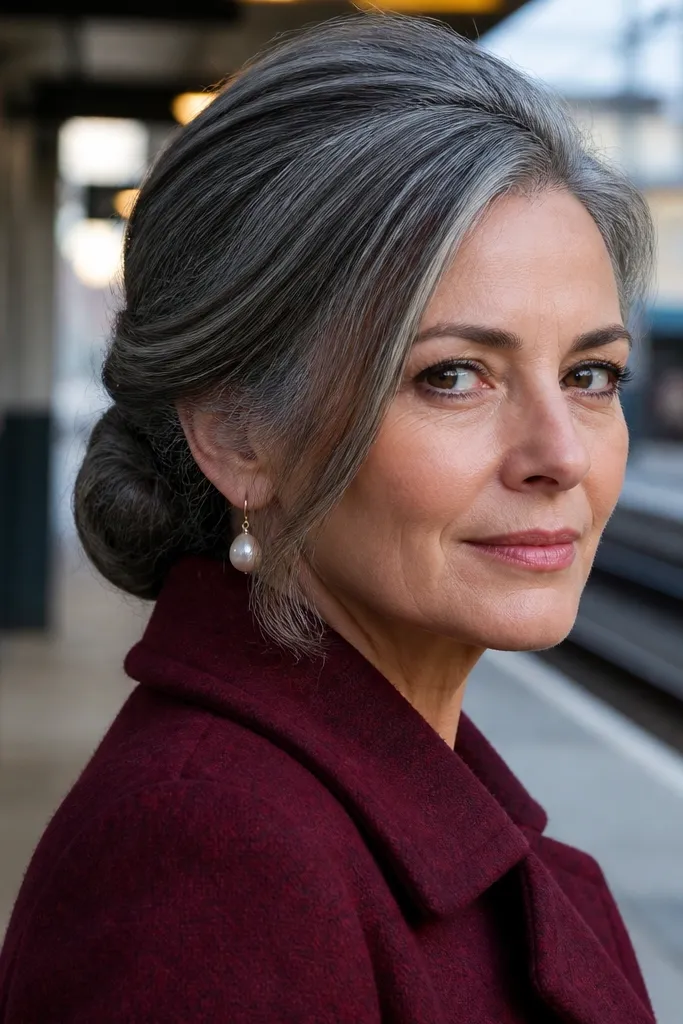
Side-parted low buns look romantic because they create asymmetry, which flatters most faces. Soft crown texture adds lift without obvious teasing lines, so it looks natural in wedding photos. This style suits brides who want a classic silhouette but with modern looseness. It’s especially flattering for photos with over-the-shoulder angles, because the side part shows definition. If your hair tends to fall flat at the crown, this gives it a gentle boost.
Start by creating a deep side part and adding a small amount of root lift spray. Scrunch the crown with your hands, then smooth the top layer so it looks soft. Twist hair into a low bun and pin the base in a tight crisscross for stability. Leave a few strands loose near the side part and finish with flexible hold spray.
Quick tipPack a travel root-lift spray if you plan to style early and touch up later.
Skip thisUsing heavy gel — it makes the side part look greasy and kills the soft texture.
16. Low Bun with Loose Knotted Rope Center
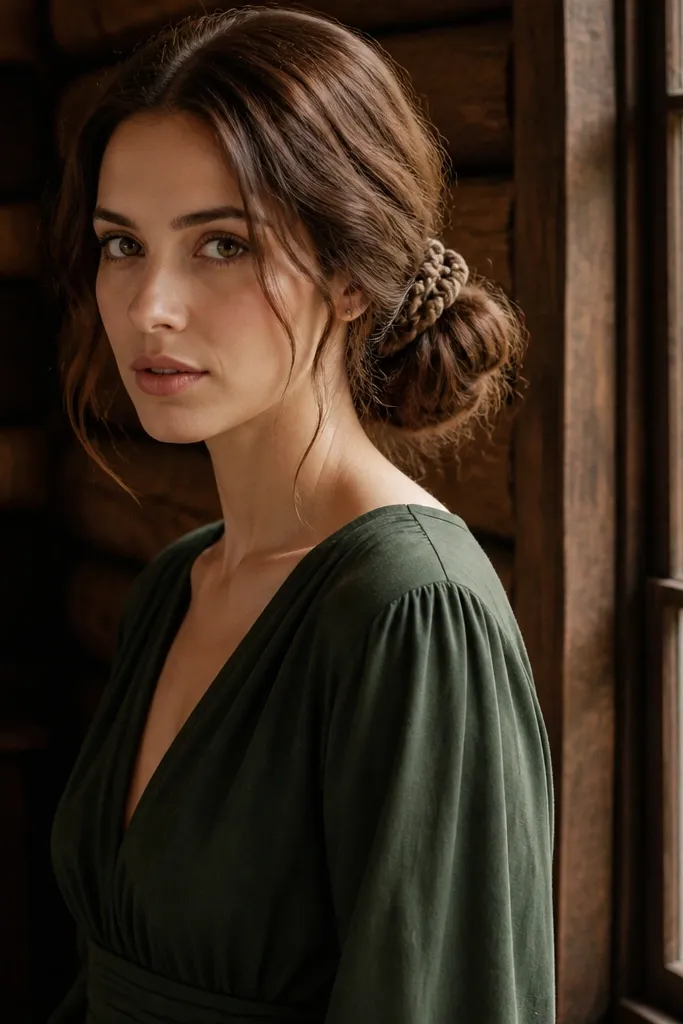
The knotted rope center gives this bun a focal point. It still reads romantic because the knot is slightly loose, with strands that look like they’re meant to move. This style works well for brides who want a low bun that looks styled from the front and back, not just the side. It also pairs beautifully with medium-length veils because the knot helps the pins sit flatter. If you want something photogenic but not fussy, this is a strong pick.
Start by splitting the low section into two parts, then twist each into a rope. Cross the ropes and tie them into a loose knot at the center back, then secure with pins underneath. Add the remaining ends by wrapping them around the bun base and pinning them so the knot stays visible. Finish with a light mist and tug the outer hair slightly to soften the edges.
Quick tipBring a small mirror and a pin set — this look needs pin placement you can verify quickly.
Skip thisTying the knot too tight — tight knots look harsh and flatten the bun.
17. Low Bun with Hidden Braided Crown Clip
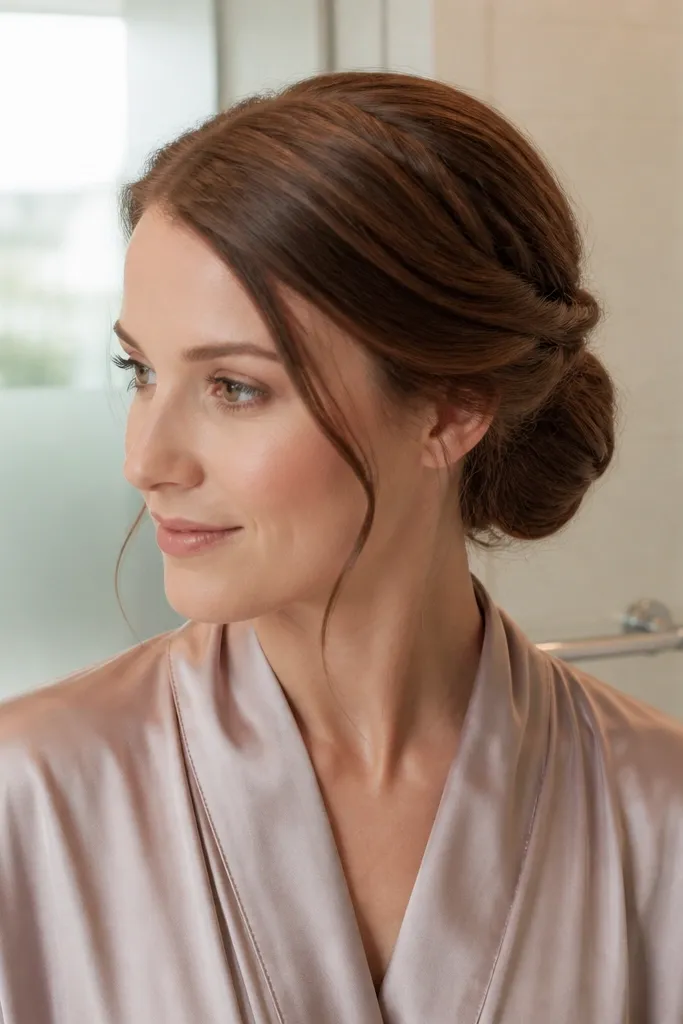
This one is romantic because the detail stays mostly hidden until light hits it. A braided crown clip can add texture and polish without making the bun look like a whole separate hairstyle. It’s ideal if you want a clean bridal finish and you’re worried about loose pieces getting messy in wind. The low bun stays soft, while the clip keeps the crown area looking styled. This works especially well for short trips to the venue where you can’t do a long hair reset mid-day.
Start by prepping the top with a light smoothing cream and brushing hair into a low bun base. Slide the braided crown clip into the hairline area just above your pin anchors, then secure the clip with a couple of bobby pins. Build the bun around the clip so it hides the join. Finish by loosening the outer bun edges with gentle tugging and misting lightly to keep the clip from shifting.
Quick tipPack the clip in a hard case so it doesn’t bend and lose grip.
Skip thisPlacing the clip too low — it can show as a second band instead of a crown detail.
18. Loose Low Bun with Soft Bow Ribbon Wrap
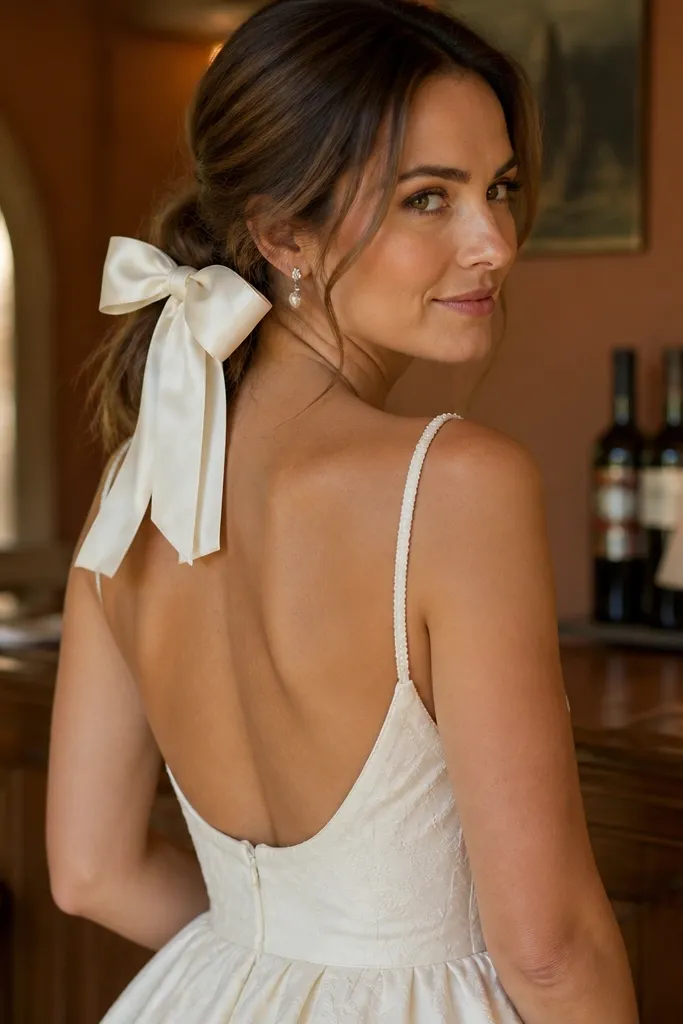
Ribbon wrap makes a low bun look instantly bridal and romantic, especially in photos with warm skin tones and soft makeup. The ribbon also hides minor imperfections where pins meet hair, so it’s forgiving for touch-ups. Pick ribbon that matches your dress undertone — cool-toned satin for icy whites, warm-toned for ivory and champagne. This style looks best when the bun is loose but not messy, so you get that “effortless on purpose” vibe. If you want your hair to feel like it belongs in bridal portraits, ribbon is the fastest way.
Start with a low bun base that you can secure firmly underneath — the ribbon should decorate, not hold the hairstyle. Wrap a thin ribbon around the bun base once, tie a small bow to the side or at the nape, then pin the ribbon tails under the bun. Tug the bun edges slightly for volume and keep the outer layer soft. Finish with a flexible hold spray, but keep it off the ribbon so it doesn’t go stiff or sticky.
Quick tipBring a tiny fabric-safe steamer or wrinkle-release spray for ribbon on travel days.
Skip thisUsing a wide ribbon — it can overpower the low bun and look bulky in photos.
19. Low Bun with Rose-Loop Spiral at the Back
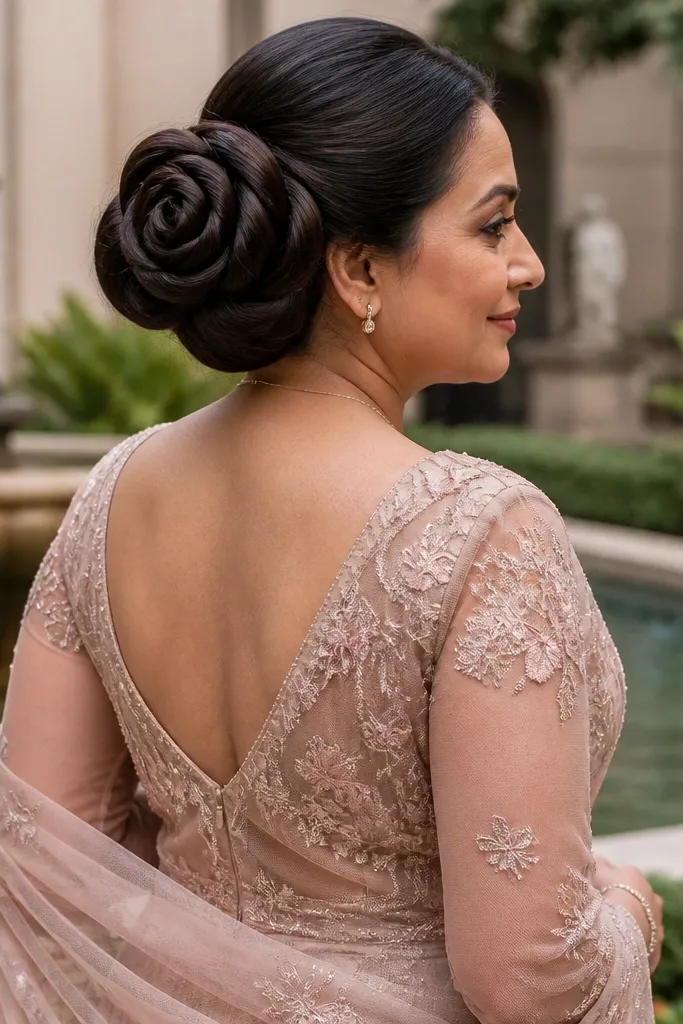
A rose-loop spiral looks romantic because it creates a flower shape without needing a full updo. The spiral gives a distinct photo focal point and makes the bun feel special even with minimal accessories. This works best on medium to long hair where you can roll sections into loops without stretching them out. It also helps if your hair is thicker, because thicker hair holds the spiral shape longer. If you want the bun to look like a design element, this is the one.
Start by dividing the low section into 3-4 smaller sections for consistent loop sizes. Roll each section into a loop and pin it to the previous loop, building a spiral from the inside out. Keep the loops slightly loose so they look airy, then anchor the base with longer pins. Finish with a light mist and gently tug the outer edges of the spiral for an open, rose-like look.
Quick tipPack a few different pin lengths; spiral buns need long pins for the base and shorter ones for the top loops.
Skip thisMaking loop sizes wildly different — it reads messy instead of romantic.
20. Loose Low Bun with Feathered Bang Clip Pieces
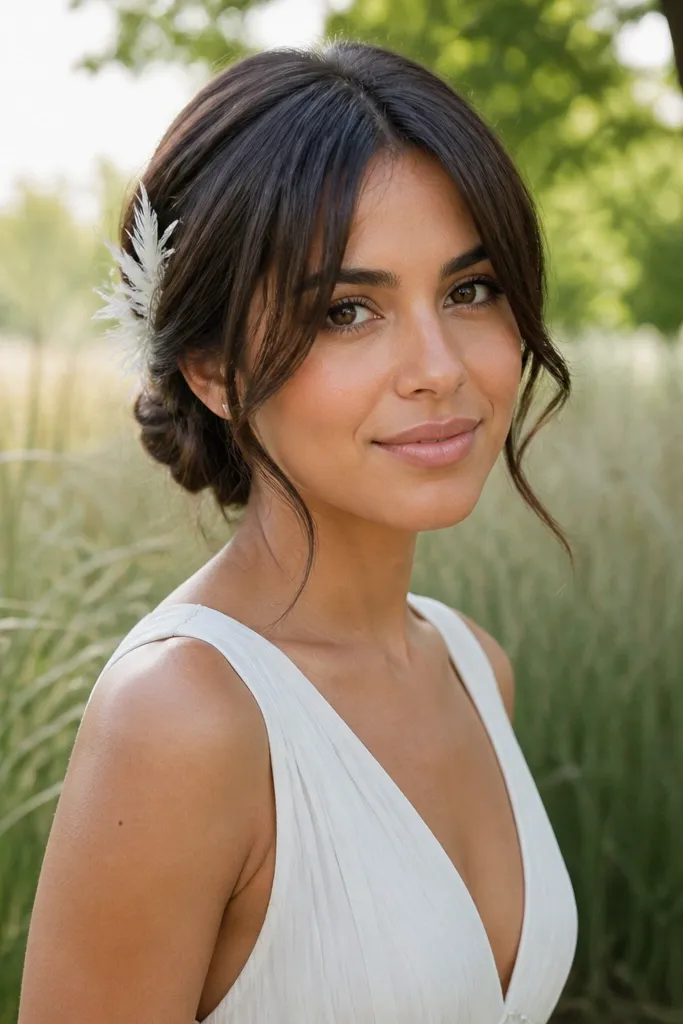
Feathered front pieces make a low bun look romantic and airy, especially if you have bangs or short face layers. The bun stays low and soft, while the front movement balances the hairstyle. This works well for brides who want something delicate without adding heavy braids or big accessories. It’s also a good solution if your hairline is uneven or you want to control flyaways around the forehead. Photos look best when the front pieces are light and wispy, not flat.
Start by blow-drying bangs or face layers with a round brush for a feathered shape, then clip them lightly back. Build the low bun with a stable base anchor so the front clips don’t need extra pin support. Pin the front pieces so they sit just above the bun line, then let a few strands fall naturally. Finish with flexible hold spray on the face pieces only, and mist the bun lightly so it stays touchable.
Quick tipPack two clip sizes — one for setting shape, one for quick hold during touch-ups.
Skip thisLeaving front pieces too wet — they shrink and can spring outward in photos.