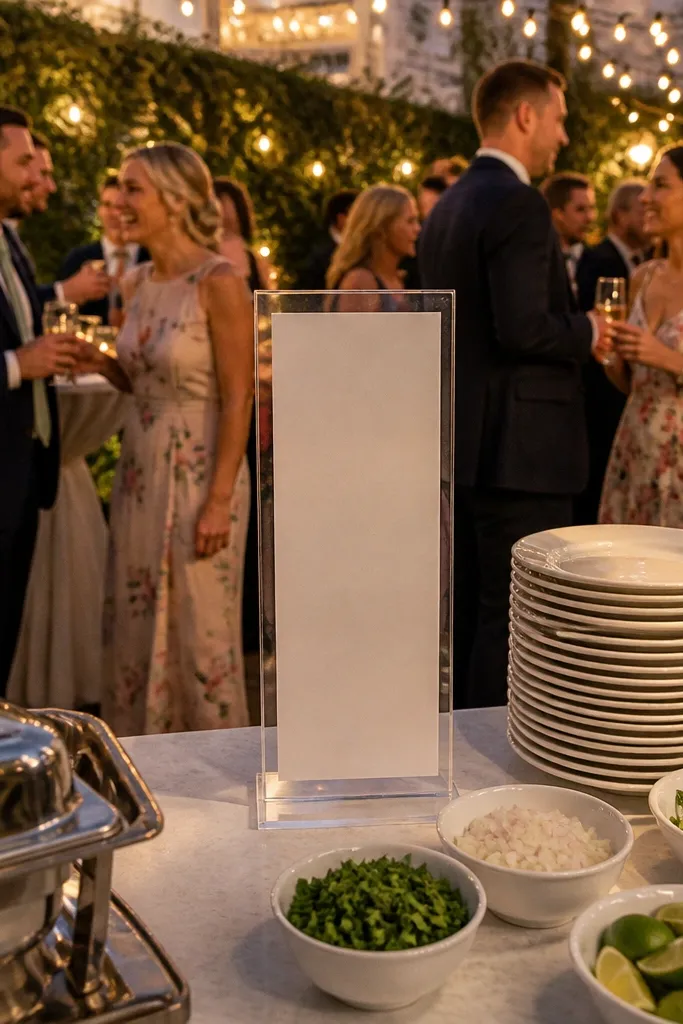
1. Late-Night Slider Bar Totes
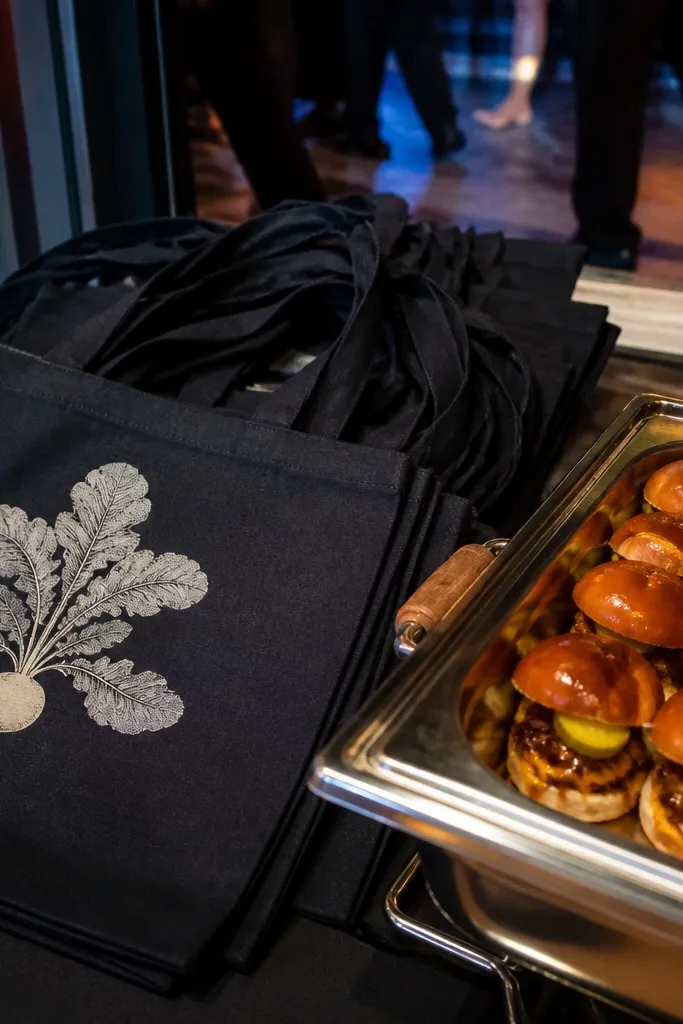
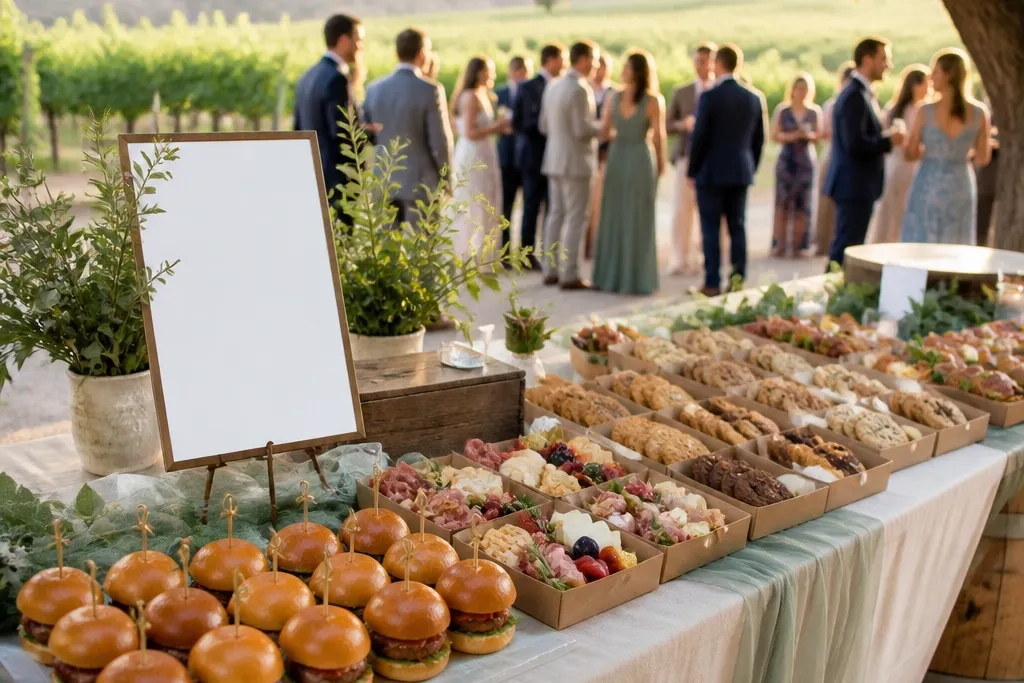
A late-night slider setup reads instantly as a “real wedding” moment because it feels like a reward after dancing. Gift this as a set of branded totes that guests can grab at once, so nobody waits with a drink in hand. Choose mini brioche buns and keep toppings simple: caramelized onions, melty cheese, and a tangy pickled option. For photos, the warm buns and glossy sauces look great under low light, and the kraft tote gives a clean, aesthetic frame for the shot.
Start by deciding the menu: two slider types (one classic beef or chicken, one veggie or spicy) plus a sauce choice. Then order or prep the components so each tote has 2 sliders, a small cup of sauce, and a folded napkin. Finally, set up a single pickup station near the dance floor with one printed card that lists the two options in big text. Budget around $8-16 per guest depending on meat choice and packaging, and book any catering orders at least 2-4 weeks ahead.
Send the couple a note to keep sliders warm in insulated bags for the last 60 minutes of the party.
Avoid messy sauces without separate cups — they turn tote photos into smears.
2. Arrival Charcuterie Grab Boxes
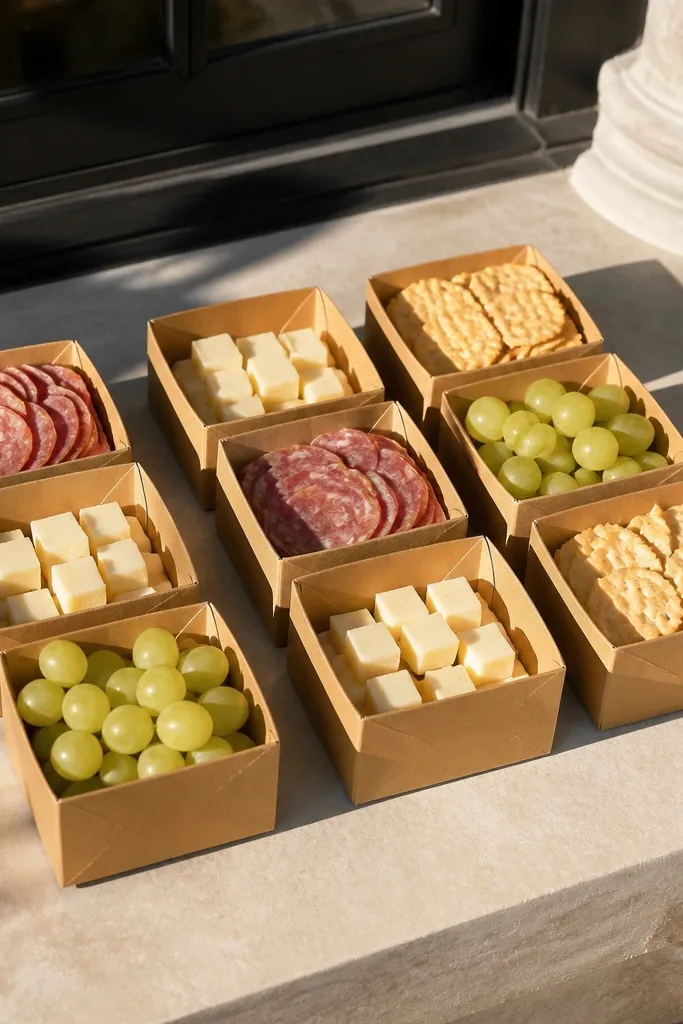
Arrival food works best when it feels effortless. These grab boxes make guests stop walking long enough to actually talk, and they photograph beautifully because the colors separate cleanly: pink salami, pale cheese, green grapes, and gold crackers. Keep portions tidy — small cubes of cheese and bite-size crackers look better than heaping slices. If the couple wants a “wow” moment without speeches, this is the gift that makes the entrance feel special.
Quick tipAsk the couple to add a small spoon or spreader for the soft cheese so guests don’t improvise with utensils.
Start by choosing a box size that fits in one hand, with a divider insert so everything stays neat. Then pick a simple palette: one cured meat, one soft cheese, one semi-firm cheese, grapes or berries, plus crackers. Finally, schedule distribution for the first 30-45 minutes after doors open, with a table placed where guests naturally pause. Expect about $10-20 per box depending on cheese selection, and place orders 3-5 weeks ahead for consistent inventory.
Skip thisSkip items that sweat in travel, like very watery fruit — it ruins the look fast.
3. Tasting Flight Cookie Samples
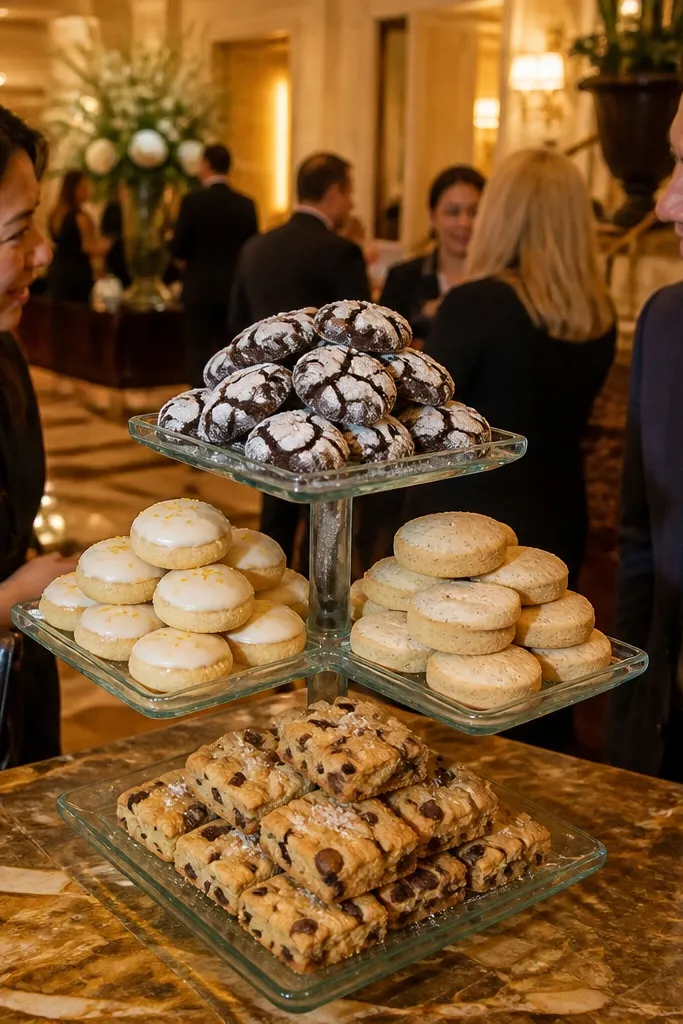
Cookie flights are a gift that looks intentional and fun, not like leftovers. Guests can sample four flavors without committing to a full dessert, which keeps lines short and makes the spread feel curated. Pick flavors with visual contrast: cocoa crinkle, lemon glaze, vanilla bean, and a chocolate-chip with sea salt. The labeled card gives guests something to photograph, and the variety makes each box look different while staying cohesive.
Quick tipPut the brightest color cookie (lemon glaze) at the top of the tray for the best first glance in photos.
Start by choosing four flavors that share one theme — for example, “bright citrus + chocolate” or “classic brown sugar + spice.” Then pack each flavor into a paper sleeve with a small label sticker and include a mini tasting card with bite-size instructions. Finally, set up the tray with tongs and a printed sign so guests can grab without waiting. Budget about $5-10 per sample set, and order ingredients or bakery items at least 2-3 weeks ahead.
Skip thisAvoid soft cookies that collapse in a sleeve — choose sturdier cookies or bake a day earlier.
4. Photo-Friendly Fruitade Bar Cups
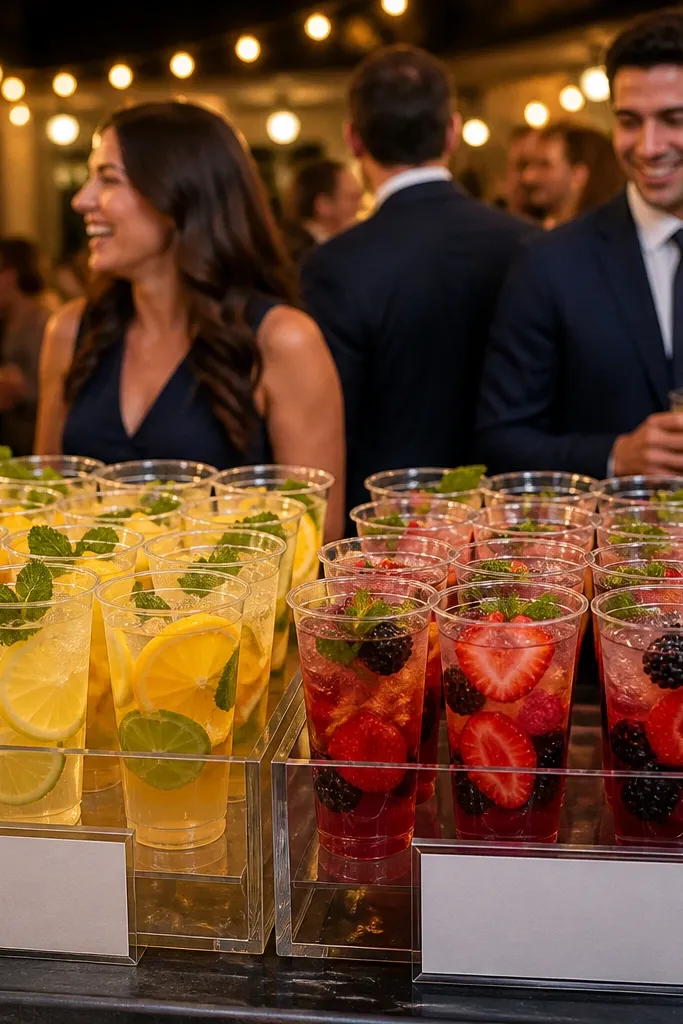
A fruitade bar solves the “everyone wants something refreshing” problem and looks stunning in crowd shots. Clear cups show the fruit layers, and the bubbles catch string light, so it looks good even in evening photos. Choose two recipes: one citrus-forward (lemon, orange, lime) and one berry-forward (strawberry, raspberry, blueberry). Add simple garnishes — mint leaves and thin citrus wheels — so every cup looks finished, not thrown together.
Quick tipUse bigger ice cubes — they melt slower and keep the drink looking clear longer.
Start by picking two flavor bases and making them in advance as concentrate so service is fast. Then set up a station with pre-filled pitchers and a ladle so a staff member can pour in 10-15 seconds per cup. Finally, provide garnish cups and napkins, and place the bar near the photo area. Cost is often $4-9 per drink depending on fruit and sparkle water, and you should finalize quantities 1-2 weeks before the wedding.
Skip thisDon’t rely on pre-cut fruit with browning edges; it looks tired in photos.
5. Custom Spice-Rub Snack Packs
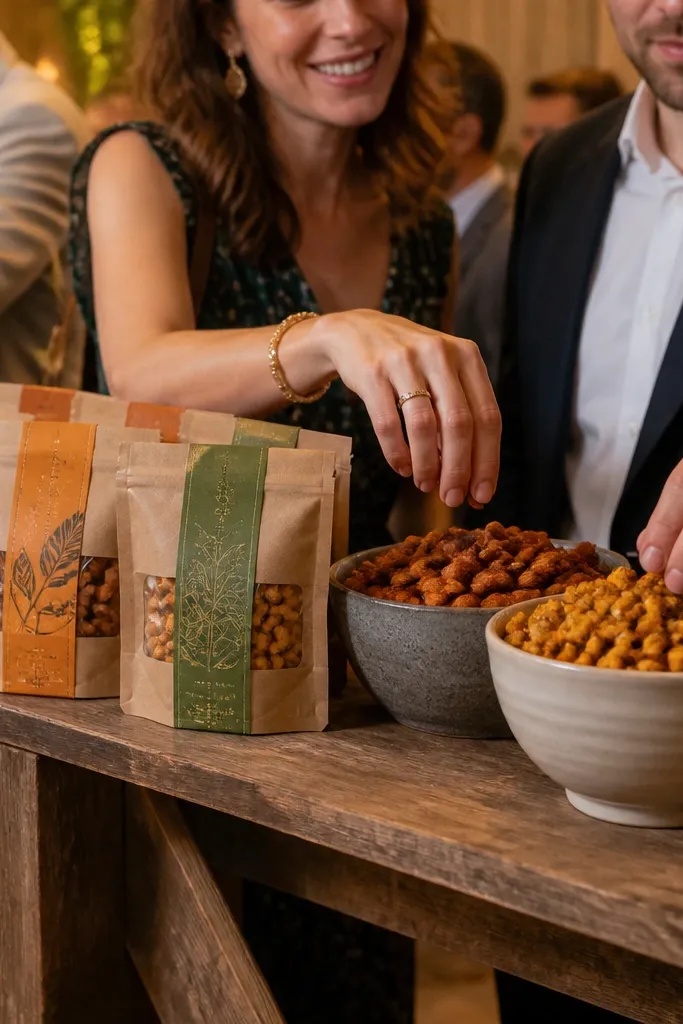
This is a gift for couples who want something different from standard candy. Spice-rub snack packs give guests a “taste journey” and photograph well because you can build a color story with labels and roasted tones. Think roasted nuts or chickpeas with two flavors: smoky paprika and citrus-herb. The packaging feels gift-like, and the spice dust gives a subtle texture that shows up in pictures.
Quick tipAdd one “mild” option so guests who dislike heat still feel included.
Start by choosing two snack bases that hold crunch, like roasted almonds and spiced chickpeas. Then pack each into sealed pouches with a label card that describes the flavor in plain text and includes allergen info. Finally, place a few packs at each table so guests don’t have to roam for them. Plan on $4-8 per pack depending on snack type, and order packaging materials 2-3 weeks ahead for clean printing.
Skip thisAvoid oily snacks that stain labels — choose properly roasted, well-drained ingredients.
6. Gourmet Popcorn Wedding Cones
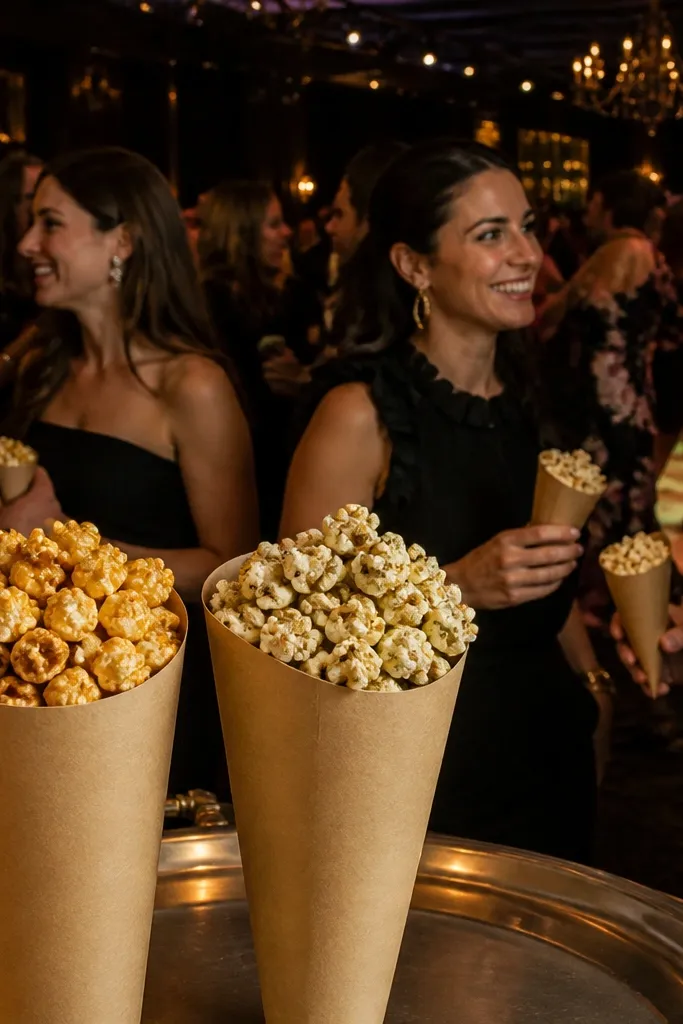
Popcorn cones are one of the easiest photogenic gifts because they’re tall, graphic, and fun in group photos. It also works for late-night or after-ceremony mingling when guests want something handheld. Choose one sweet and one savory coating so people can pick what matches their mood. The cones look great on a buffet table, and the ribbon tag gives couples an easy branding moment.
Quick tipUse a matte label sticker; shiny stickers glare under flash.
Start by choosing two flavors that photograph well: caramel corn and cheddar-butter popcorn. Then order cones in a standard size and fill them close to service time so popcorn stays crisp. Finally, set up a station with a staff member or a self-serve tray plus napkins. Budget around $3-7 per cone, and place orders 2-4 weeks ahead so the coating batches are fresh.
Skip thisSkip pre-filled cones from a week ago — they go stale and lose the texture that makes photos pop.
7. Mini Dessert Shooters on a Tier
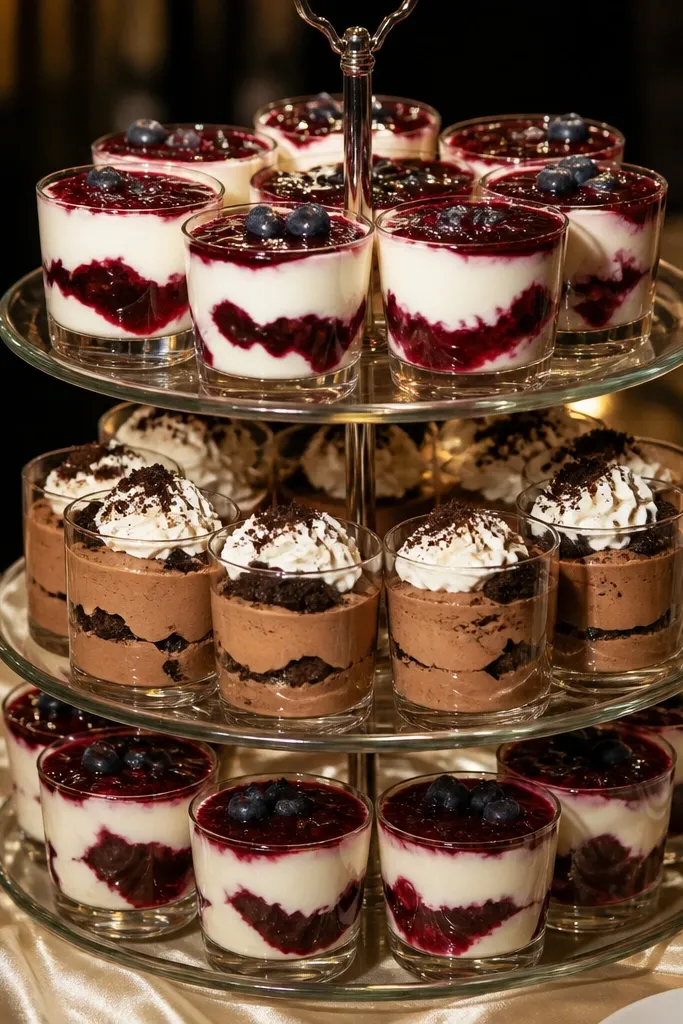
Layered dessert shooters look like “dessert styling,” not just sweets. Use clear glasses so guests can see layers — vanilla cream against berry compote, or chocolate mousse with whipped cream and cookie crumbs. This is a strong gift when the couple wants a high-end look without a full plated dessert for everyone. The tiered stand creates instant height for photos, and the small glasses make distribution fast.
Quick tipAsk for plastic lids if there’s any outdoor heat, so layers stay stable.
Start by picking two shooter flavors that layer cleanly and don’t bleed, like berry + vanilla or chocolate + cream. Then prepare in batches and assemble right before service so the layers stay crisp. Finally, place a tiered stand by the reception entrance or dessert table, with a small sign for “choose one.” Expect $7-14 per shooter set depending on ingredients and glassware, and book any dessert vendor at least 3-4 weeks ahead.
Skip thisAvoid fruit-heavy layers that leak juice — it ruins the clean look.
8. Personalized Tea & Honey Gift Tags
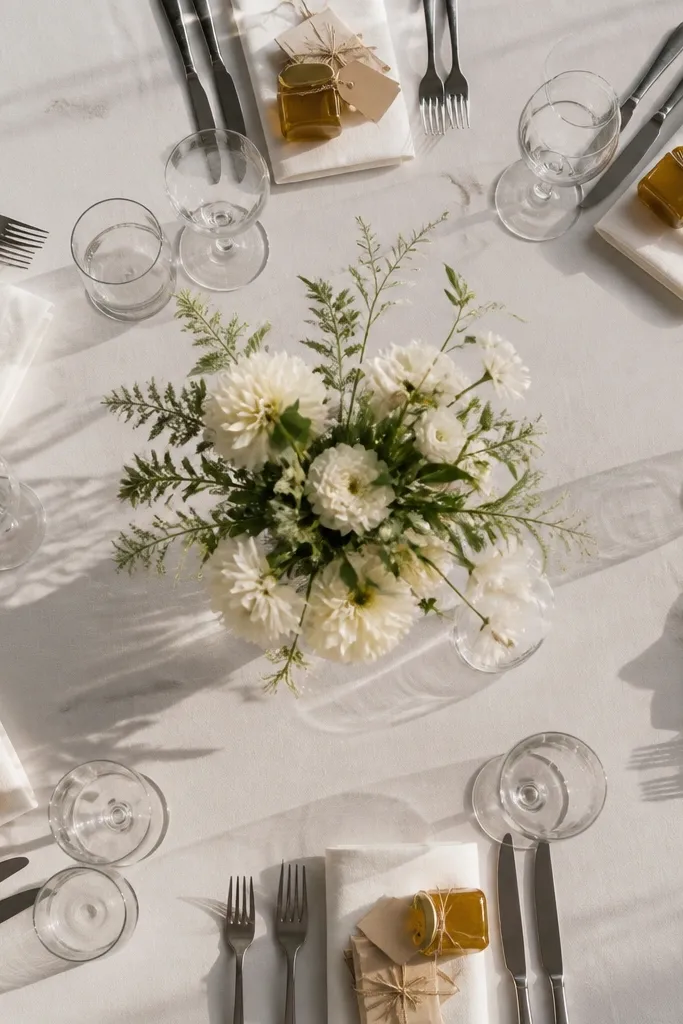
If the couple has a cozy vibe, tea and honey gifts look thoughtful and photograph like a lifestyle shoot. The honey jar catches warm light and the tea sachets stack neatly, giving a tidy, premium look at each table. This also works when weddings run late and guests want something comforting instead of only sweets. Choose one floral tea and one classic black tea so the set feels intentional.
Quick tipUse thick twine and a matte tag for better texture in photos.
Start by ordering small honey jars and matching tea sachets in two varieties. Then attach a printed tag with the couple’s names and a simple serving hint like “Pour over hot water, stir, sip.” Finally, place one set at each guest table or hand them out during the last 30 minutes. Budget about $6-12 per set, and order printed tags 1-2 weeks ahead to avoid rush shipping.
Skip thisSkip ultra-thin tags that curl under humidity.
9. S'mores Assembly Kit Boxes
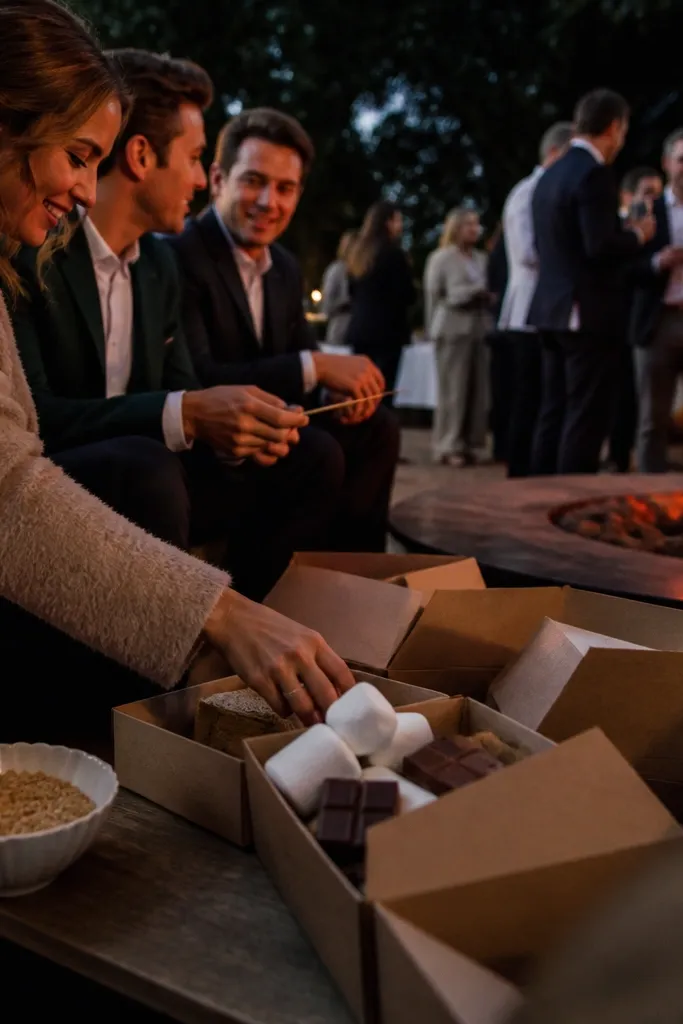
S’mores kits bring instant campfire energy and still look polished when packed right. The kraft box is photogenic, and guests love assembling their own, which keeps the line moving. Choose a clean chocolate look — dark squares plus a creamy milk chocolate — so the pieces look distinct. Marshmallows should be large and fluffy so they photograph with texture, not flat staleness.
Quick tipIf the wedding is outdoor, add a small bag of extra napkins; sticky hands happen.
Start by sourcing graham crackers, chocolate squares, and marshmallows in a consistent brand style so the kit looks cohesive. Then pack each kit with a printed instruction card that tells guests how to build their s’more and where to set it to toast. Finally, set up a toasting station with a clear sign and enough heat tools for fast turns. Plan around $9-18 per kit depending on chocolate quality, and confirm supplies at least 3 weeks ahead.
Skip thisDon’t use tiny marshmallows — they look stingy in photos.
10. Sparkling Mocktail Garnish Bars
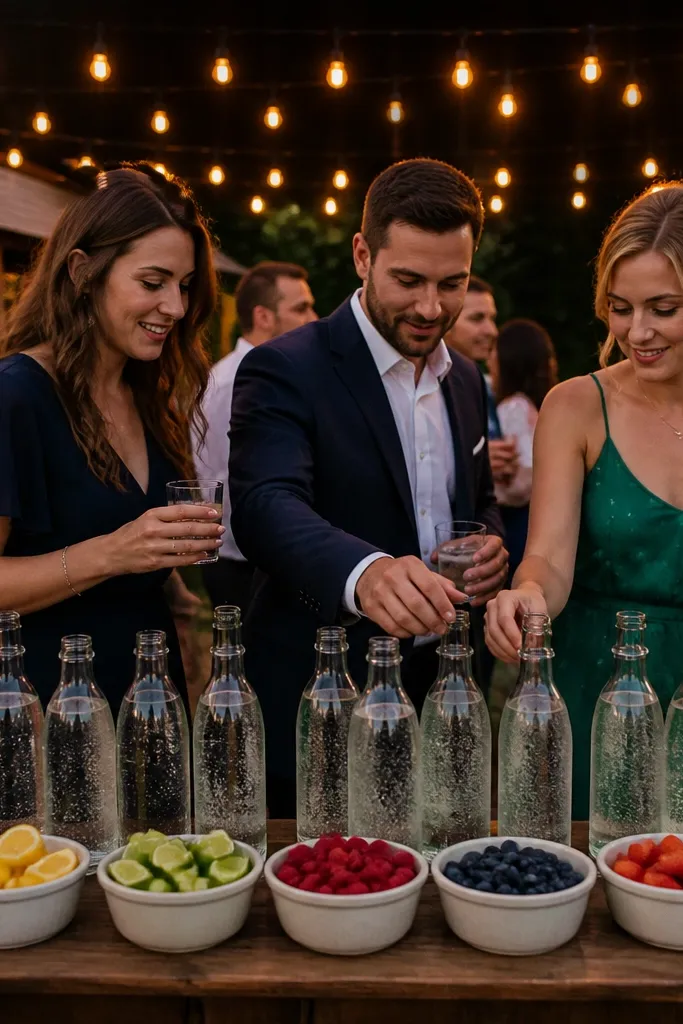
A garnish bar turns non-alcoholic drinks into the star without making it feel like a compromise. It’s also one of the prettiest “food guide wedding celebration” gifts because guests pick their own mix, creating variety in every cup. Use clear bottles for the base and arrange garnishes in small bowls by color: citrus, mint, berries, and edible flowers. The result is photogenic and interactive, which keeps guests engaged at the same time.
Start by choosing two mocktail bases and keeping them chilled in labeled bottles. Then set out garnish bowls with serving spoons so guests can build quickly without hovering. Finally, place the bar near a seating area where people naturally stop, and give a sign with two flavor names. Budget $6-14 per guest depending on base ingredients, and order edible flowers or specialty syrups 2-3 weeks ahead.
Skip delicate flowers if the weather is hot; use mint and citrus instead for stability.
Avoid overcomplicated recipes with too many steps; quick builds photograph better.
11. Table-Number Cheeseboard Labels
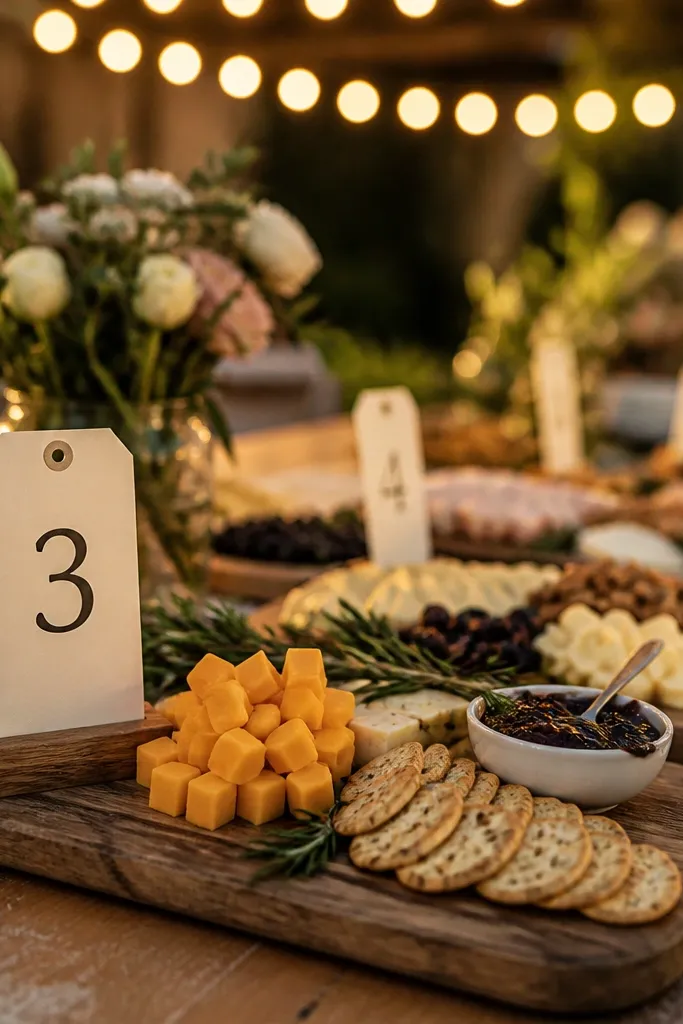
This is a gift that looks subtle but makes the whole food spread feel designed. Instead of random cheese boards, you get clean table-number labels that tell guests what they’re eating and how to pair it. The labels photograph well because they’re legible and sit on the boards in crisp lines. Choose 4-6 boards across the venue, each with two cheese types and one pairing like jam or honey, so the labels can guide guests without confusion.
Quick tipUse thick card stock so the label doesn’t bend when boards are moved.
Start by planning board themes based on flavor pairs, like “sharp cheddar + apple jam” or “blue cheese + pear honey.” Then print labels with large type and include a short pairing line plus allergen notes. Finally, place one label per board and coordinate with the couple so it matches table numbers. Costs are usually $30-80 for printing and materials depending on quantity, and you should finalize text 1-2 weeks before the wedding.
Skip thisDon’t write labels with tiny fonts; they disappear in photos.
12. Chocolate-Dipped Strawberries in Sealed Trays
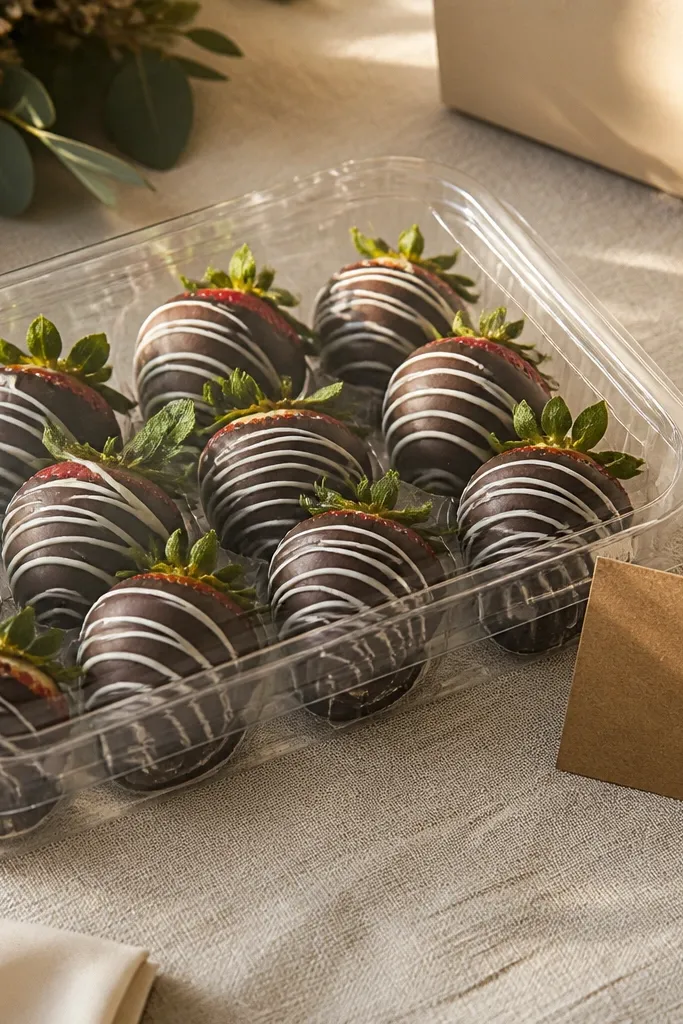
Chocolate-dipped strawberries look romantic and premium, and the sealed tray makes them feel like a real gift rather than a snack. They’re also one of the easiest desserts to portion for guests because everyone can grab one without cutting. Choose dark chocolate for a dramatic look and add a thin drizzle of white chocolate for contrast. Put them on a table with a light-colored cloth so the red berries pop under warm lighting.
Quick tipIf the wedding is outdoors, request insulated delivery so berries don’t soften.
Start by ordering strawberries in trays sized for one or two per guest, then arrange in sealed containers for freshness. Then label each tray with the couple’s names and a simple note like “Grab one after dinner.” Finally, distribute during a dessert window so guests don’t wander for it. Budget about $7-15 per guest depending on chocolate and tray size, and place orders 3-5 days before for best freshness.
Skip thisAvoid pooling chocolate — keep drizzle light so the trays look clean.
13. Mini Charcoal Grill Skewer Boxes
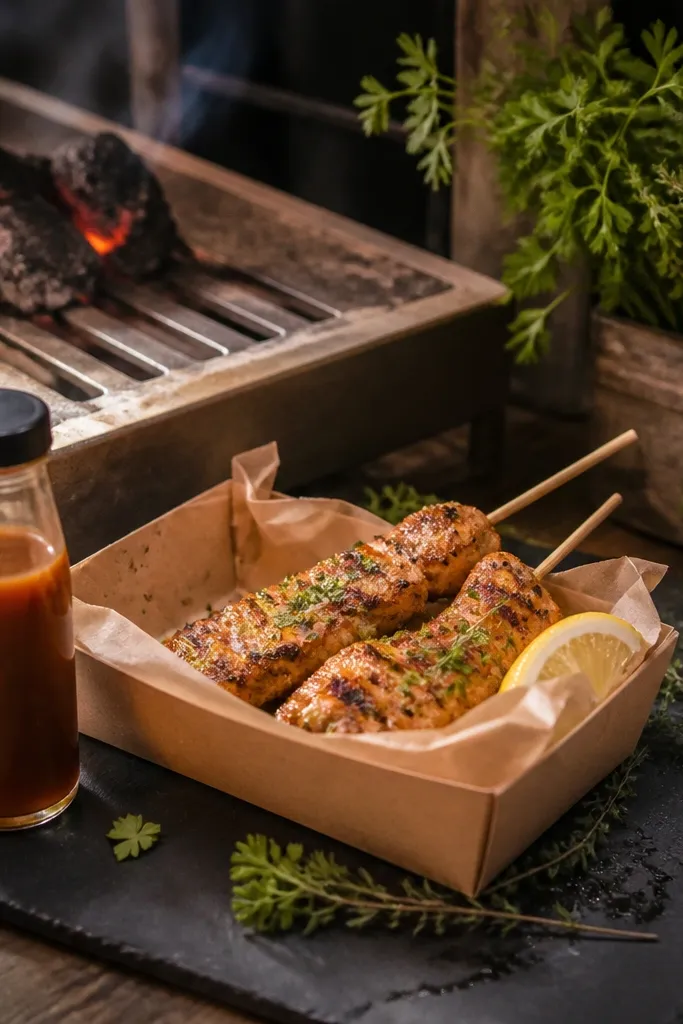
Skewer boxes bring a warm, savory smell into the reception, and the visuals are strong: caramelized edges, herbs, and a sauce bottle that looks great in photos. This gift works best for evening because grilled food looks best when it’s served hot and glossy. Choose two skewer types like chicken with lemon herb and a veggie option like mushroom and zucchini. The box keeps everything contained and makes distribution fast.
Start by choosing skewer counts per guest, usually 2 per person, and confirm the sauce separately so it doesn’t soak. Then coordinate with the venue about where grilling or hot-holding is allowed, and plan delivery timing so skewers arrive close to service. Finally, set up a pickup station with tongs and napkins, plus a printed sign with two flavor names. Budget $12-25 per guest depending on meat and venue rules, and book a catering service 4-6 weeks ahead.
Use a heat-safe box insert so skewers don’t slide and ruin the presentation.
Skip sauces inside the box; serve sauce on the side for clean photos.
14. Custom Photo Menu Cards for Food Stations
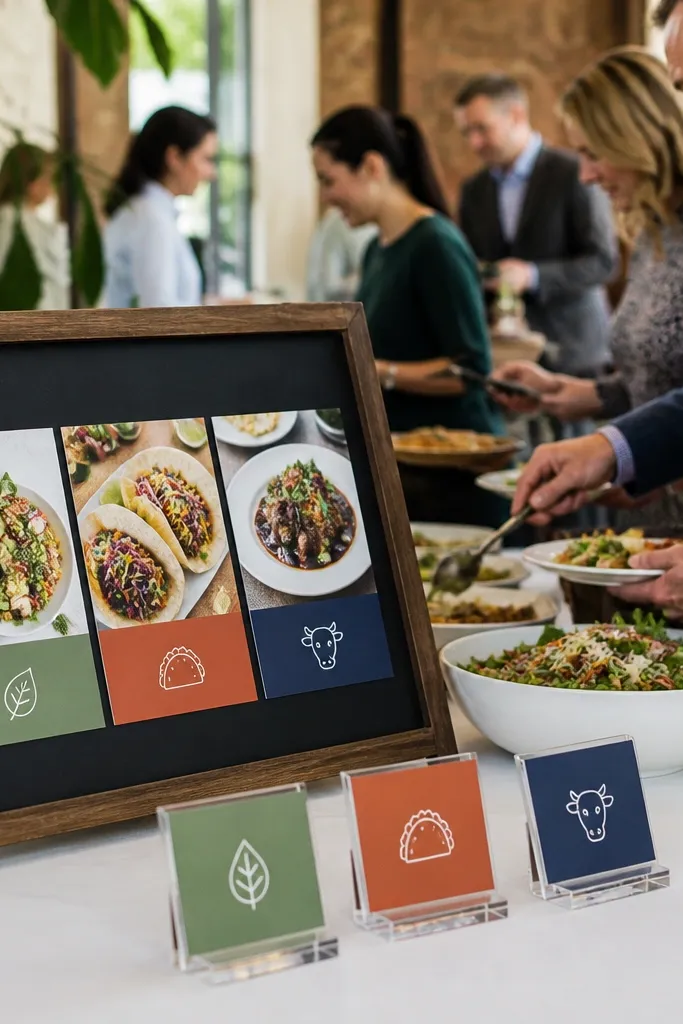
Menu cards are a small gift that changes everything: guests know where to go, what to grab, and how to talk about it. For photos, clean menu cards make the food station look designed instead of chaotic. Use simple icons or color bands for each station so guests can scan quickly. This is especially good for food guide wedding celebration planning because it reduces confusion and keeps the crowd moving.
Quick tipUse one consistent color for headings across every card so the whole venue looks cohesive.
Start by listing each food station and choosing one line description per item, like “Citrus fruitade cups” or “Cheese + jam boards.” Then print menu cards on thick matte paper and add an allergen note for each station in small text. Finally, place one card at the entrance to each station and one at the main buffet table. Costs are often $40-120 depending on print size and quantity, and you should finalize item names 1-2 weeks before.
Skip thisAvoid long paragraphs; guests won’t read them and it looks messy in pictures.
15. Fresh Pasta Salad Cups with Herb Tops
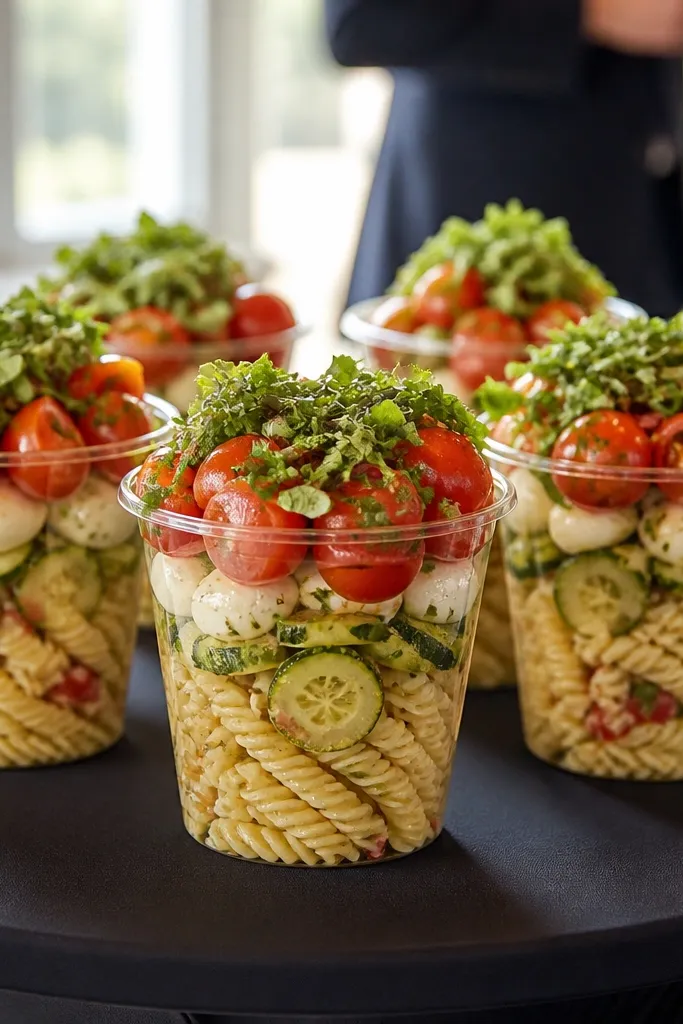
Pasta salad cups are a clever gift when the wedding runs into warm weather or long cocktail hours. They’re filling without feeling heavy, and the clear cups show layers that look great on tables. Add bright cherry tomatoes and chopped herbs so the top looks fresh and photo-ready. This is also a crowd-pleaser for guests who don’t want only sweets or only meat.
Quick tipUse small cups so pasta doesn’t look flat; taller cups read better in photos.
Start by choosing a dressing style that holds — olive oil and lemon, or a light vinaigrette. Then pack cups with a clear layer structure: pasta, veggies, and a final herb sprinkle right before sealing. Finally, place them near the bar or seating area so guests can grab without walking far. Budget $6-14 per cup depending on ingredients, and prep at least a few hours ahead so flavors set, but don’t chill too long if you want the herbs to look lively.
Skip thisAvoid creamy dressings in hot weather — they separate and look dull.
16. Mini Donut Towers for Dessert Tables
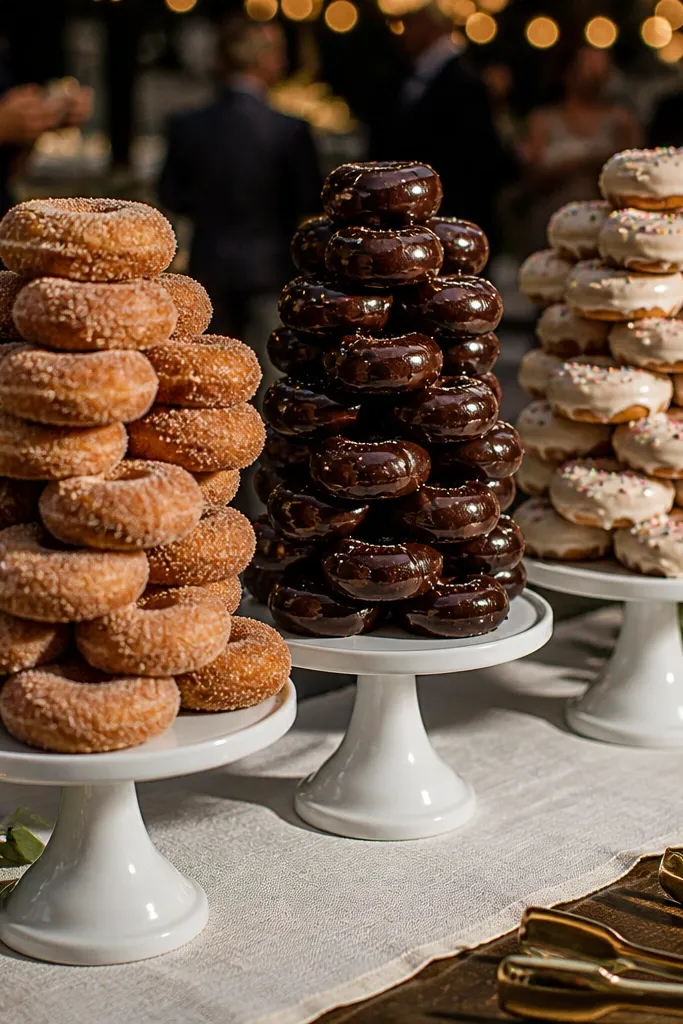
Donut towers look like a celebration even before anyone tastes them. Mini donuts create a speckled texture that photographs well, and multiple glazes let guests find a flavor quickly. Choose three looks: cinnamon sugar, chocolate glaze, and vanilla with sprinkles. This gift also helps the couple avoid the “one big cake photo” pressure because the tower becomes the dessert headline.
Quick tipUse a white or light base tray under the stand to make the glaze colors pop.
Start by selecting a tier stand size that holds 80-120 mini donuts depending on guest count. Then order donuts in mixed glazes and keep them in sealed packaging until the day of setup. Finally, assemble on-site and dust lightly with extra sugar for a fresh look under lights. Budget around $10-22 per guest depending on donut quantity and stand rental, and place orders 2-3 weeks ahead.
Skip thisSkip over-sauced donuts; drips smear tiers and ruin the clean look.
17. Picnic Blanket Candy and Nuts Packs
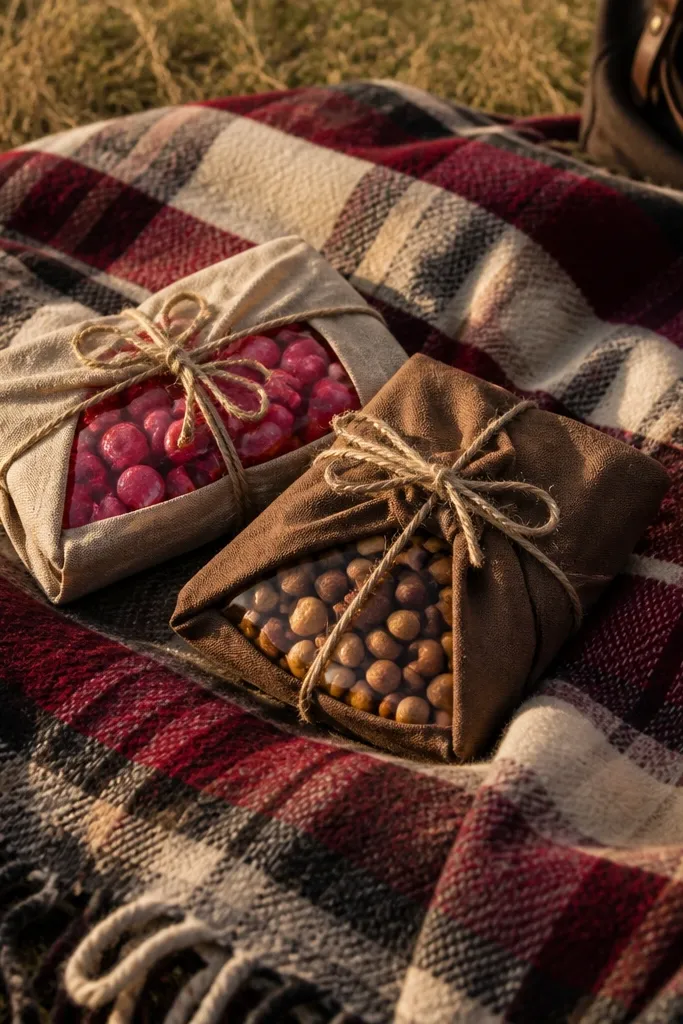
This gift leans into the “aesthetic” side of food guide wedding celebration without feeling gimmicky. Fabric-wrapped packs look like they belong on a blanket picnic, and they photograph well because the texture shows. Include a mix that reads visually: one candy color (like strawberry red) plus roasted nuts for contrast. Add a small fold-out card with a simple pairing suggestion like “sweet with salty” so guests know what they’re grabbing.
Start by choosing fabric wrap colors that match the wedding palette, like cream linen or sage cotton. Then pack a small portion of candy and nuts into an inner pouch so nothing leaks into the fabric. Finally, place the packs at seats or on a welcome table with a clear sign. Budget about $5-12 per pack depending on candy choice, and buy fabric in bulk or use reusable napkins to cut costs.
Pre-tie the fabric with a consistent knot so every pack looks uniform in photos.
Don’t use glossy candy that melts in heat; pick stable hard candies.
18. Grown-Up Nacho Bar in Paper Trays
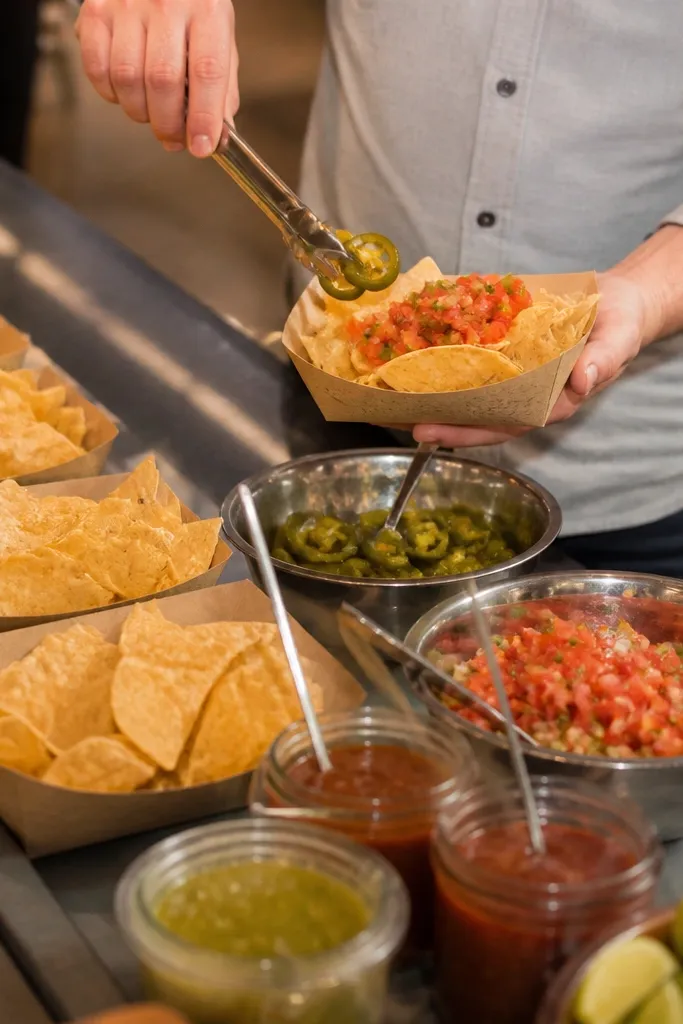
Nachos hit the party sweet spot: salty, shareable, and photogenic when you keep the mess controlled. Paper trays make it easy to distribute and keep the look consistent across the room. Use two toppings that show clearly — jalapeños and pico de gallo — and keep salsa in small side jars so chips stay crisp. This is a great gift for couples who want food that matches the energy of dancing rather than slowing the night down.
Start by building two nacho styles: one classic cheese and one with a spicy topping option. Then set up a topping station where staff can assemble trays fast, with salsa cups on the side. Finally, distribute at set intervals so guests get fresh trays, not lukewarm piles. Budget $10-22 per guest depending on toppings and cheese, and confirm venue rules for any warming equipment at least a month ahead.
Add a squeeze bottle of lime — it makes the station look brighter in photos.
Don’t over-stack toppings; heavy layers make trays slump and look messy.
19. Mini Caprese Salad Cups with Balsamic Swirl
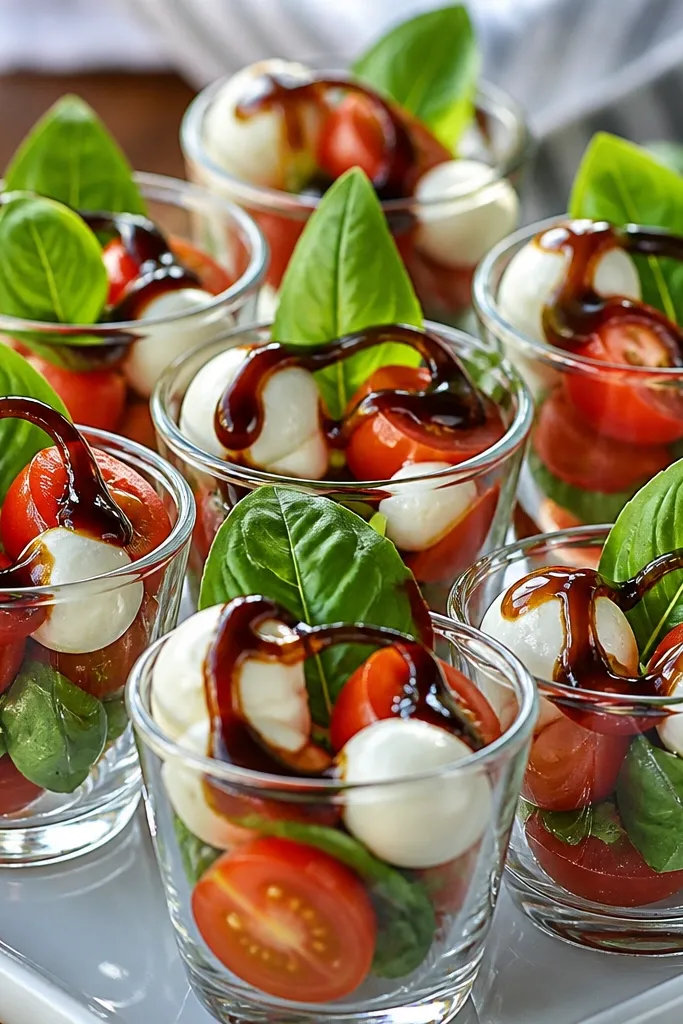
Caprese cups are clean, fresh, and extremely photogenic because the colors stay bright. Cherry tomatoes, white mozzarella pearls, and green basil look good in daylight and under warm reception lighting. Balsamic drizzle adds a dark contrast that makes the cup look finished. This is a strong gift for daytime weddings or spring and summer celebrations because it reads light and thoughtful without feeling like a salad compromise.
Start by choosing portion size for one or two bites per fork, usually 6-8 tomato halves and a handful of mozzarella pearls. Then build cups in layers and add basil right before sealing so it stays vibrant. Finally, set up distribution near the ceremony exit or cocktail area so guests can grab and mingle. Expect $7-14 per cup depending on mozzarella quality, and order ingredients 1-2 days ahead for best freshness.
Use thicker balsamic glaze instead of watery balsamic so the swirl holds its shape.
Avoid thin, runny dressings in clear cups — they pool and blur the layers.
20. Bread Service Rolls with Herb Butter Labels
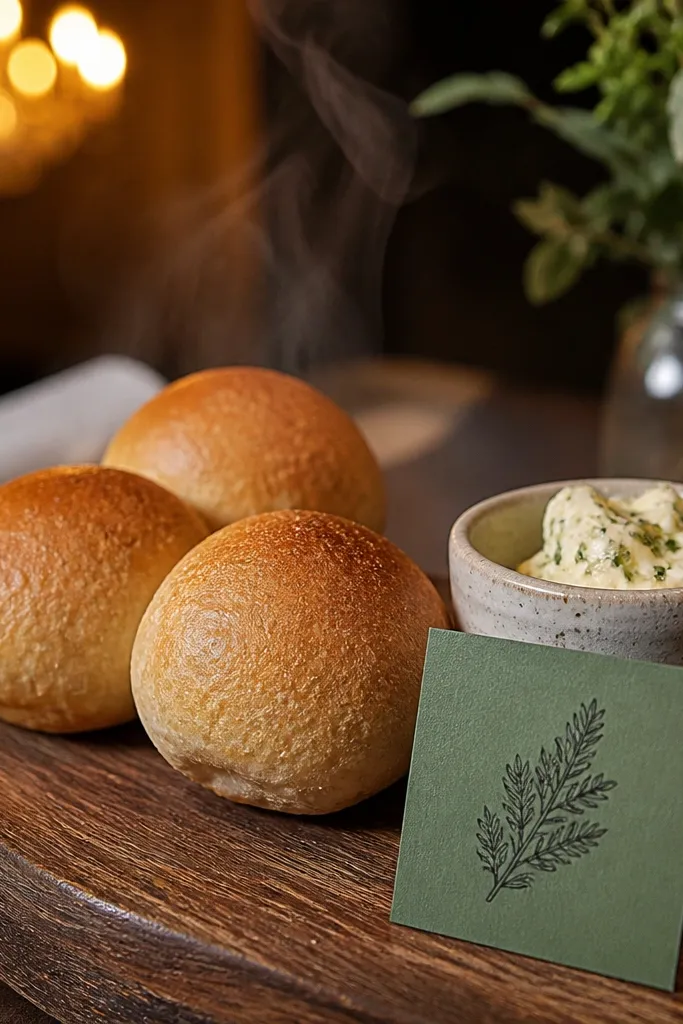
Bread service is the quiet luxury gift because it makes guests feel taken care of before the main meal lands. It looks warm and comforting, and the herb butter cups add a clean, modern touch. Choose mini rolls that hold shape and keep the butter portion consistent so every tray photo looks neat. Labeling the herb butter flavors gives guests a reason to stop and read, which makes the bread table a natural photo spot.
Quick tipWarm the rolls right before service; cold bread looks flat in photos.
Start by ordering mini rolls in bulk and pairing them with two herb butter flavors like garlic-chive and roasted pepper. Then portion butter into small cups with printed labels and keep everything chilled until service. Finally, place the bread table at the entrance to the dining area so it’s visible when guests arrive. Budget around $5-10 per guest depending on bread and butter, and confirm quantities 2-3 weeks ahead.
Skip thisSkip butter without labels — guests will crowd the table and the shot looks chaotic.
21. Sangria Bottle Labels for the Bar
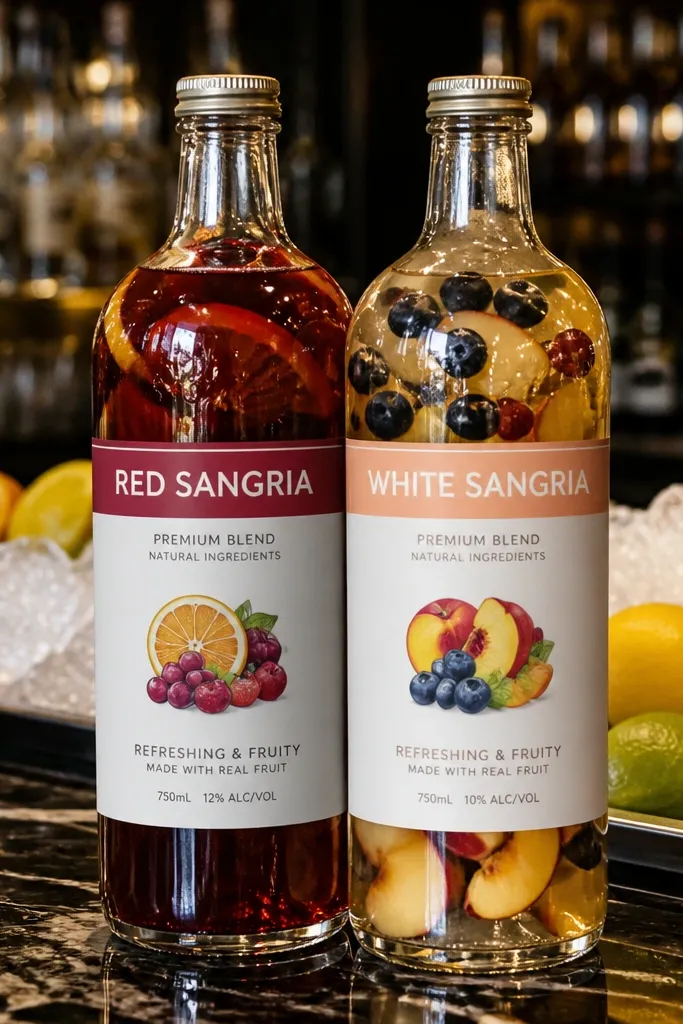
If the couple wants the bar to look designed, label it. Sangria bottle labels are a gift that makes the drink station look intentional and helps guests choose fast. Use two sangria colors for photo impact: red with citrus slices and a white version with berries or peach. The labels also reduce the “what is this” confusion, which keeps the line moving during peak bar times.
Quick tipKeep citrus slices visible in the bottle — it gives the label a backdrop in photos.
Start by choosing two sangria recipes and ordering bottles or pitchers in the right size for the venue. Then print labels with large drink names and a short ingredient note so guests can pick quickly. Finally, attach labels and place bottles on a bar cart or table with matching glassware. Costs are usually $25-70 for label printing, and you should finalize the drink names at least 1-2 weeks before the wedding.
Skip thisAvoid tiny labels; they’re unreadable from across the room and look sloppy.
22. Vegetarian Main Bento Boxes
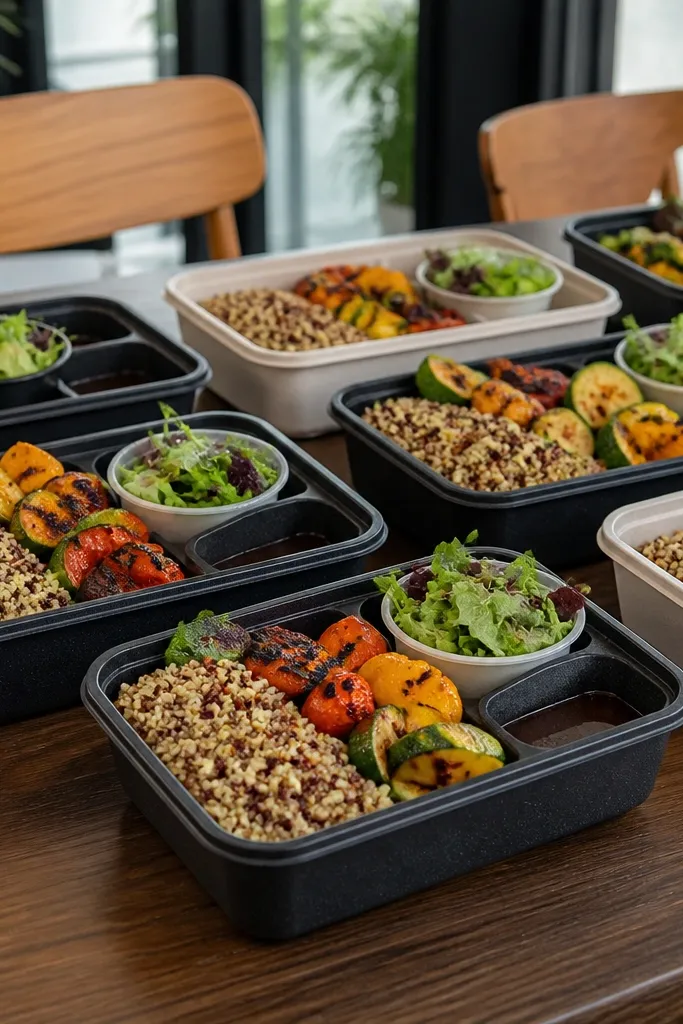
Bento boxes are a photogenic way to handle dietary needs without making anyone feel singled out. This gift works best when the couple already plans vegetarian and the wedding has assigned seating. The boxes look clean and styled, especially when you keep portions balanced: a grain base, a roasted vegetable component, and a sauce drizzle. Guests love the sense of “special meal,” and the couple gets a tidy, organized look at the table.
Start by selecting a vegetarian main that holds its shape, like roasted cauliflower steak with chimichurri or a stuffed pepper with a stable sauce. Then pack in lidded bento boxes with a small garnish card that tells guests how to finish it, like “add lemon on top.” Finally, deliver boxes to the table right before the main course so food looks fresh. Budget $12-25 per vegetarian box depending on ingredients and packaging, and coordinate with the caterer at least 3-4 weeks ahead.
Choose sauces that stay glossy when warmed; dull sauces make photos look flat.
Avoid watery sides that leak into the box seams.
23. Mini Wine and Olive Pairing Cards
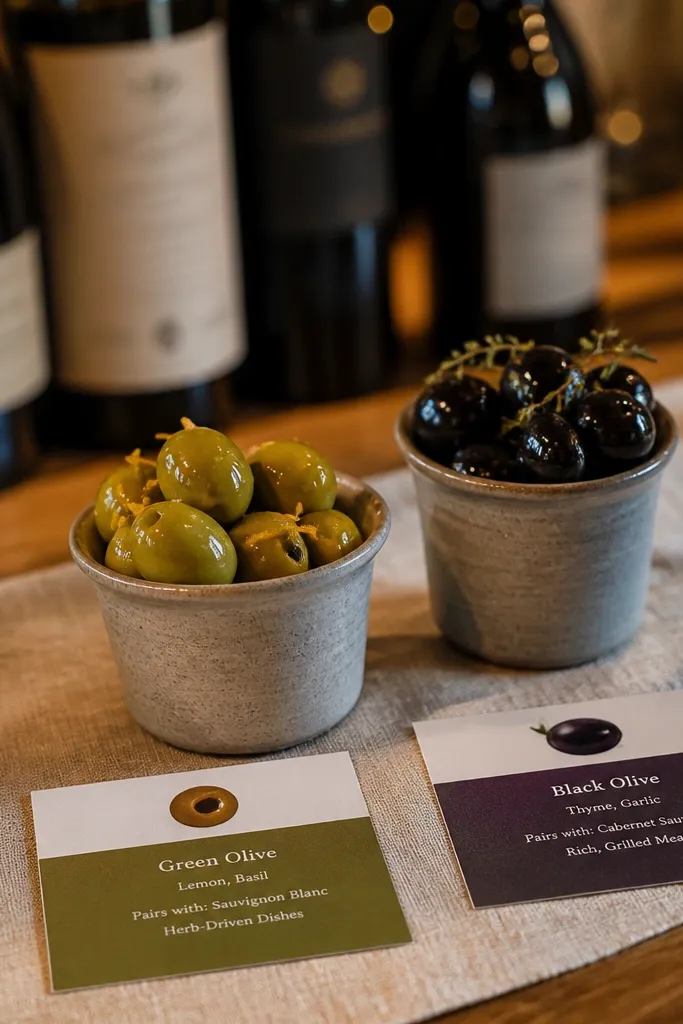
This is the gift that makes a bar moment feel like a curated experience. Mini olive cups look elegant, and pairing cards give guests a reason to taste with intention. If the couple has an adults-only or upscale vibe, this fits perfectly. Pick olives with different colors and textures — green olives with citrus zest and black olives with herbs — so the spread looks varied in photos.
Quick tipUse small clear cups so guests can see the olive color — it reads better on camera.
Start by selecting a pairing format: either small olive cups for guests or a mini tasting board at the bar. Then print pairing cards with one line about the flavor match, plus allergen notes. Finally, place the olive cups near the wine glasses so the pairing is visible during the first bar rush. Costs are usually $6-15 per guest depending on olive selection, and you should order olives 1-2 weeks ahead for freshness.
Skip thisSkip overly salty olives; they make wine taste dull and guests stop ordering.
24. Coffee Cart with Flavor Syrup Barrels
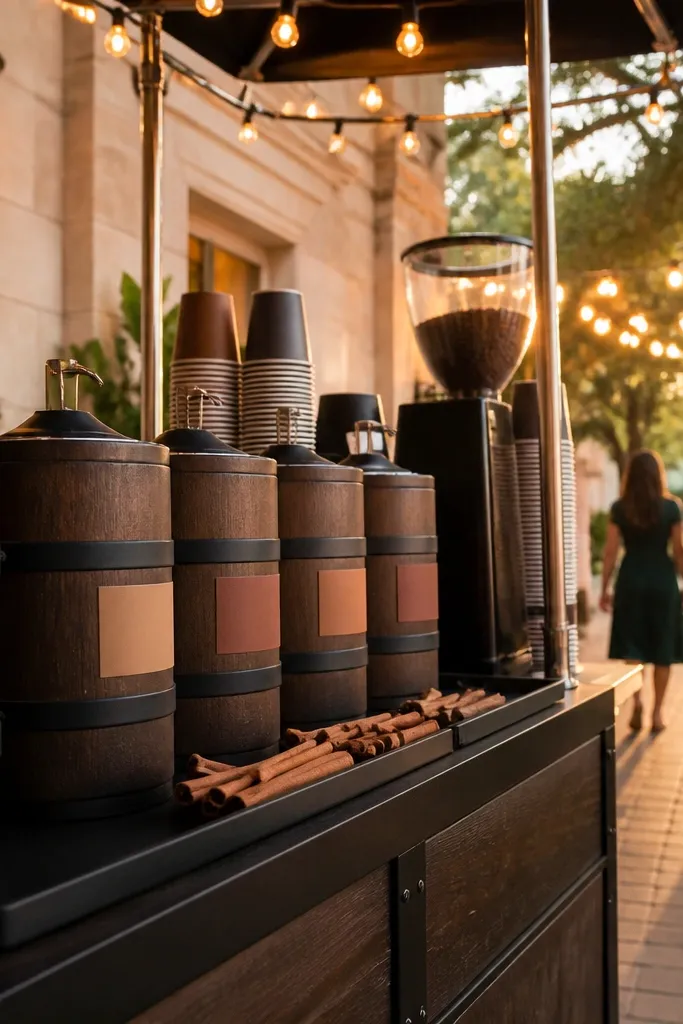
A coffee cart is a late-day reset that looks premium and keeps guests comfortable. Flavor syrup barrels with squeeze bottles are very photogenic because the labels and colors line up neatly, and cinnamon sticks add a warm visual texture. This gift works especially well for fall and winter weddings or when the ceremony runs early. It also gives the couple a “final moment” station that feels thoughtful instead of last-minute.
Quick tipKeep an oat-milk option on the cart and label it clearly; it prevents awkward questions.
Start by choosing two syrup flavors that photograph well: vanilla bean and caramel or hazelnut. Then set up the coffee cart with small cups, stir sticks, and a topping bar like whipped cream or cinnamon dust. Finally, time the cart for after dinner or during the transition to dancing so guests feel the payoff. Budget around $7-18 per guest depending on service style, and book the cart or vendor 4-6 weeks ahead.
Skip thisAvoid a cart that runs out of cups; it ruins the look and the flow.
25. Cozy Macaron Welcome Boxes with Matcha Latte Sachets
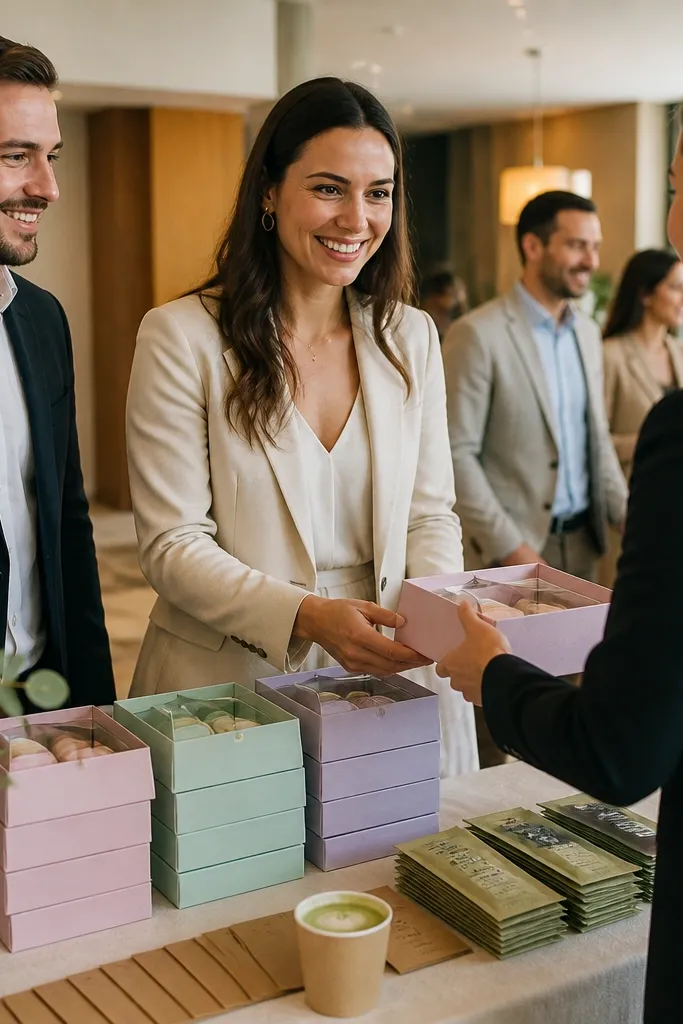
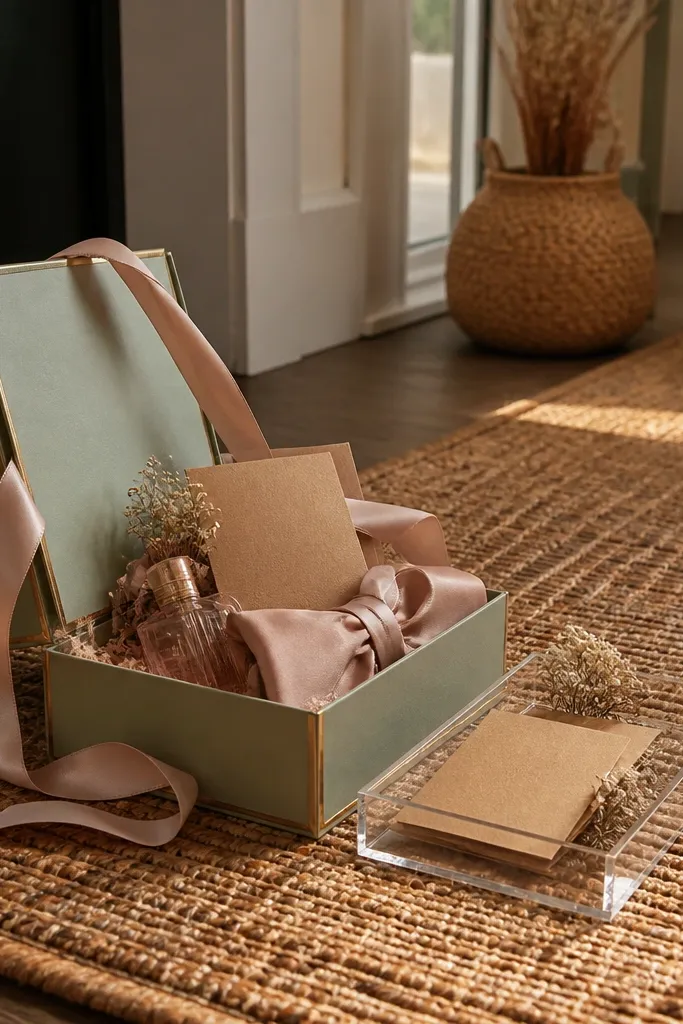
This gift feels extra special because it lands right at arrival, not at the end of the night. You’re giving something photogenic and bite-sized, plus a warm drink add-on that makes people slow down and actually enjoy the moment. The look is clean and soft — pastel macarons in a matte gift sleeve with a small kraft card and a ribbon loop. It suits couples who want a welcome treat for guests, or a simple “we thought of you” moment for destination weddings. It works best in spring and fall when people are craving something sweet and comforting, and it also photographs beautifully in indoor venues with soft lighting.
Step 1 — Put together a welcome box that has 8-12 macarons in a clear-lid sleeve (so the colors show) and include 2 matcha latte sachets per box. Pair flavors that photograph well together: pistachio, raspberry, vanilla bean, and salted caramel; keep fillings consistent so the box feels intentional. Step 2 — Order macarons from a bakery that offers same-week pickup and ask for a mix box with a sealed cold-pack option. Step 3 — Plan delivery timing: place them 1-2 days before the wedding so they stay fresh, then store boxes in a cool room away from direct sun until distribution. Expect to spend about $18-$30 per box depending on macaron count and packaging, and plan 10-15 minutes to hand them out at check-in or the guest welcome table.
If you’re distributing these at a hotel, ask the front desk where they’ll accept deliveries and keep a printed delivery receipt so you don’t lose the boxes on arrival day.
Don’t pick macarons with fragile decorations (edible glitter, tall sugar pieces) if you’re traveling — they look great until they get smudged in transit.