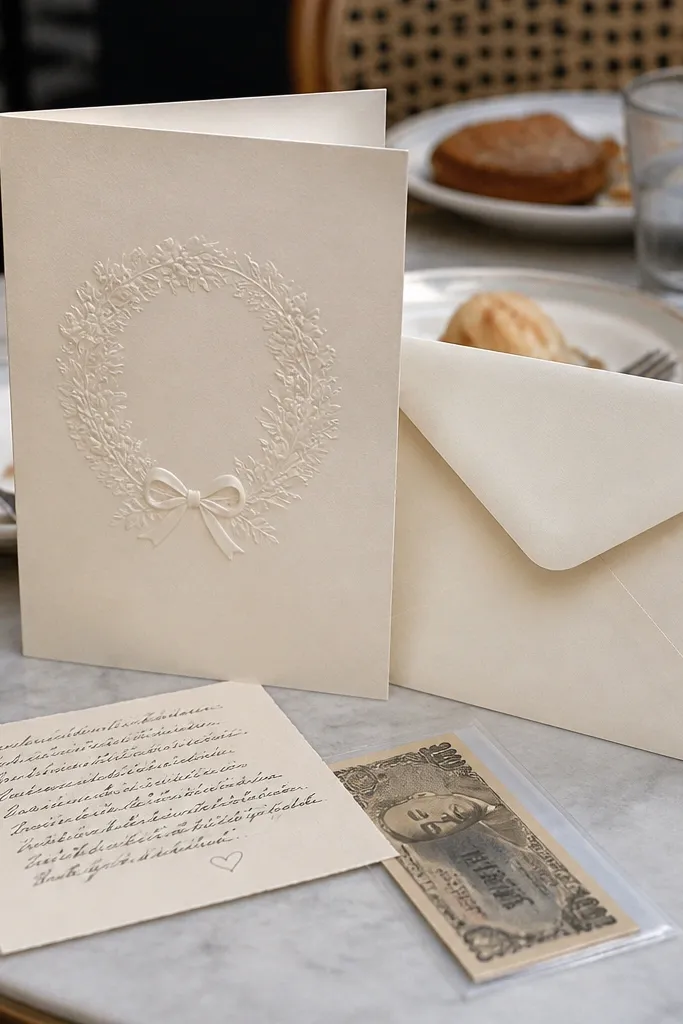
1. Kraft Paper Money Bouquet in a Clear Cellophane Sleeve
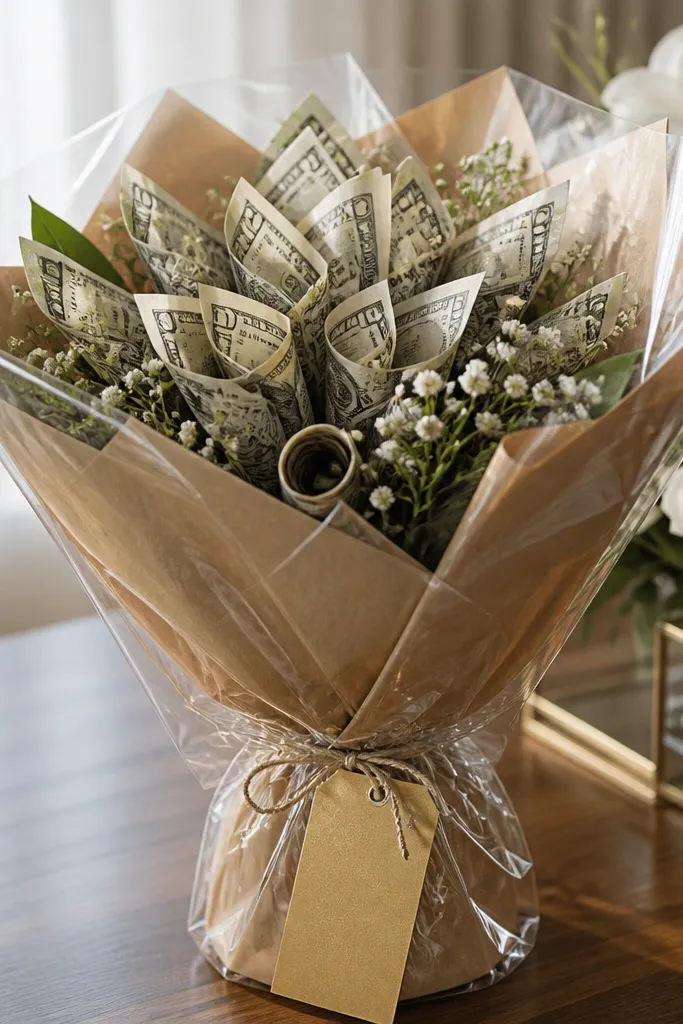
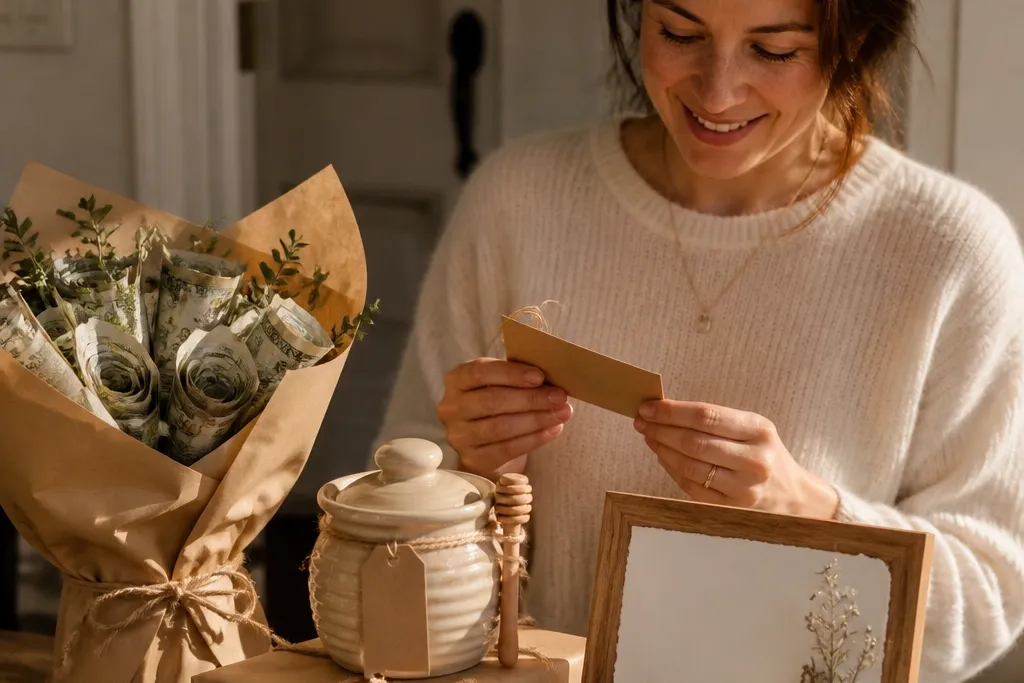
Start by cutting 6-8 small kraft paper squares for the “petals” and folding each bill into a crisp rectangle. Then tape the bill petals around a thin wooden skewer or a florist-style pick, alternating directions so it looks full. Finally, slide the bouquet into a clear cellophane sleeve, tie a ribbon around the top, and attach a tag written in black ink. Keep the ribbon color to one shade so it looks cohesive in photos.
This is the cleanest way to make cash look like a keepsake. Fold bills into simple petal shapes and stack them so the bouquet has layers you can see from the front. The kraft paper gives warmth and texture, while a clear sleeve protects the folds and makes it photo-friendly on a table. Add a small paper tag that says exactly what the money is for, like “Dinner on us” or “Your next weekend away.” It works best for couples who like cozy styling and for guests who want one gift that looks intentional even from a distance.
Skip thisDon’t overstuff the bouquet with too many bills; it turns into a thick bundle that looks messy.
Quick tipUse black or deep brown ink on the tag — it reads sharp in daylight photos and printer ink won’t smear on kraft.
2. Ceramic Honey Jar with a Cash Stack Label
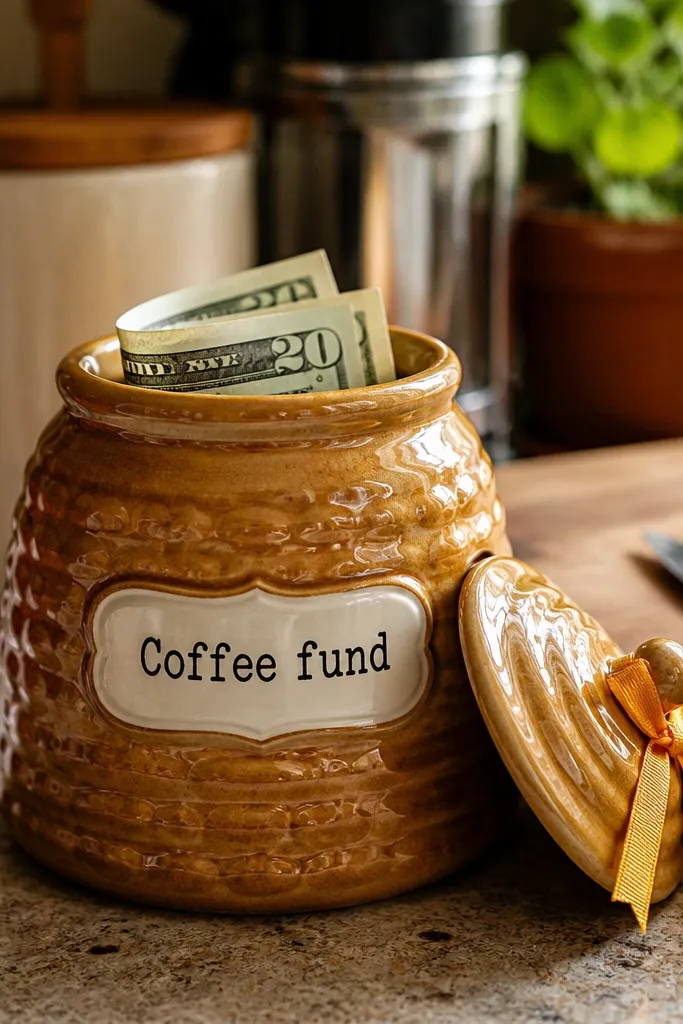
A honey jar looks sweet, warm, and homey, so cash feels like something they’re actually receiving for their kitchen. The jar shape makes the bills easy to arrange — you can stack them vertically and keep the top visible. Tie a mini ribbon around the lid and print a label that tells them what the money becomes: “Coffee money for mornings” or “Pantry upgrade fund.” This gift suits couples who host, cook, or want a cozy home vibe. It also photographs well because the label and jar create a clean focal point.
Start by buying a small ceramic jar with a lid and cleaning it with dish soap so glue and labels stick. Then fold bills into thirds and stand them upright inside so the top edge shows above the bottom layer. Finally, attach a label to the front and tie a ribbon around the lid; one color of ribbon is enough. If the lid doesn’t have a lip, use a thin strip of kraft paper under the ribbon so it stays centered.
Print the label on matte sticker paper so it won’t glare under indoor lighting.
Avoid glossy labels; they reflect light and hide the text in most wedding photo lighting.
3. Mini Travel-Snack Board with Cash Wrapped Like a "Ticket"
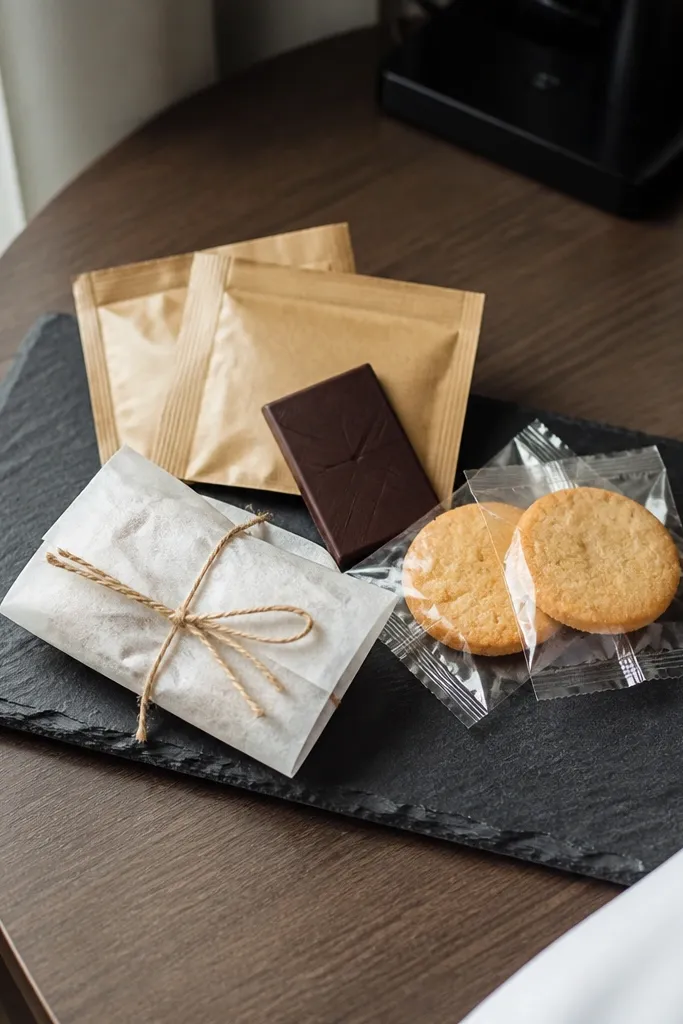
Start with a small board and pick snacks that don’t leak or melt during transport. Then wrap the cash in wax paper, fold it into a ticket shape, and tie with twine. Finally, arrange snacks in a triangle and place the cash ticket in the open space so it’s visible in photos. Keep the snack colors to two or three tones so the board doesn’t look crowded.
If they’re honeymooning or just planning trips, this looks like a thoughtful welcome kit instead of a cash handout. Use a small wooden board (or even a thick slate) and add 2-4 travel snacks: tea sachets, mini chocolate, or a couple of cookies. Wrap the cash in wax paper like a ticket, then tie it with twine and tuck it onto the board. The result is photogenic because the board has natural texture and the snacks add color blocks. It fits couples who like practical gifts and guests who want a “cute but usable” presentation.
Skip thisDon’t use messy snacks like jam packets; they smear and ruin the board’s clean look.
Quick tipAdd one small sprig of dried rosemary or a single cinnamon stick for scent and a polished look.
4. Tall Glass Candle Jar with Money Hidden Under a Layer of Wax-Color Paper
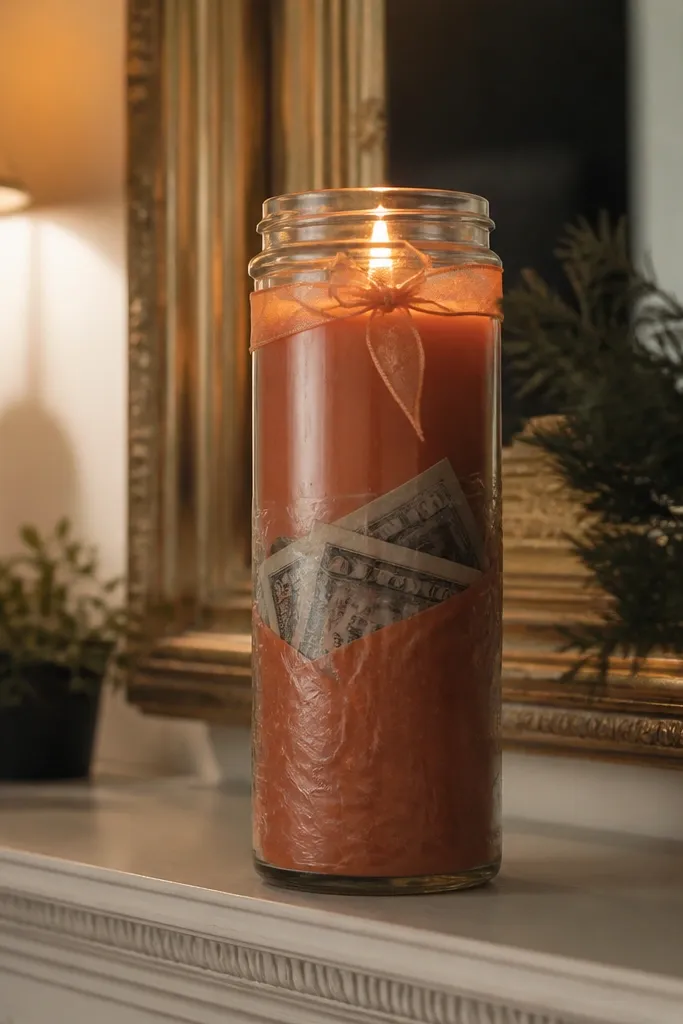
Start with a tall jar candle or a clean glass jar you can fill safely. Then cut a sheet of tissue or craft paper and place it at the bottom like a “false base,” followed by folded cash. Finally, close the lid or cover the top with another neat tissue layer and secure with ribbon. Choose one color palette and don’t mix metallics and bright colors.
This one looks like a high-end home gift because the jar is already the star. Add a layer of tissue paper in a warm tone (cream, sand, or terracotta) under the cash so the money looks intentionally placed. If the couple keeps candles, it feels like a real purchase they’d make themselves. It also works for groomsmen gifts because it looks uniform and stylish. The money stays secure, and the jar makes it easy to photograph from multiple angles.
Skip thisAvoid thin paper that crinkles loudly in the photo — it looks wrinkled and cheap.
Quick tipUse thick tissue paper so it holds shape and doesn’t collapse onto the bills.
5. Boarding Pass Envelope with Cash and a Date Night Voucher Card
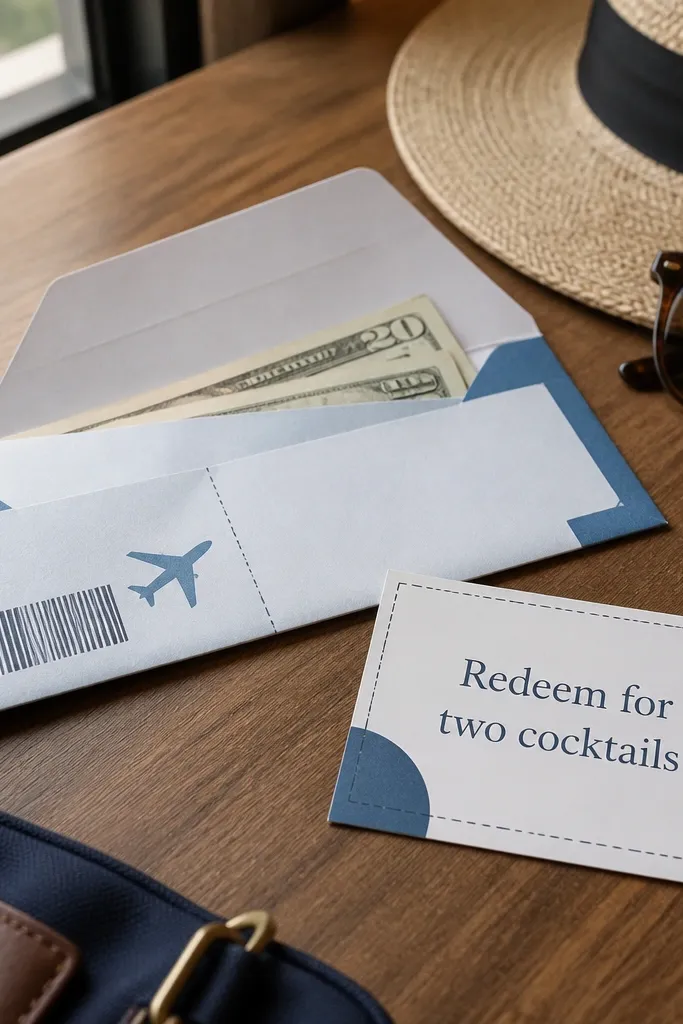
Start by making or buying boarding pass-style envelopes in muted colors like navy, gray, and cream. Then fold bills and insert them flat so the envelope stays smooth. Finally, add a voucher card with a simple redemption line and tape it to the inside so it’s visible when they open it. Use a black pen for the text — it prints crisp against light paper.
This gift turns cash into a “plan.” The boarding pass look feels travel-forward, even if they’re not going anywhere soon, because it suggests an experience. Put the cash inside a paper envelope printed or cut to match boarding pass colors and add one small voucher card: “Redeem for two cocktails” or “Movie + dessert night.” The envelope design gives you a clear front-facing photo area, so the gift reads instantly. It works for couples who love date nights or couples who already have honeymoon plans.
Skip thisDon’t use bright neon envelopes; they look like novelty party favors, not wedding gifts.
Quick tipAdd a small “gate” number and “seat” line on the voucher — it looks playful and keeps the design cohesive.
6. Linen Drawstring Pouch with a Cash Origami Corner Fold
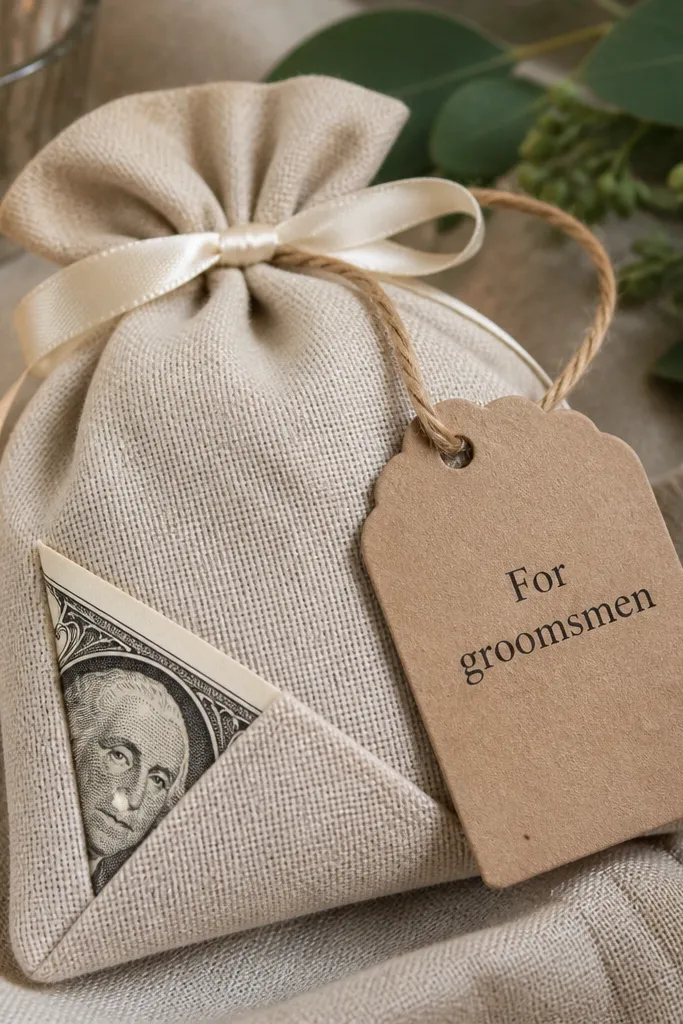
Start by choosing a natural linen pouch in cream, oatmeal, or sand and test the drawstring pull so it doesn’t twist. Then fold bills into a slim rectangle and finish with one neat corner fold so it looks intentional at the opening. Finally, insert a tag inside the pouch and tie the ribbon around the drawstring knot. Make sure the opening is facing forward so the visible corner fold shows in photos.
A linen pouch looks premium for under $10 when you buy the right size. The trick is making the cash visible in a clean way: fold bills with a corner fold so one edge sticks out like a design detail. Tie it closed with a thin ribbon and attach a small tag with a specific purpose. This works especially well for groomsmen because pouches look consistent and you can match them across gifts. It’s also a great choice for couples who like minimal, modern home styling.
Skip thisAvoid satin pouches; they shine under flash and hide the tag text.
Quick tipUse a small wax seal sticker on the tag for instant “designed” energy without spending more.
7. Framed "Spend This on Us" Note with a Cash Strip Inside
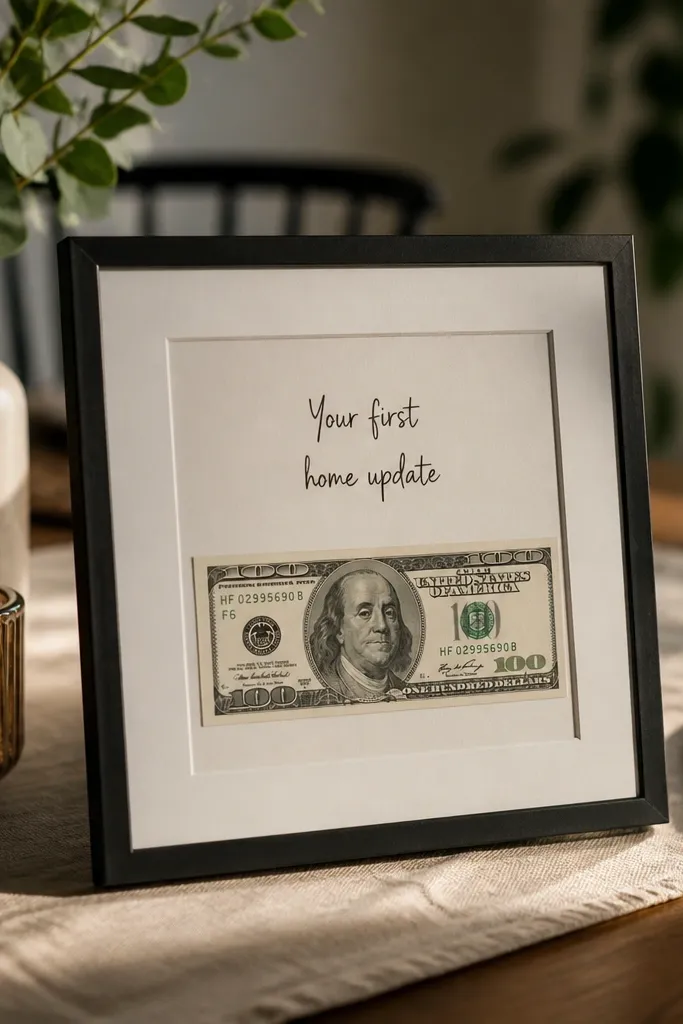
Start with a small tabletop frame or a 5x7 frame and choose a neutral background mat. Then print or handwrite a clean note and place it so it sits centered. Finally, insert a folded cash strip behind the note using a clear sleeve so the cash doesn’t slide. Use one ink color and one font style so the front looks designed.
This is the type of money gift people actually hang. Put a small frame on the table, add a handwritten print mat style note, and tuck a cash strip behind a protective insert so it stays flat. The frame turns cash into art, not packaging. Keep the message short and specific: “Your first home update” or “Kitchen gadgets fund.” It’s ideal for couples who like wall decor and for any wedding where you want a gift that doesn’t look like a typical envelope. The photo looks intentional because the frame is a strong shape.
Skip thisDon’t use cheap clip frames that look flimsy; the frame quality is what makes the money gift feel elegant.
Quick tipChoose a frame with a glass front — the glare is predictable and you can angle it away from overhead lights.
8. Recipe Card Stack in a Mini Cookbook Wrapper
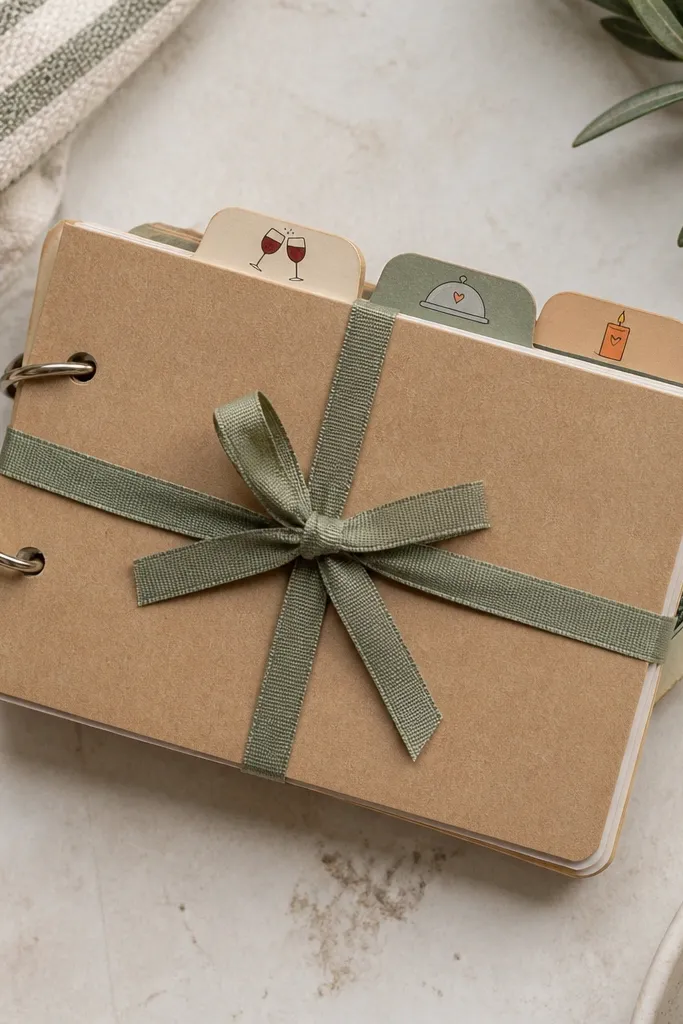
Start by creating recipe cards on thick paper and write short instructions plus a “redeem money for ingredients” note. Then fold bills and slide them into a pocket sleeve at the back of the stack. Finally, wrap the stack in kraft paper and tie ribbon around the middle with a neat bow. Add one small sticker label like “Dinner plans” so it reads clearly in photos.
This works because it turns money into a home-use promise. Make a small stack of recipe cards with 6-8 “date-night” or “weeknight dinner” ideas, then tuck cash into the back of the stack. Wrap it with kraft paper and a ribbon that matches the wedding palette. The gift photographs like a thoughtful planner, not a cash envelope. It suits couples who cook together or who want a system for dinners without spending extra time planning.
Skip thisAvoid loose leaf recipe cards; they look messy and the cash can slip out.
Quick tipUse thick index cards so the stack looks substantial and doesn’t bend in transport.
9. Gold Foil Ticket Strip with Cash and a Small Photo Booth Strip
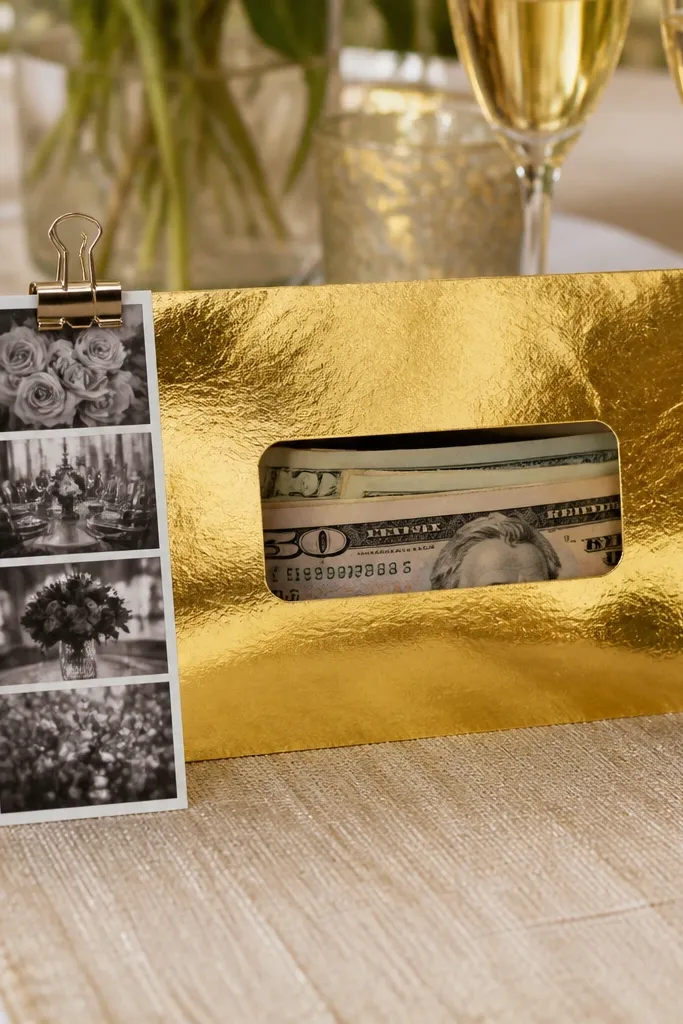
Start by buying or making ticket-style sleeves in gold foil or metallic-look paper. Then fold bills flat and insert them so they don’t wrinkle the sleeve. Finally, attach a small photo strip with double-sided tape and write the message directly on the ticket back. Keep the note short — long handwriting crowds the photo.
This is for couples who like playful, party energy but still want a clean aesthetic. The gold foil ticket look gives you that “event” vibe, and the photo strip adds personality. Put the cash inside the ticket sleeve, then attach a short note on the back of the photo strip: “Use this on your next celebration.” It’s photogenic because the gold catches light and the photo strip gives a focal point beyond the bills. Works best for modern weddings with black, cream, and gold color themes.
Skip thisDon’t pair gold foil with bright neon markers; the handwriting will look messy in photos.
Quick tipAngle the gold sleeve slightly when photographing; straight-on flash makes foil look blown out.
10. Mini Terracotta Planter with Cash Seed-Packet Labels
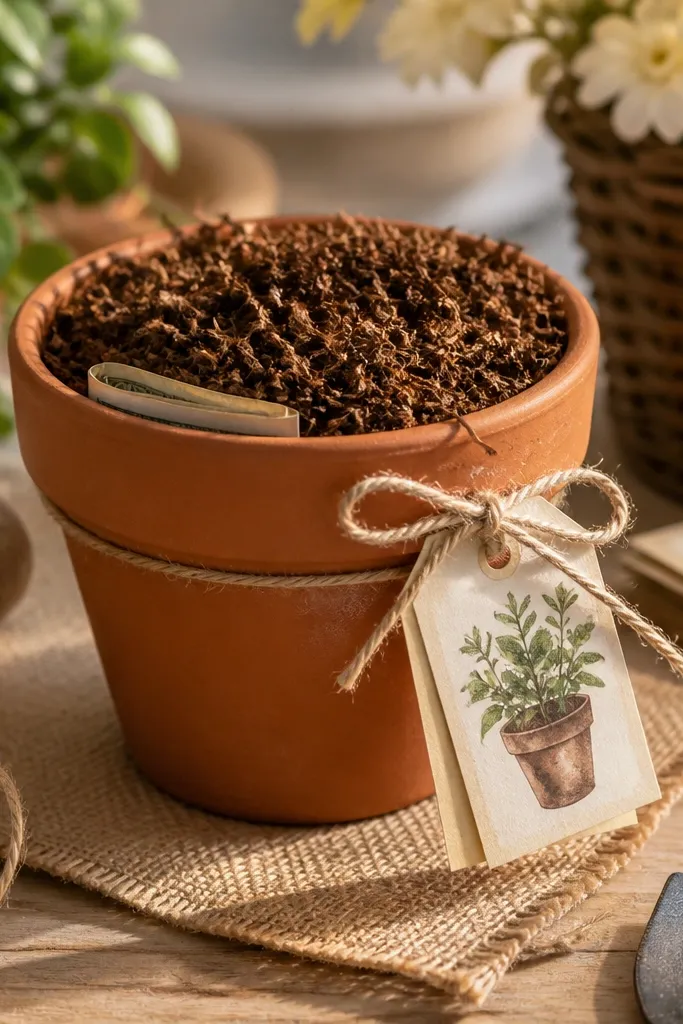
Start with a small terracotta pot and line the bottom with shredded paper or decorative moss so cash doesn’t slide. Then fold bills and place them under a top layer of faux soil so only the label tops peek out. Finally, attach seed-packet labels to small sticks and insert them into the pot for height. Keep labels consistent in font and color so the planter looks designed.
A tiny planter makes money feel like growth, and it looks adorable on a gift table. Use a small terracotta pot and add a layer of decorative soil or shredded paper so the cash can sit under the top layer. Create seed-packet labels that tell them what to do with the money: “Plant fund” or “Garden dinner.” The visual is strong because terracotta is warm and earthy, and the labels look like real stationery. Great for couples who love gardening, plants, or just a cozy home aesthetic.
Skip thisAvoid real soil if the cash can get damp; stick to decorative filler and sealed cash.
Quick tipUse faux soil that holds shape; loose soil collapses and makes the gift look sloppy.
11. Wine Bottle Sleeve with a Cash "Message in a Bottle" Window
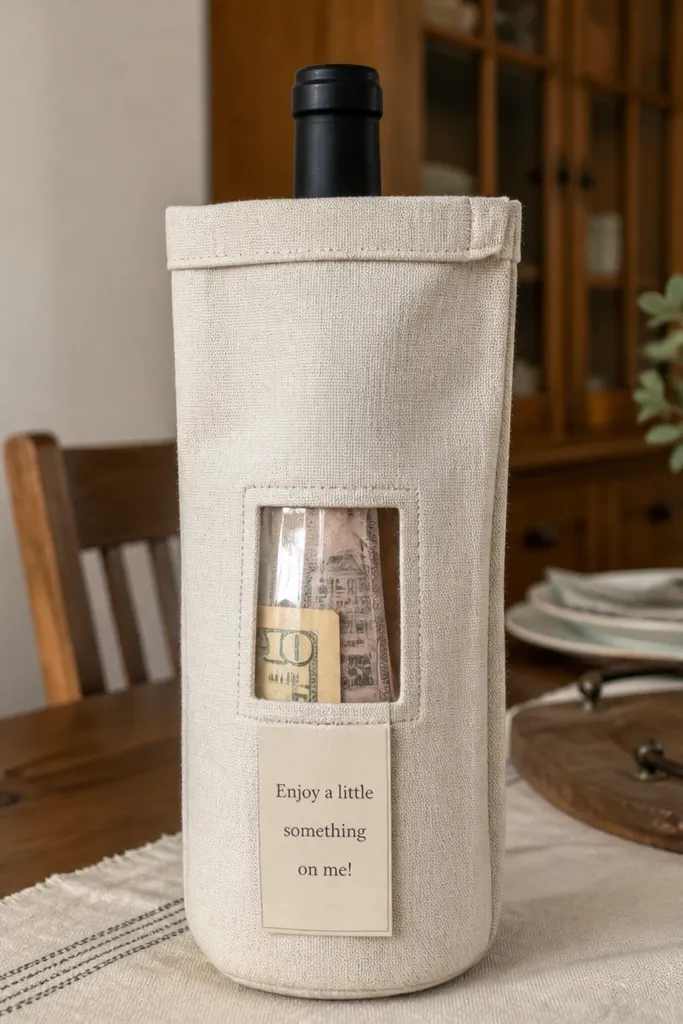
Start by choosing a bottle sleeve fabric and wrapping it tightly so there are no wrinkles. Then cut a small clear pocket or use a clear sleeve panel on the front where the cash note will slide in. Finally, fold bills into a neat rectangle and insert them into the window, then add a ribbon tie at the top. Keep the bottle label area covered so the front looks uniform.
This is for couples who drink wine or who like the idea of a bottle gift. Wrap a bottle in a fabric sleeve in cream, black, or deep olive, then create a small clear window on the front where a folded cash note sits behind. Add a short message card like “For your next toast” so it reads as a gift, not random cash. The fabric sleeve makes the bottle look expensive, and the window keeps the money visible for photos. It’s also easy to personalize without adding bulk.
Skip thisDon’t leave the bottle label exposed; it makes the gift look like a store purchase with a random insert.
Quick tipUse a matte ribbon; shiny ribbon reflects overhead lights and washes out the window.
12. Wooden Photo Peg Tray with Cash Clips and Mini Polaroids
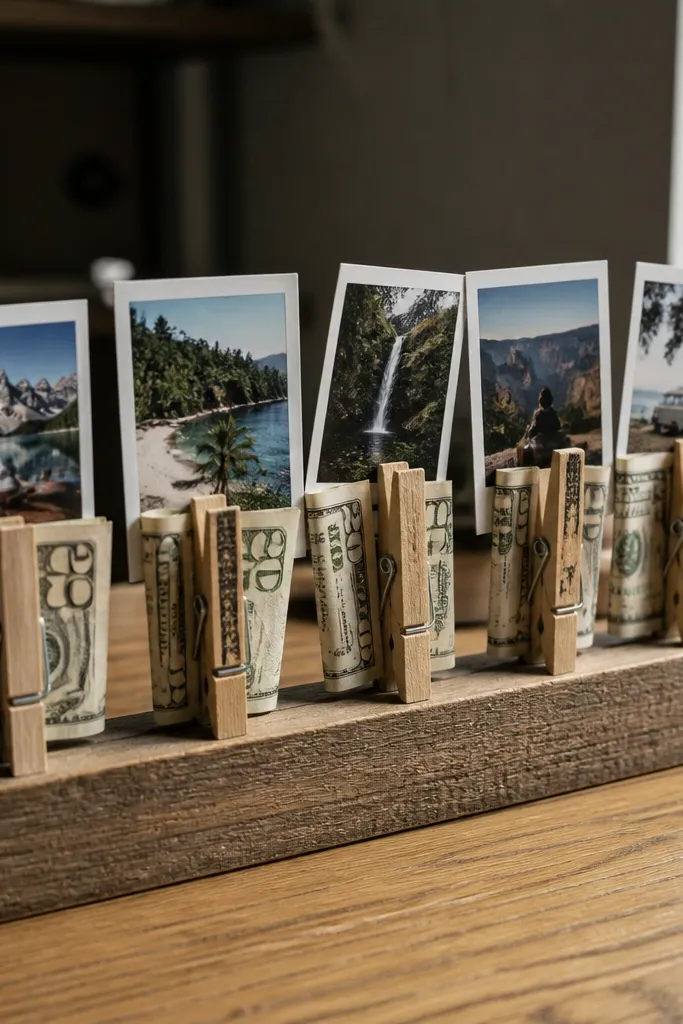
Start with a small wooden tray and attach 3-6 clothespins across the top edge. Then fold bills into slim rectangles and clip them on so the tops are visible. Finally, place mini photo cards in the back and write one short line on each card. Use matching paper stock so the photos and money look like one set.
A peg tray turns money into a mini display. Clip folded bills onto clothespins across a small wood tray and add 3-4 mini photo cards or printed snapshots behind them. It looks like a desk accessory, not a one-time envelope. This gift is especially good for couples who like sentimental decor and for weddings where you want a modern, clean look. The photos give it personality and keep the gift from feeling purely financial.
Skip thisAvoid too many different paper colors; the display gets visually noisy fast.
Quick tipChoose photos with neutral backgrounds so the tray looks cohesive in daylight.
13. Clear Acrylic Makeup-Style Organizer Filled with Cash and Tea Packets
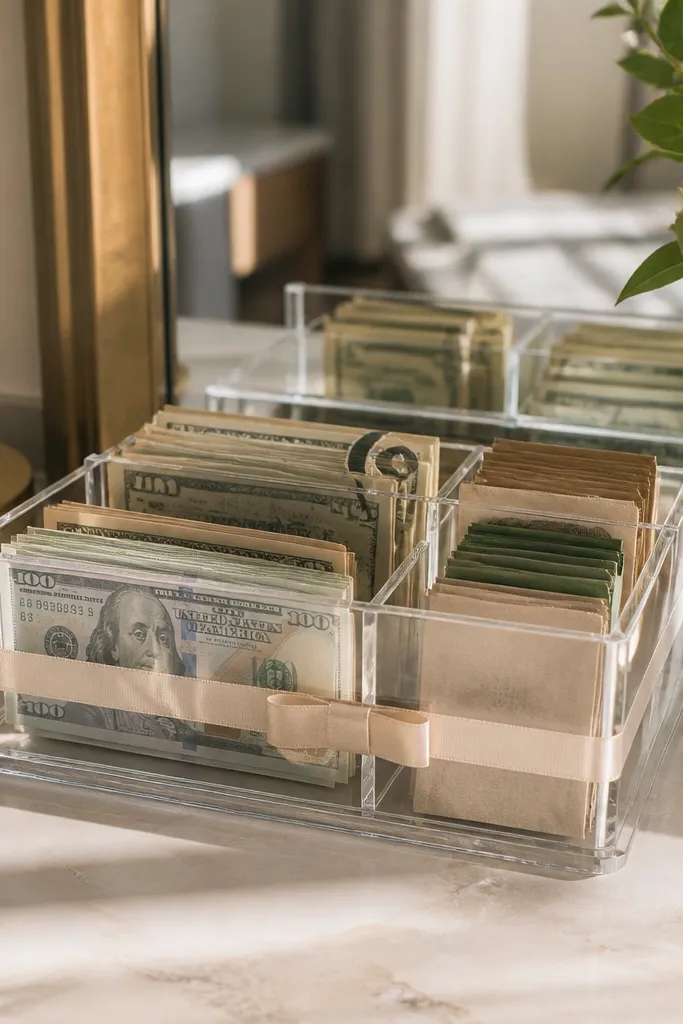
Start by buying a small clear acrylic organizer with removable compartments. Then fold bills and place them into different slots so you get height and spacing instead of one thick pile. Finally, add tea packets in one section and tie a ribbon label onto the front using double-sided tape. Keep the label text short and centered for readability.
Clear organizers are clean, modern, and very photogenic. Fill compartments with folded cash stacks and add a small set of tea packets or mini snacks so the organizer looks full. The money stays visible through the acrylic, so it doesn’t hide behind packaging. Put a ribbon label on the front that says what it’s for, like “Honeymoon tea stops” or “Morning coffee fund.” This works best for couples who love modern decor and for guests who want a gift that looks polished on arrival.
Skip thisAvoid mixing too many items; one extra category looks cluttered through clear plastic.
Quick tipWipe the acrylic with a microfiber cloth right before photos; fingerprints ruin the look.
14. Pastel Ombre Tissue Wrap with a Cash Cylinder Center
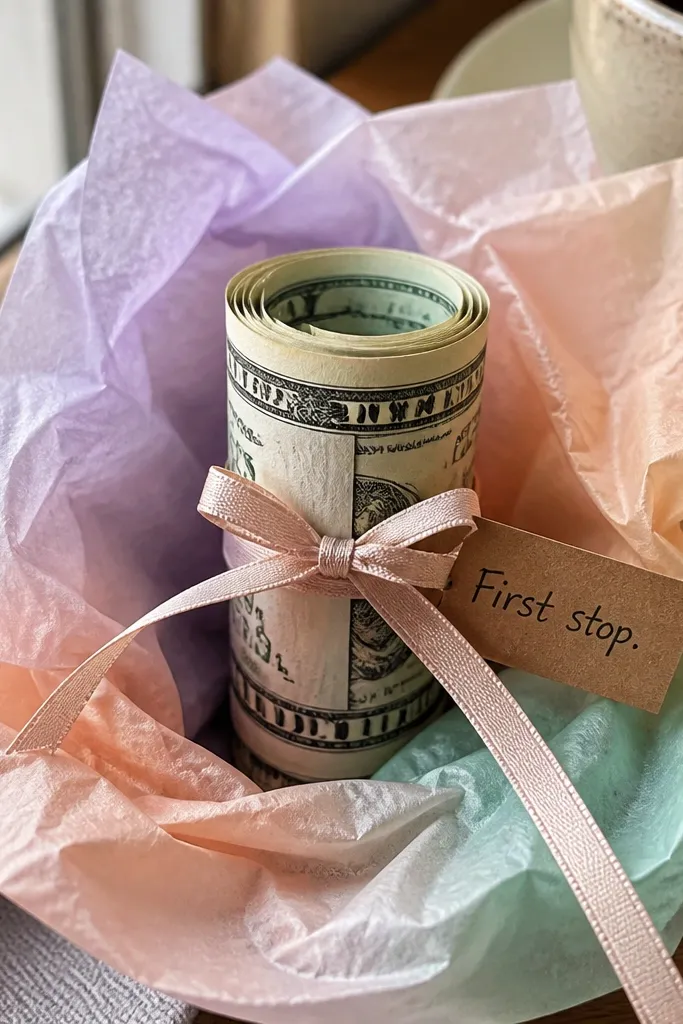
This is an aesthetic trick: wrap the money as if it’s a centerpiece, then reveal it neatly. Roll bills into a cylinder, tie with a thin ribbon, and place it in the center of an ombre tissue wrap in three shades. The outer tissue gives color and movement, while the ribbon keeps the cylinder aligned. Add a tag that says “Date night money” or “Upgrade fund.” It’s a great choice when you want something that looks like a styled gift box even if you’re only spending on cash and paper.
Start by rolling bills tightly and tying them with a thin ribbon so they don’t loosen. Then gather tissue paper sheets in three pastel shades and wrap them around the cylinder like a bouquet. Finally, tie a ribbon around the middle and add a tag on the front. For photos, keep the tag facing outward and fluff the tissue so it forms a soft shape.
Pick tissue colors that match the wedding palette; mismatched pastels look chaotic in photos.
Avoid over-crumpling the tissue; it should look airy, not wrinkled.
15. Map-Print Envelope with Cash and a Tiny "First Stop" Pin
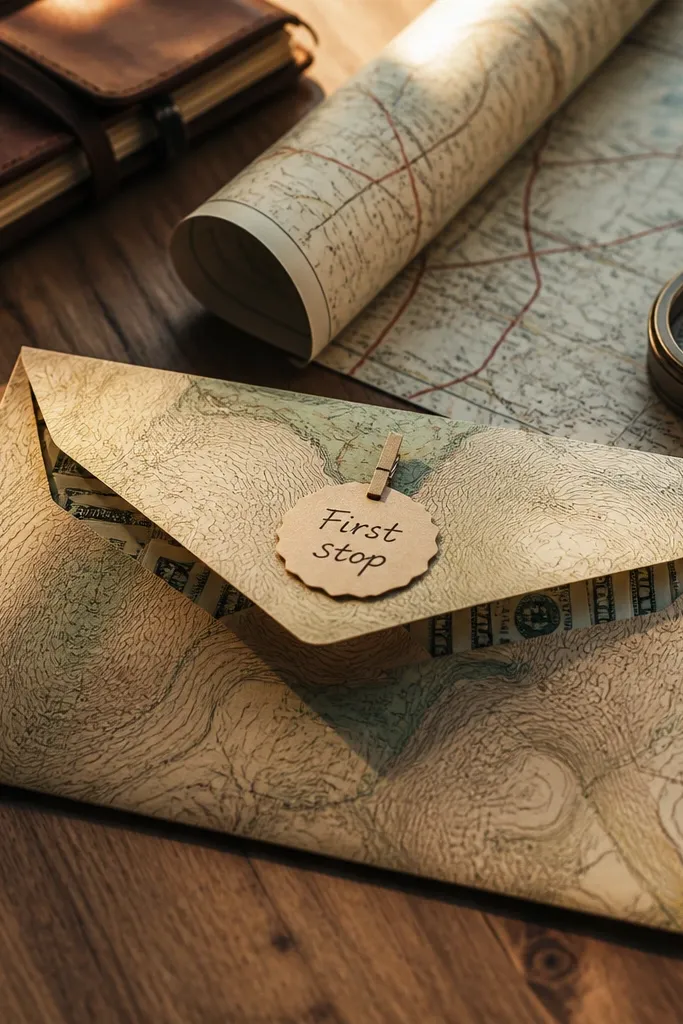
Start by printing or buying map-print stationery in a muted palette like beige and gray. Then fold bills and place them in the envelope flat so the front stays smooth. Finally, attach a small pin or badge on the front with the “First stop” label and a short date. Keep the pin small so it doesn’t block the envelope edge in photos.
Map print immediately signals travel planning, which makes cash feel less random. Use a map-themed envelope and insert folded bills, then add a tiny pin or paper badge labeled “First stop.” The point is to connect the money to a specific moment so it feels thoughtful. This gift is great for couples who are road-tripping, honeymooning, or just planning their next weekend. It photographs well because the map background gives pattern and the “First stop” pin adds a crisp focal detail.
Skip thisAvoid neon map backgrounds; bright prints look cheap and distract from the note.
Quick tipUse a dark ink pen so the label stays readable on patterned paper.
16. Matching Cream Linen Napkin Wrap with Cash Folded into a "Gift Bow"
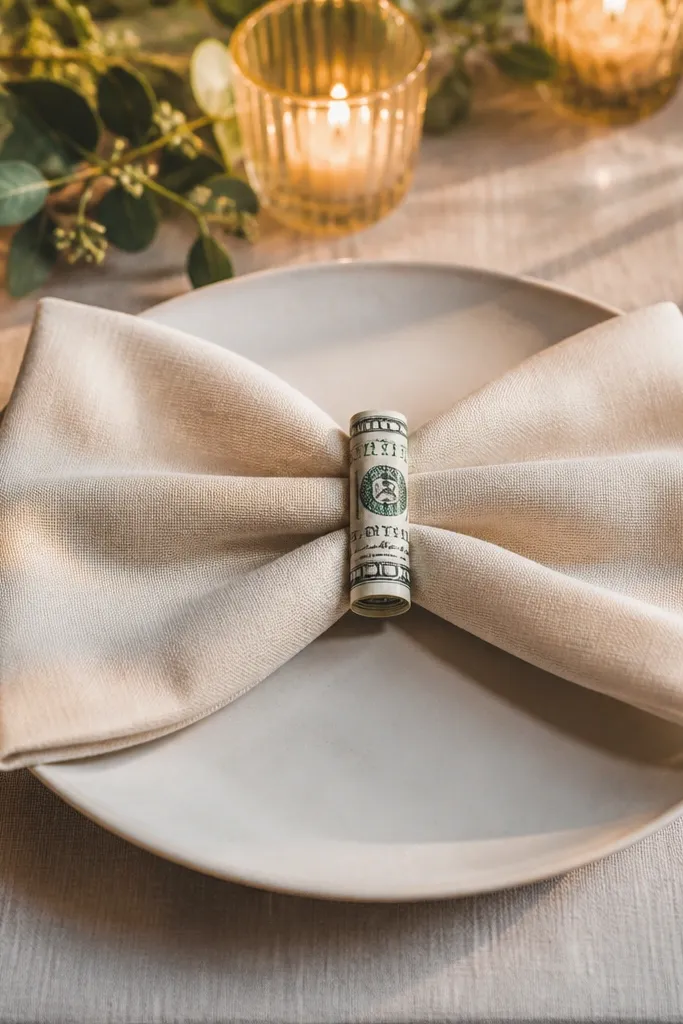
A linen napkin wrap looks like a couture table setting, and it’s surprisingly easy to make money feel fancy. Fold bills into a slim strip and place them where a bow would sit, then wrap a cream linen napkin into a bow-like knot. The gift reads as home-luxury, not a generic envelope. It’s especially good for couples who host dinner parties or who want a cohesive table aesthetic. The photo angle is strong from the top because the bow knot creates shape and symmetry.
Start with a small cream linen napkin and fold it into a long strip. Then place folded cash at the center and wrap the napkin ends around it like a ribbon bow. Finally, tie a thin ribbon or string to lock the knot and attach a small tag on one side. Choose one knot style and keep it tight so the bow holds shape.
Steam the napkin lightly before wrapping; crisp linen makes the whole gift look intentional.
Don’t use wrinkled fabric; it makes a simple wrap look sloppy.
17. Small Tin Box with a "Date Night" Ticket Map and Cash Inside
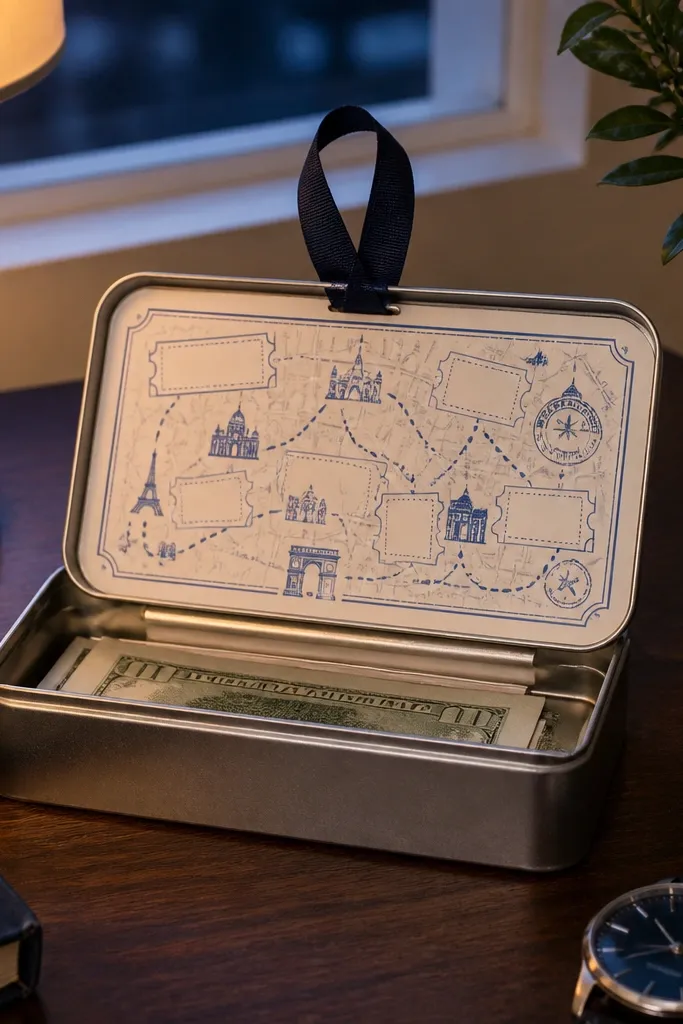
Start by buying a small decorative tin with a secure lid. Then cut a map-style paper insert that fits the lid and place it under the cash so it peeks out when they open it. Finally, fold bills and arrange them flat so the tin closes cleanly, then attach a date-night label to the front. Use a single font style for the label so it looks like a designed piece.
A tin box is the secret weapon for on a budget wedding gift ideas. It’s sturdy, photogenic, and it looks like something they’ll keep for jewelry, keys, or receipts. Add a printed “date night ticket map” insert so the front looks like a mini travel brochure, then hide cash inside the tin. This makes the gift feel like a plan with instructions, not just money. It works well for couples who like practical, organized home items. The metal color also pops in photos against wood tables and neutral linens.
Skip thisAvoid oversized inserts; if the tin doesn’t close easily, it looks awkward and cheap.
Quick tipAdd a small strip of tissue in one matching color inside the lid; it makes the tin look fuller on opening.
18. Honeymoon Laundry Tag Gift with Cash and a Mini "Packing List" Card
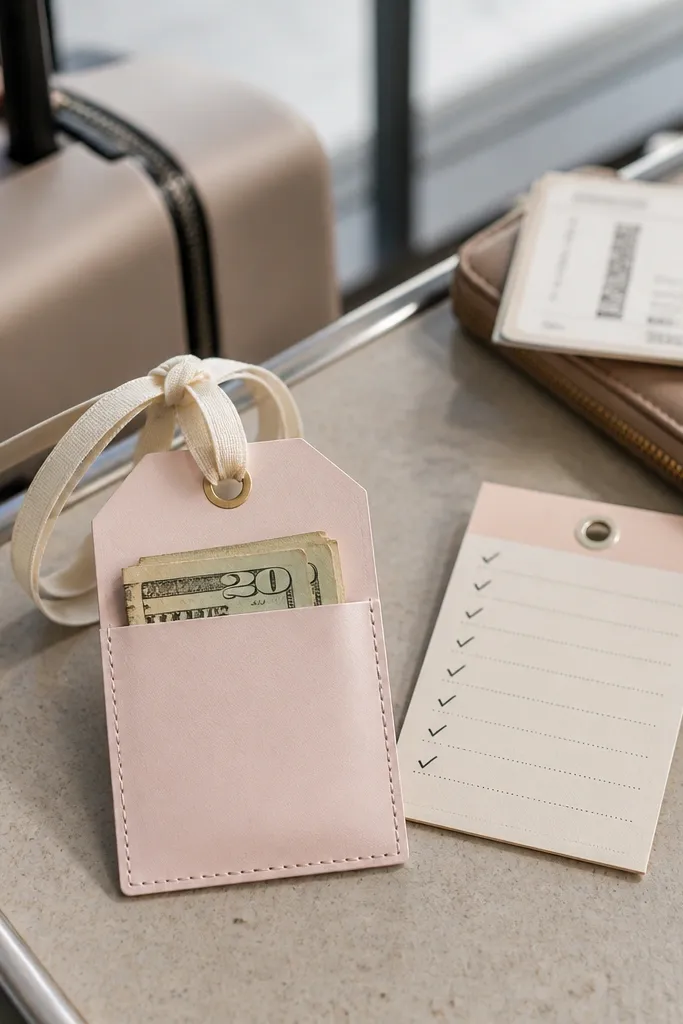
Laundry tag style gifts look playful and purposeful, which is exactly what cash needs. Use a luggage tag or luggage-shaped card holder, write a short “packing list” note, and slip cash into the tag’s pocket. Attach a small card with a specific instruction like “Buy one outfit you’ll feel confident in” or “Book your first activity.” It’s photogenic because tags have bold shape and clear text. Great for couples who travel a lot, and it also works for destination weddings where the vibe is already travel-heavy.
Start by buying luggage tags with a clear pocket or using a tag-shaped envelope. Then write a short packing list on thick card stock and insert it behind the cash. Finally, attach a luggage string and tie it so the tag hangs neatly from the gift bundle or ribbon. Keep the handwriting tight and centered for readability.
Use thick card stock so the tag doesn’t flop and blur in photos.
Avoid tiny text; tags are read at a distance in most gift photos.
19. Mini Chocolate Bar Sleeve with Cash Tucked Under a Custom Label
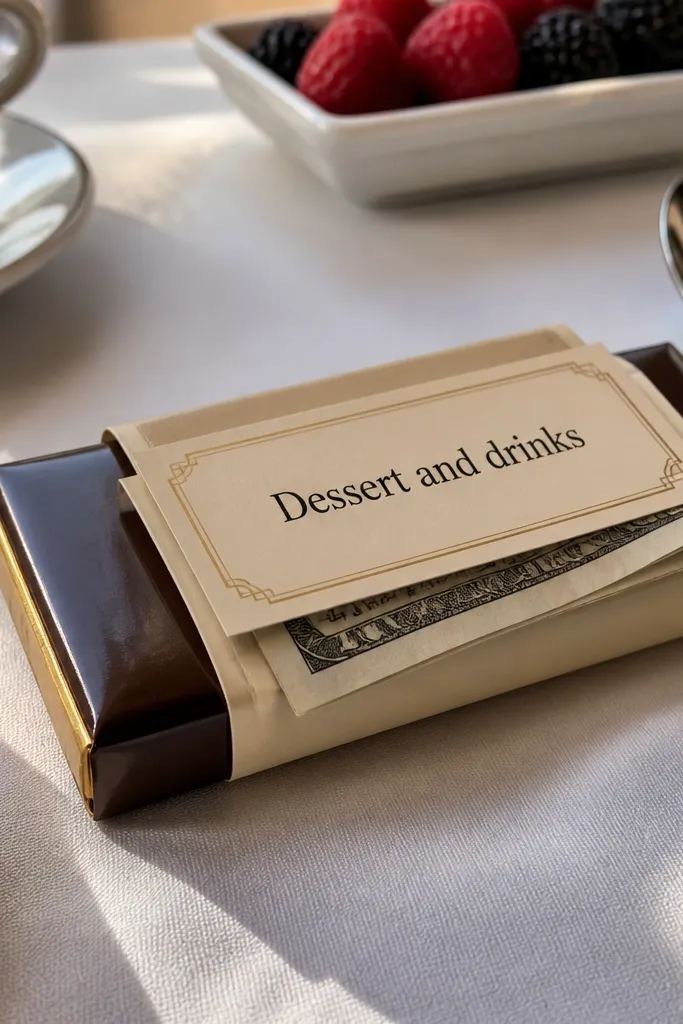
Start by choosing mini chocolate bars in wrappers with neutral tones so the label stands out. Then cut a paper sleeve, wrap it around the bar, and slide the folded cash behind the label section. Finally, seal the sleeve and attach a label with black ink and a simple “redeem for” line. Keep the cash folded flat so the bar sleeve doesn’t bulge.
This is one of the most reliable ways to make money feel sweet. Buy individual mini chocolate bars, then wrap them in a simple paper sleeve and tuck folded cash under the label so it looks like part of the design. The front label tells them what the money is for, like “Dessert and drinks.” It photographs well because the chocolate wrapper adds color and gloss, while the label keeps the gift readable. It suits couples with a fun, casual vibe and works for big wedding guest lists where you need a fast, good-looking approach.
Skip thisDon’t use labels that cover the chocolate brand completely; it looks like you hid the product.
Quick tipStick to one ribbon color for all chocolate gifts so your table looks cohesive.
20. Clear Glass Jar with Cotton String and a "Savings" Label
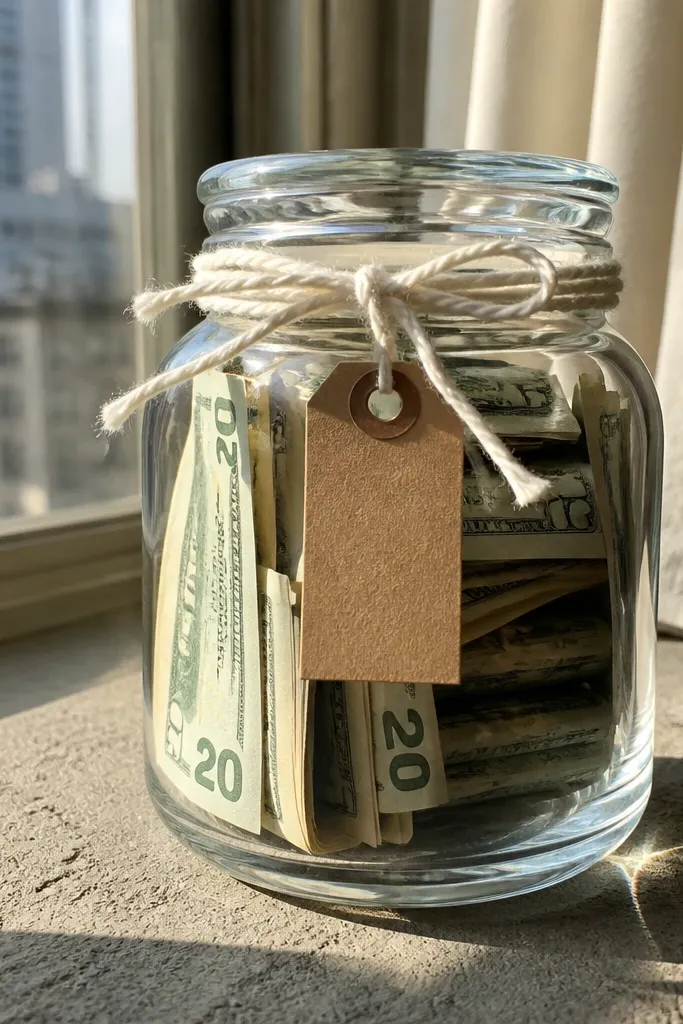
A glass jar is the classic container for a reason: it shows the money neatly and it looks good on any surface. Use a jar with a wide opening so you can stack folded bills without crumpling. Tie cotton string around the lid and add a label that says what the money becomes, like “New home fund” or “First apartment upgrades.” This looks elegant because glass + cotton string feels handmade. It works across wedding styles, from rustic to modern, and it’s easy to personalize without extra clutter.
Start by choosing a clear jar and cleaning it so labels stick cleanly. Then fold bills into uniform rectangles and stack them so you can see the edges through the glass. Finally, tie cotton string around the lid and attach a label to the front with matte sticker paper. For photos, keep the jar centered and add a flat tag so it doesn’t curl.
Add a thin layer of tissue paper inside the jar as a backdrop so the bills contrast better on camera.
Avoid too much string around the neck; it hides the label and makes the jar look tangled.