1. Blush bow shortbread with gold-foil sparkle
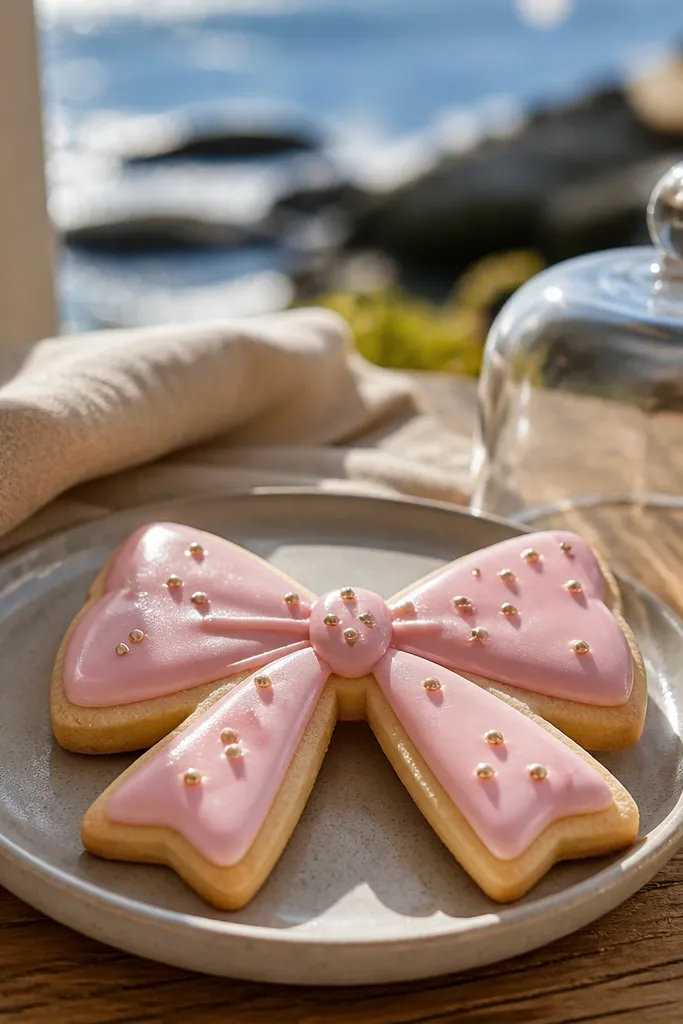
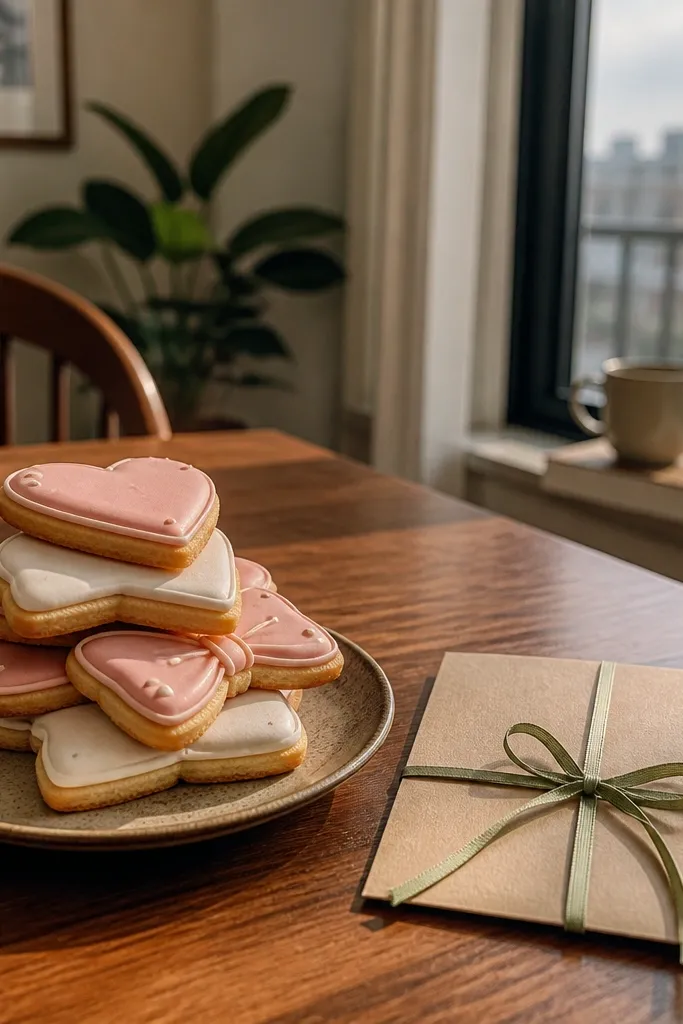
This is the “pretty but safe” option for Bridesmaid Proposal Cookies year round because the bow shape is instantly wedding-coded and the flavor stays classic. Use a butter shortbread base so the cookie edges stay crisp under icing. The design works best when you keep the bow lines clean and add tiny gold-foil dots only as accents — they catch light without adding bulk. It’s a strong pick for winter proposals too, since blush still looks soft in low light and won’t feel seasonal.
Quick tipIf you’re sending, place a sheet of parchment between layers even when you have a “divider” box — it reduces scuffing.
Start by baking shortbread cut into bow-friendly shapes (rounded rectangles with a bow notch works well). Flood the main icing in blush, then pipe a slightly darker blush outline for definition and let it dry 2-3 hours. Add gold-foil dots last using edible gold dust or tiny foil flakes pressed into a tacky spot. Pack in a rigid cookie box with parchment layers so the bows don’t smear against each other.
Skip thisDon’t use thin, lacy bow piping; it cracks when cookies shift in a box.
2. Champagne script "Will you be my bridesmaid?" tags
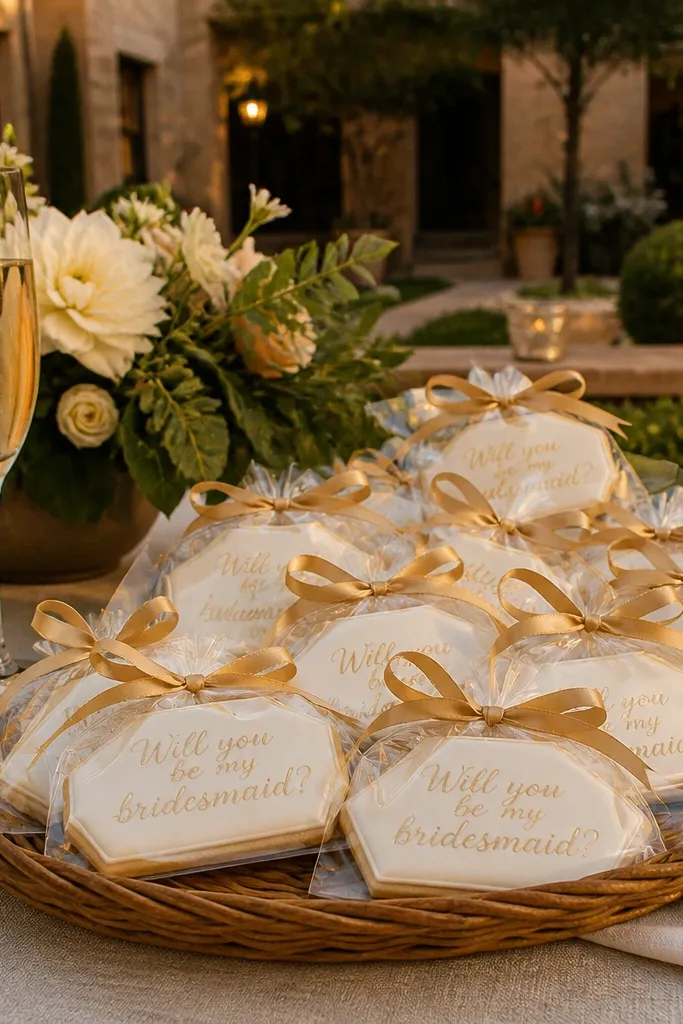
Tag cookies photograph like stationery, and they read clearly from a distance. The champagne color keeps the set warm and bridal without turning into a holiday theme. Write the message in a single clean script line so it looks intentional, not busy. This is ideal when you’re proposing to multiple bridesmaids because each tag can get a name or mini initial stamp while still matching the set.
Quick tipDo one cookie message per cookie — if you cram multiple lines, the script looks messy after travel.
Bake sugar cookies cut into tag shapes with a small top hole or notch. Flood the background in champagne icing, then pipe the script in gold or metallic champagne using a #2 or #3 tip. Let the ink-dry details cure fully before stacking, then add a small bow of icing or a tiny dot cluster near the top. For travel, wrap each tag in parchment and place flat in a sturdy box with no loose movement.
Skip thisSkip super-thin “marker” icing; it smears when the cookie flexes.
3. Marble heart cookies with white swirls and pearl dots
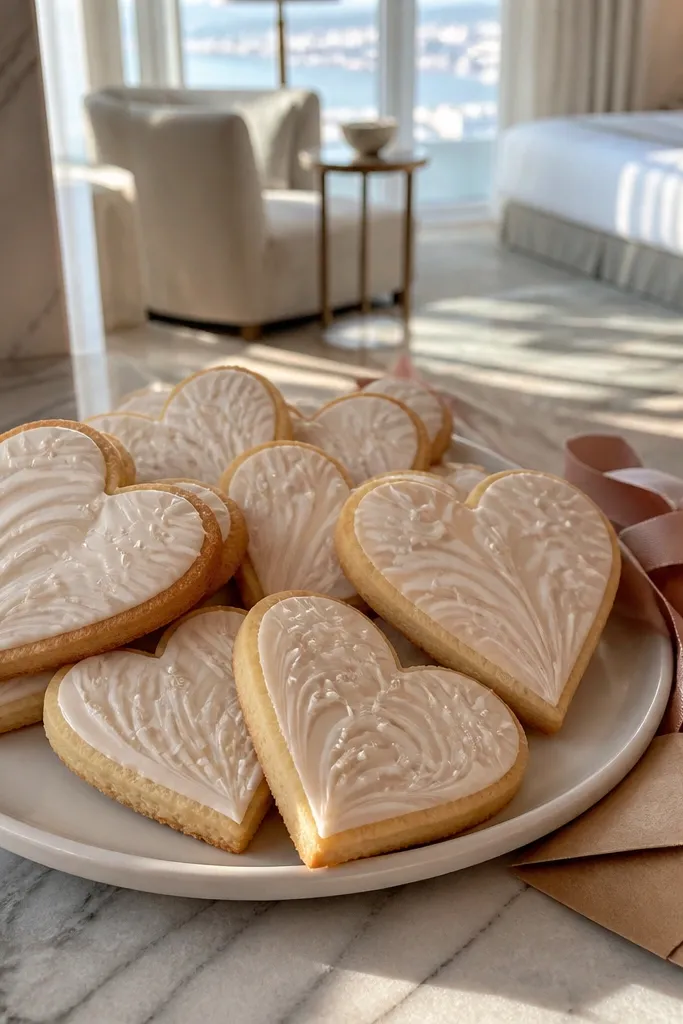
Marble hearts look luxe and modern, and they still feel romantic for a bridesmaid ask. The marble technique hides small imperfections because the swirls blend, which matters when you’re doing this for a group. White swirls and pearl dots give a clean, bridal finish that doesn’t depend on seasonal colors. It’s a great choice if your wedding theme is neutral — think cream, taupe, or soft gray — because the marble reads premium in both bright and warm lighting.
Quick tipLet marble cookies set uncovered for 45-60 minutes so the swirls don’t pool during packing.
Bake a dense sugar cookie heart shape and keep the thickness around 1/4 inch so it doesn’t crack. Flood the base in a light taupe or pale gray, then marble by dropping white icing dots and gently swirling with a toothpick. After the marble settles, pipe a thin outline in the base color to frame the heart. Finish with pearl sprinkles or edible pearl dust dots once the surface is firm, then pack flat with parchment.
Skip thisDon’t over-swirl; you want movement, not full blending into one flat color.
4. Navy and gold crest cookies with mini crown outline
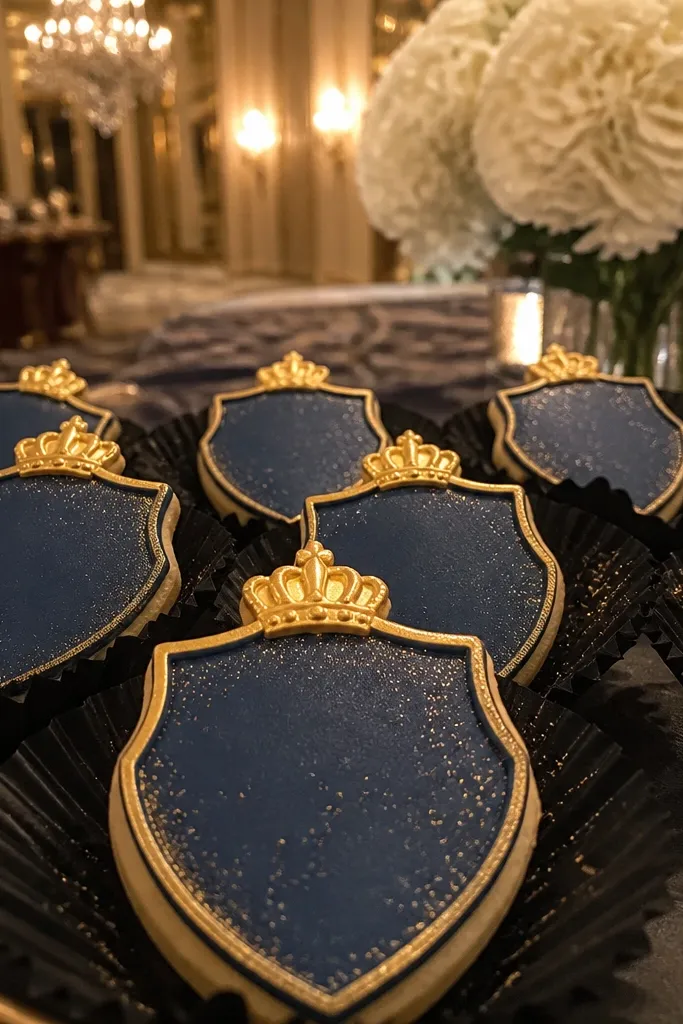
If your wedding palette is navy, black, or deep tones, this set looks sharp and expensive. Crest shapes feel like a wedding emblem, and the mini crown outline ties directly to the bridesmaid role without turning into cartoon cuteness. The contrast between navy and gold reads strong in photos, even at night receptions. It also works well for year-round proposals because deep colors don’t feel tied to a specific season.
Quick tipUse navy icing with a thicker consistency; watery navy can look streaky after it dries.
Bake cookies cut into crest or shield shapes with a sturdy outer border. Flood the navy base, then pipe a thin gold border around the crest edges for crisp separation. Add a simple crown outline near the top using gold icing lines; keep it small so it stays intact. After drying, place each crest in a single parchment sleeve or layer with parchment so the gold lines don’t scrape.
Skip thisDon’t add lots of tiny details; small crowns and dots smear if they aren’t fully dry.
5. Rose-gold blush florals with pressed petal look
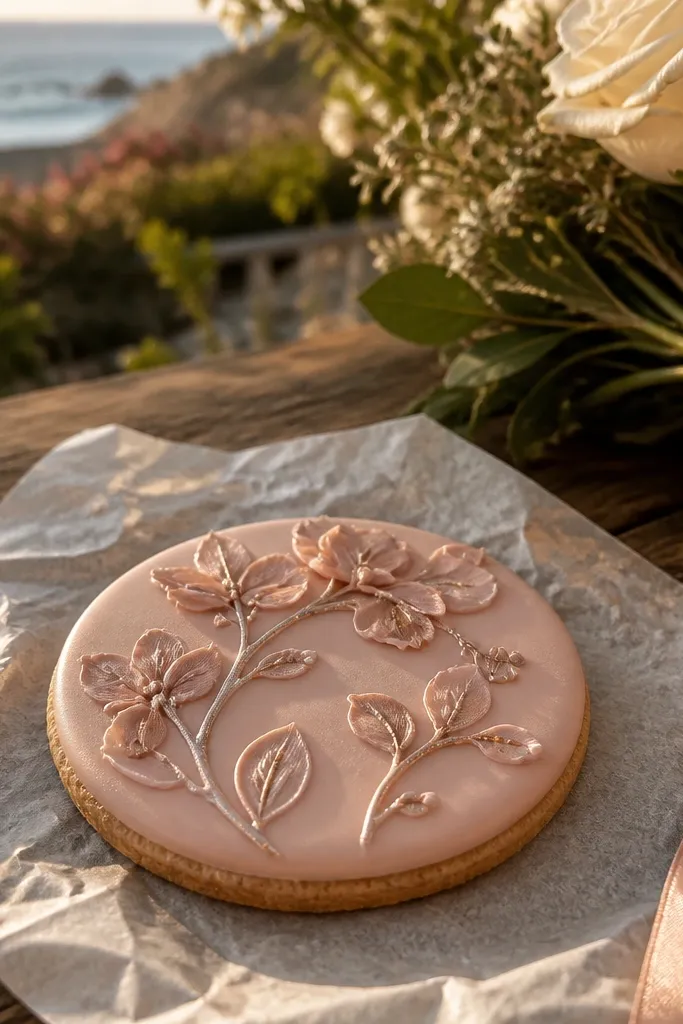
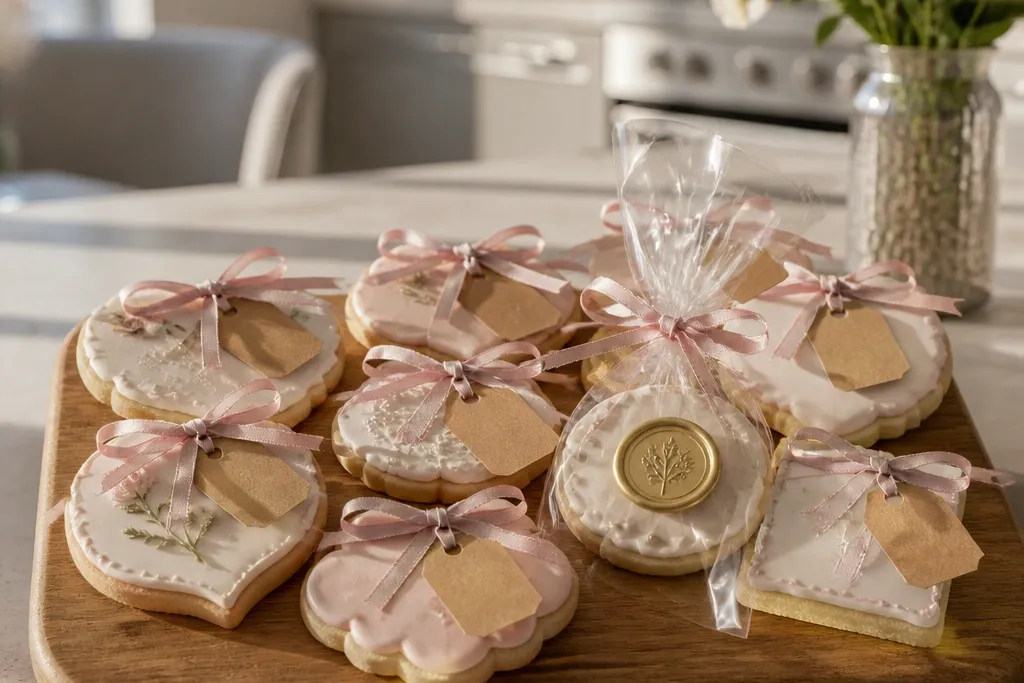
Florals make the cookie feel like part of the bridal aesthetic, and the rose-gold accents keep it modern. The key to “pressed petal” style is keeping the floral shapes simple and letting the background do the work. This option is perfect for proposals that match a bouquet palette — blush, dusty pink, cream — because it mirrors that softness. It’s also a good pick if you want something that doesn’t shout a message on every cookie; the floral set still reads “bridesmaid proposal” through coordinated design.
Bake round or square cookies with slightly thicker edges for stability. Flood the base in pale blush, then pipe a single floral cluster (3-5 petals max) using a darker blush outline. Add rose-gold dots around the petals using edible shimmer dust or small gold sugar pearls. Let the icing dry fully before stacking flat in a box with parchment separators.
Choose one flower motif and repeat it across the set so the cookies look like a matching set, not random designs.
Skip ultra-fine petal piping; it chips when cookies slide.
6. Pastel gingham squares with bow corner accents
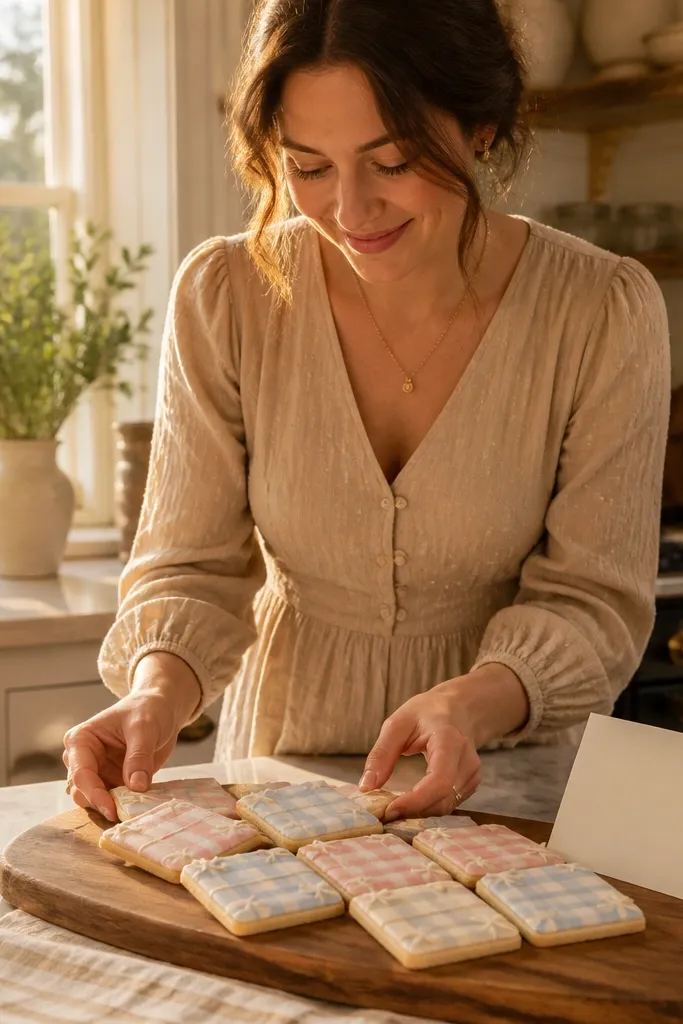
Gingham squares look adorable and very “bridal summer,” but they also work year round because the pattern is clean and graphic. The trick is using pastel colors that match your bridesmaid dresses, then repeating the same two-tone grid on every cookie. It feels playful without looking childish. If your proposal involves a picnic, hotel welcome snacks, or a casual hang, gingham cookies fit the vibe and photograph well against wicker baskets and linen napkins.
Quick tipUse contrasting pastel shades, not high-contrast neons — the goal is soft, not loud.
Bake sugar cookies cut into neat squares, then flood with the lightest gingham color. Create the grid by piping thin lines in the second color, letting them dry before adding cross-lines. Add a small bow corner accent with a single loop and tail so it doesn’t overtake the pattern. Pack with parchment and keep cookies flat so the grid lines don’t get dented.
Skip thisDon’t rush the grid; if the first lines aren’t set, cross-lines smear.
7. White-on-cream monogram cookies with envelope style
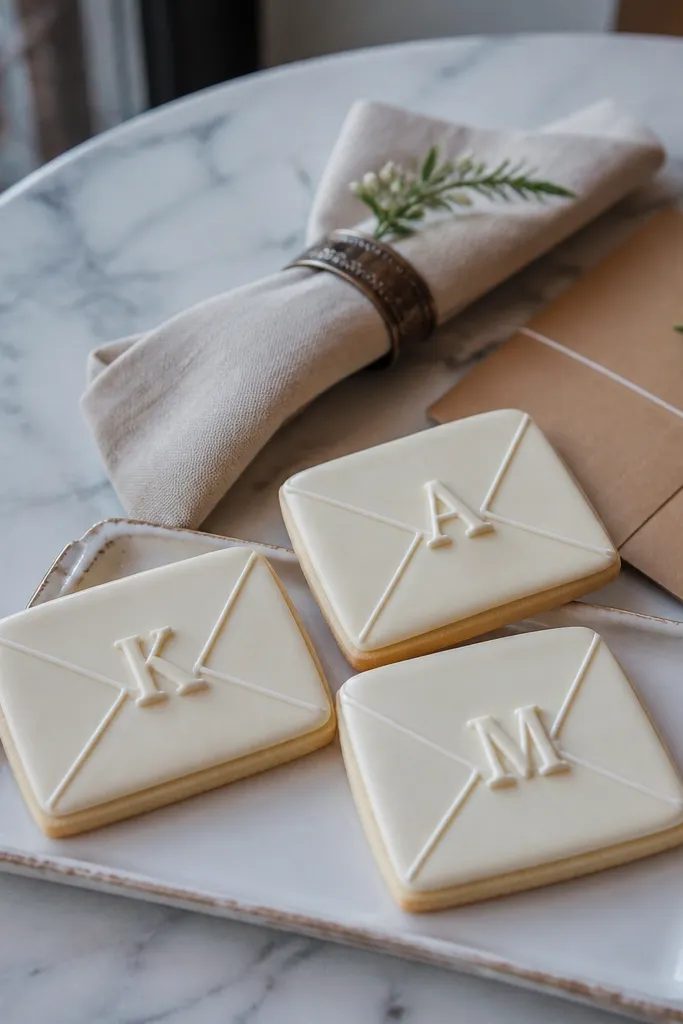
Monogram cookies feel personal fast, and the envelope shape reads like a wedding invite. White-on-cream looks clean in photos and stays classy even if your wedding palette is minimal. This set is especially good when you’re asking bridesmaids whose names you want to highlight — each cookie can get a first initial. For year-round proposals, cream and white keep the look neutral and easy to match with any ribbon color.
Quick tipKeep monograms centered and large enough to read from a photo thumbnail.
Bake cookies in envelope or rectangle-with-flap shapes. Flood the base in cream, then pipe the monogram in white icing with a consistent line thickness. Add a small “seal” dot near the corner using a metallic shimmer or gold dot. Let everything dry hard, then arrange in a box with no air gaps so the corners don’t bump.
Skip thisSkip tiny, delicate lettering; it disappears once iced surfaces dry and settle.
8. Olive leaf cookies with cream icing and gold honeycomb dots
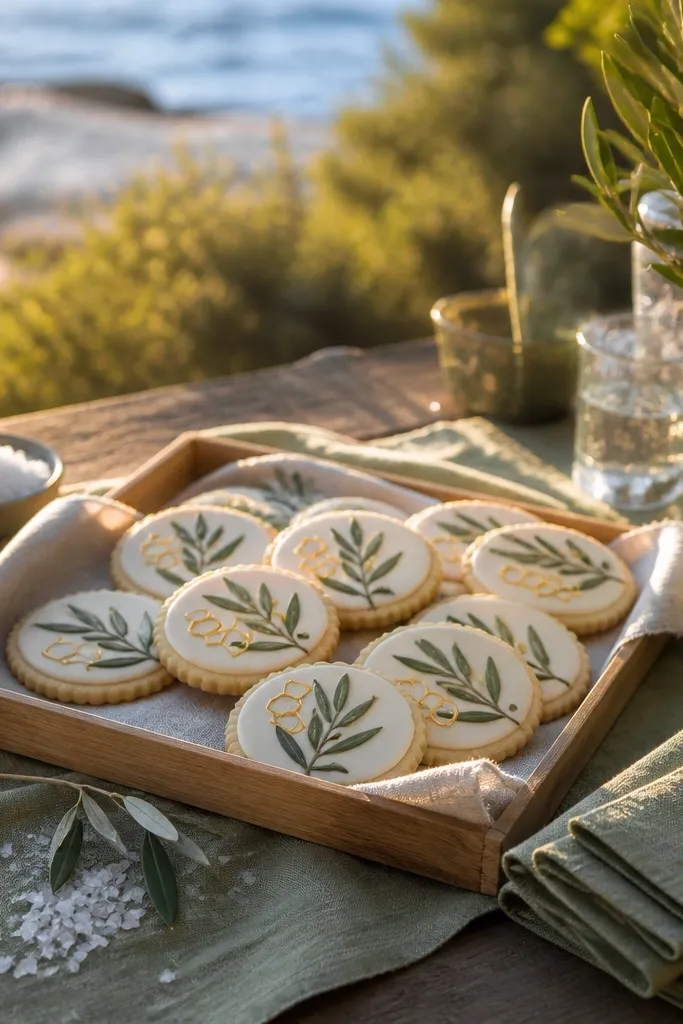
Olive leaf designs look modern and outdoorsy without turning into a rustic theme overload. Cream icing keeps it bridal, while olive line art adds a grounded, grown-up feel. Gold honeycomb dots add a subtle wedding sparkle without needing heavy metallic paints. This is a strong year-round option because olive looks good in spring, summer, fall, and winter — it doesn’t flip seasonal like bright pastels.
Bake a round or oval cookie base and flood with cream icing. Pipe simple leaf line art using olive icing, then add a thin gold dot cluster around the leaves using edible gold dust or tiny gold sprinkles. Keep leaf shapes to 2-3 per cookie so the design stays bold. Dry fully, then pack flat in a rigid box to protect the line art.
If your leaves look too dark, add a few cream highlights with a thin white drizzle.
9. Black tie bow cookies with white icing stripes
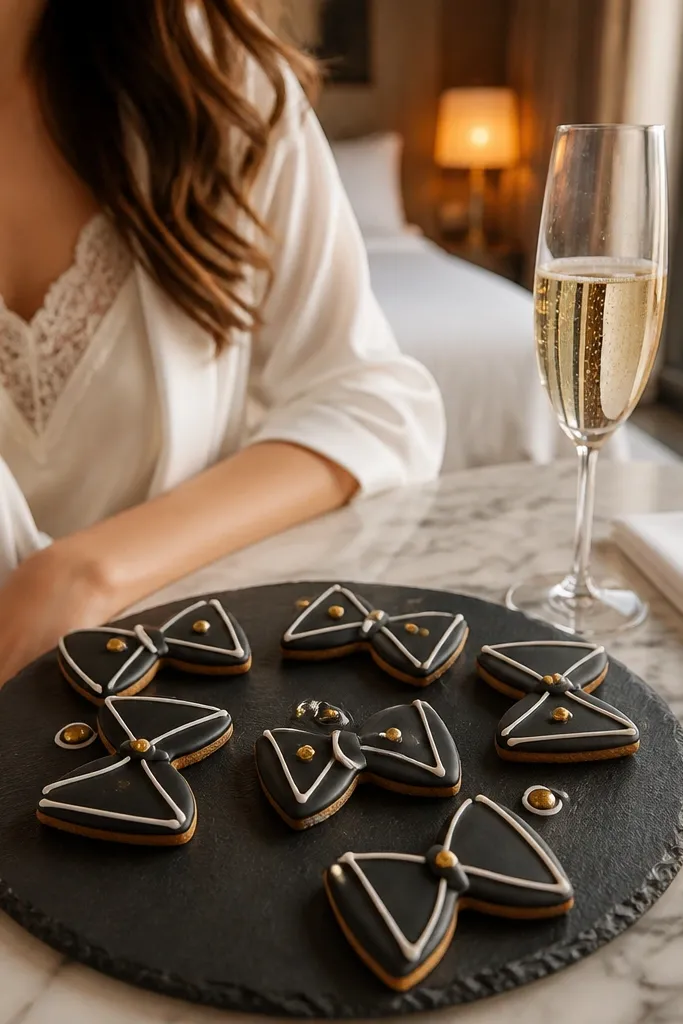
This is the set for brides who want a sleek, fashion-forward look. Black cookies with white stripes read like formalwear, and the bow detail makes it feel wedding-specific. Add a few tiny gold dots and it looks intentional, not heavy. It’s also forgiving in photos because black holds contrast — you can photograph these cookies against light linens and they still pop.
Quick tipAim for matte black icing, not glossy; matte looks cleaner in overhead photos.
Bake a thick sugar cookie and flood it in black icing. Pipe two or three white stripe lines across the cookie, then add a small bow at the top using white or black-and-white alternating loops. Finish with 3-5 gold dots around the stripes. Let the black base dry completely so it doesn’t smear when you add white lines, then pack flat with parchment.
Skip thisDon’t add too many stripes; three lines reads best and stays neat.
10. Tropical leaf cookies with lime glaze and gold confetti
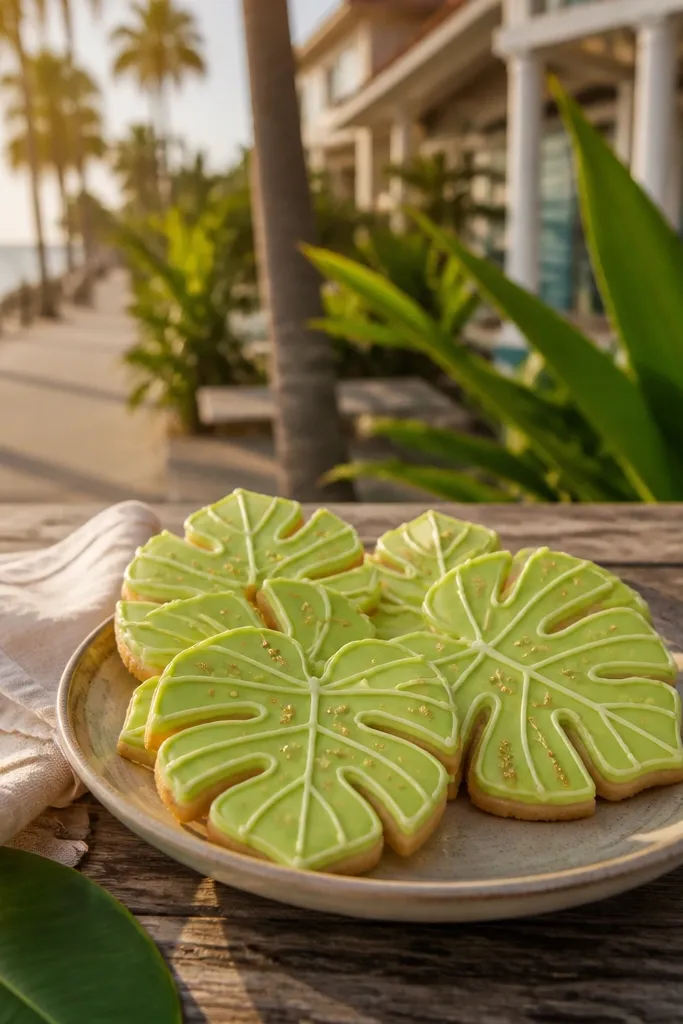
For warm-weather proposals or bridesmaids in beach towns, tropical leaf cookies feel fresh and still bridal with the gold confetti. Lime glaze adds energy, but it looks best when you keep the leaf line art simple and the background clean. This set is also great year round because you can dial the palette down for winter by using muted lime and a cream base. The gold confetti gives that “party” feel without needing big decorations.
Bake oval cookies and flood the base with a light cream or pale lime glaze. Pipe tropical leaf outlines in a deeper green, keeping the leaves to 2-3 per cookie. Add gold confetti dots using edible shimmer or small sprinkle pieces after the glaze sets. Let dry, then place cookies in a box with parchment to keep leaves from smudging.
If you’re sending, keep the leaf lines thicker than you think; thin lines chip.
11. Ocean blue waves cookies with pearl "shell" dots
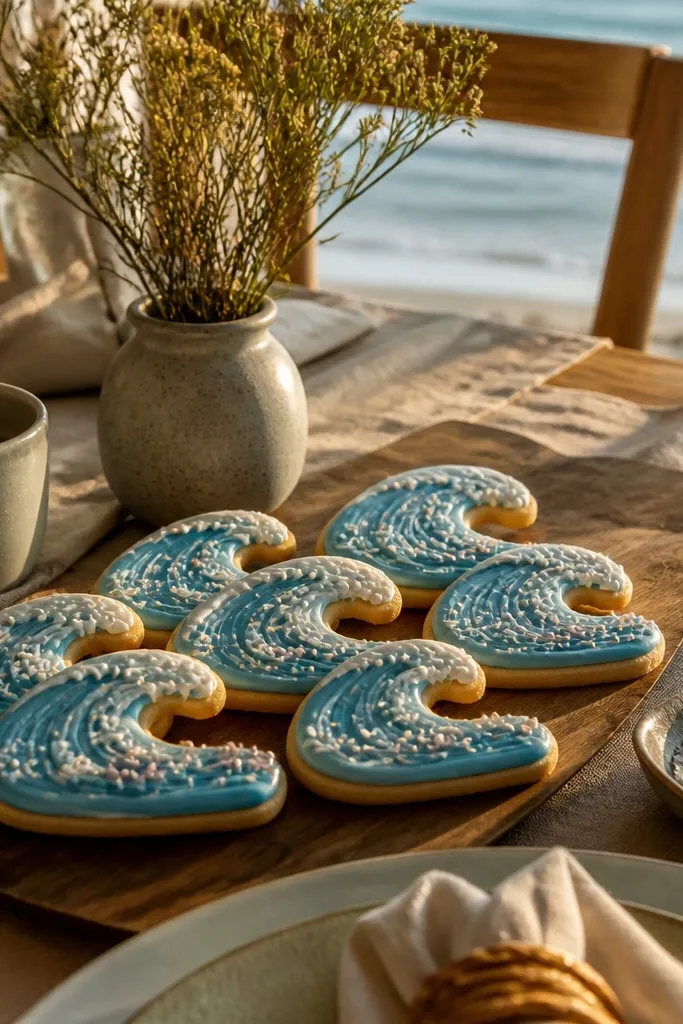
Ocean-blue waves are a clean way to tie the proposal to a destination wedding vibe without needing a full beach theme. The design feels calm and pretty, and it looks great in both daylight and warm indoor lighting. Pearl-like dots make it feel bridal and slightly elevated. This is a good choice when your bridesmaids dresses lean blue, teal, or sea-glass tones.
Bake a round cookie and flood with ocean blue icing. Pipe 3-4 wave lines across the cookie using a lighter or white-blue shade, then add small pearl dots where the waves crest. Keep the wave pattern consistent across the set so it looks like one coordinated design. Dry fully and pack flat with parchment layers to prevent smearing.
Use a lighter wave shade that’s still clearly distinct from the base — it reads better in photos.
Don’t add wet pearl sprinkles on fresh icing; they sink and blur.
12. Red velvet mini cake-cookie with cream swirl tops
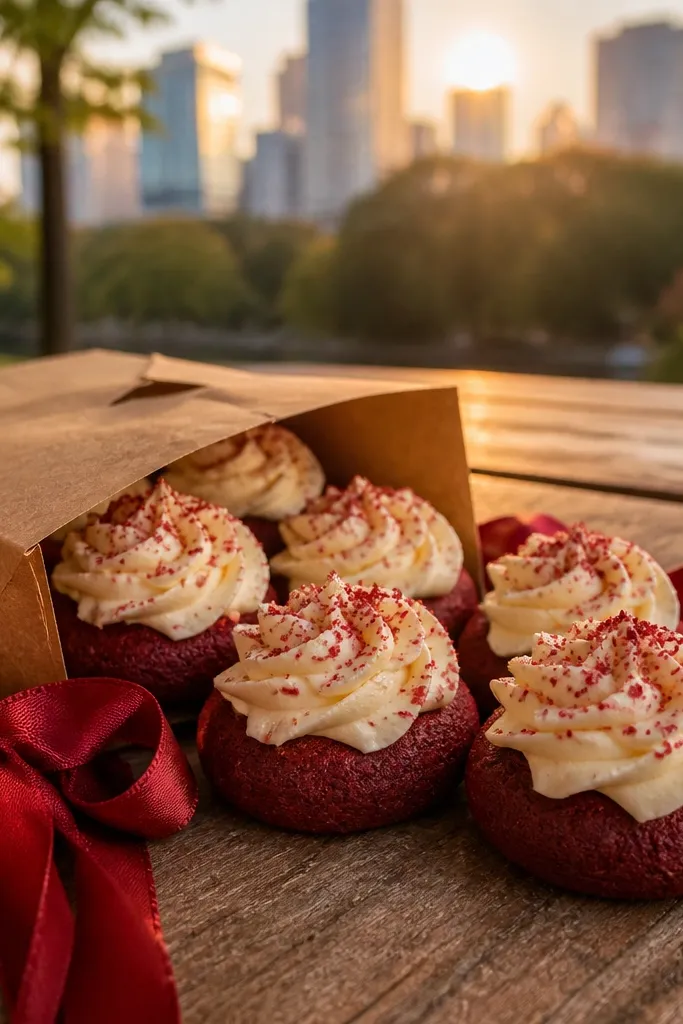
If you want something that feels like a mini celebration, red velvet base cookies with a cream swirl top deliver. The color is bold, photogenic, and reads “special” even without elaborate shapes. For bridesmaid proposals, this design stands out because it looks like a bite-sized dessert, not just a decorated cookie. Pair it with cream icing and tiny gold sprinkles for a bridal finish that still feels festive year round.
Quick tipChoose smaller cookie sizes if you’re shipping; bigger domes crack more easily.
Bake dense red velvet cookies in small rounds or slightly domed shapes. Pipe a thick cream swirl on top using a star tip for texture, then add 5-8 tiny gold sprinkles in a small cluster. Let the swirl set so it stays raised without collapsing under packaging weight. Pack in a box that won’t crush tops — use a tighter fit or a box with inserts.
13. Iced ring cookies with white bow and pearl edge
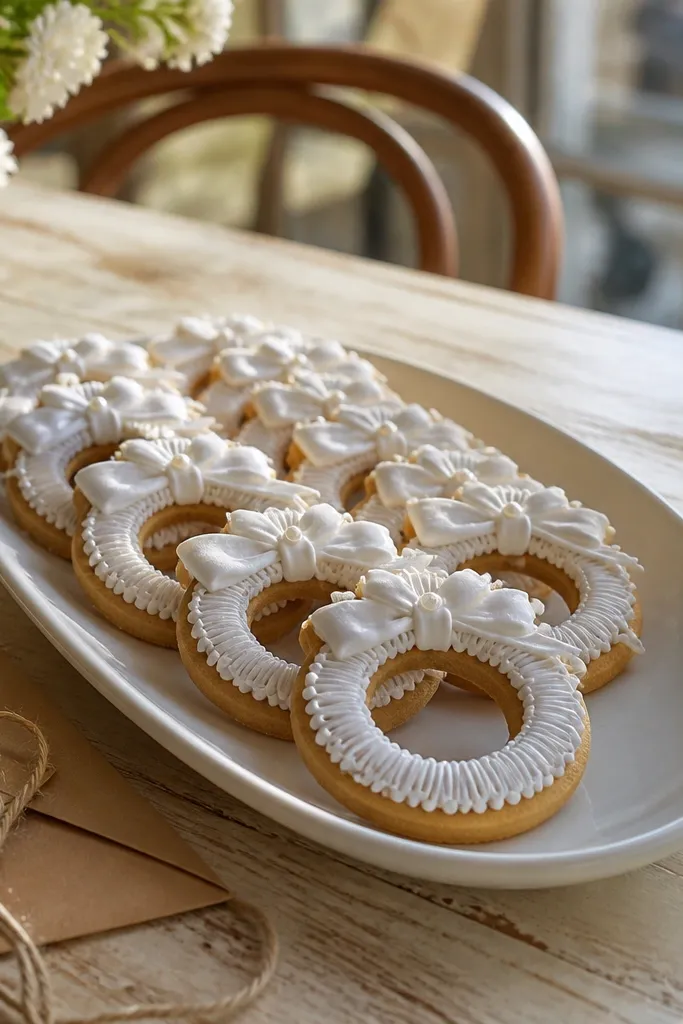
Ring-shaped cookies look like jewelry, which makes them perfect for a proposal that feels romantic and symbolic. The white bow adds bridesmaid energy, while pearl dots along the edge make it look finished. This set is photogenic because the ring shape frames the center space for a message or a small monogram. It also works year round since the palette is mostly white and metallic, not seasonal.
Quick tipIf you want a message, keep it to one initial or one short word so it stays readable.
Bake ring-shaped cookies (or cut a larger circle and remove a center) so the shape is sturdy. Flood the ring in white icing, then pipe a small bow on the top area of the ring. Add pearl dots around the outer edge using edible pearls or pearl dust. Let it dry hard, then stack with parchment and keep cookies centered so the ring doesn’t get pressed.
Skip thisDon’t use floppy bow icing; it needs thick lines to hold shape.
14. Rose gold mirror glaze cookie with chocolate script
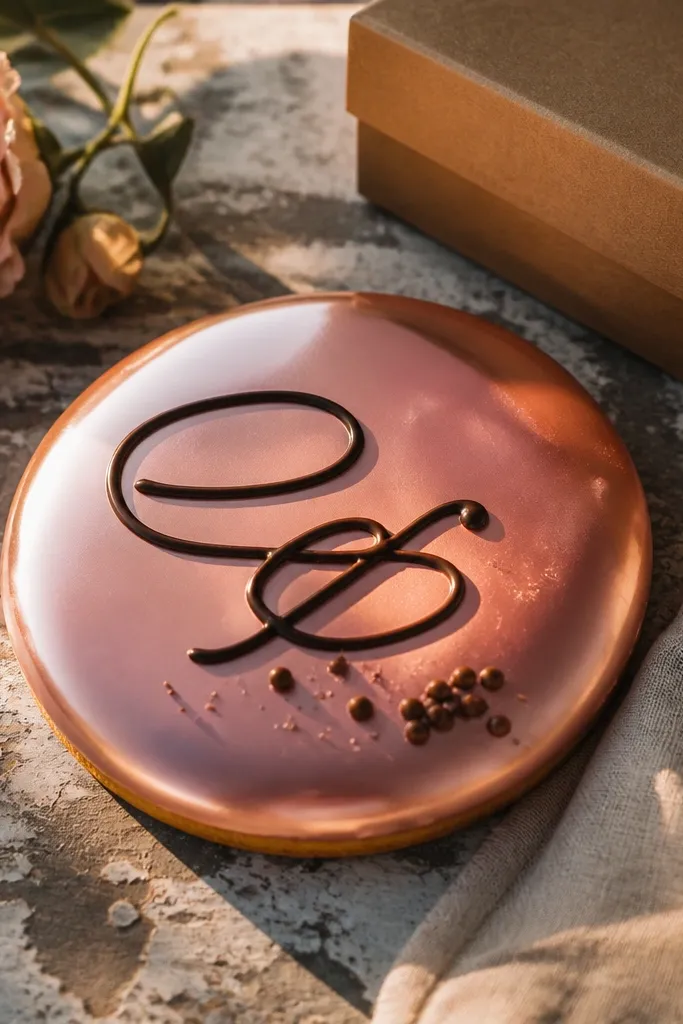
This is the “wow” look for brides who want something glossy and modern. Rose gold mirror glaze makes the cookie surface reflect light, which reads amazing in photos and makes the set feel like dessert art. Chocolate script keeps it warm and readable without needing bright colors. It’s best when you want a clean, upscale vibe rather than a cute cartoon look.
Quick tipGlaze needs time to set; give it at least 2 hours before boxing so it doesn’t smear.
Bake a firm sugar cookie base and let it cool completely. Pour a thin rose-gold glaze over the cookie surface, then add chocolate icing script once the glaze sets slightly so it doesn’t bleed. Keep the script short — one phrase or name initial — because longer text blurs on glaze surfaces. After the glaze firms, pack flat in a box lined with parchment and avoid stacking too high.
Skip thisSkip thick glaze layers; they run, crack, and transfer during shipping.
15. Floral lattice cookies with translucent sugar window
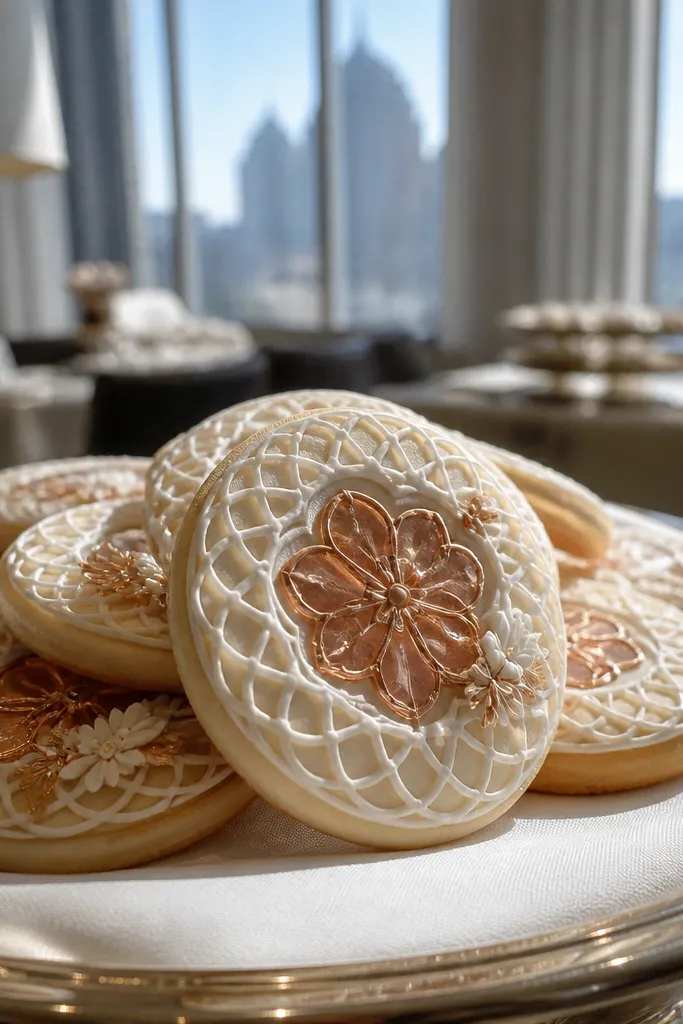
Lattice cookies look like wedding invitations made edible, and the translucent sugar window adds that “pretty surprise” factor. This is a showstopper option for in-person proposals where you can control handling. The lattice gives structure, and the window makes the design feel more dimensional without adding fragile 3D pieces. It’s also a great choice for spring and fall because florals match the vibe, but the window keeps it neutral enough for winter too.
Bake a sturdy sugar cookie in a square or rectangle shape and let it cool fully. Pipe a lattice pattern with royal icing, then create a center window area with crushed clear hard candy embedded behind a thin icing frame. Dry until the lattice is hard, then wrap individually in parchment. Pack in a rigid box and avoid shaking — windows are pretty but need protection.
Use individual wrapping even for local delivery; it prevents sugar window cracks from rubbing.
Don’t choose this if you need long shipping; windows are fragile.