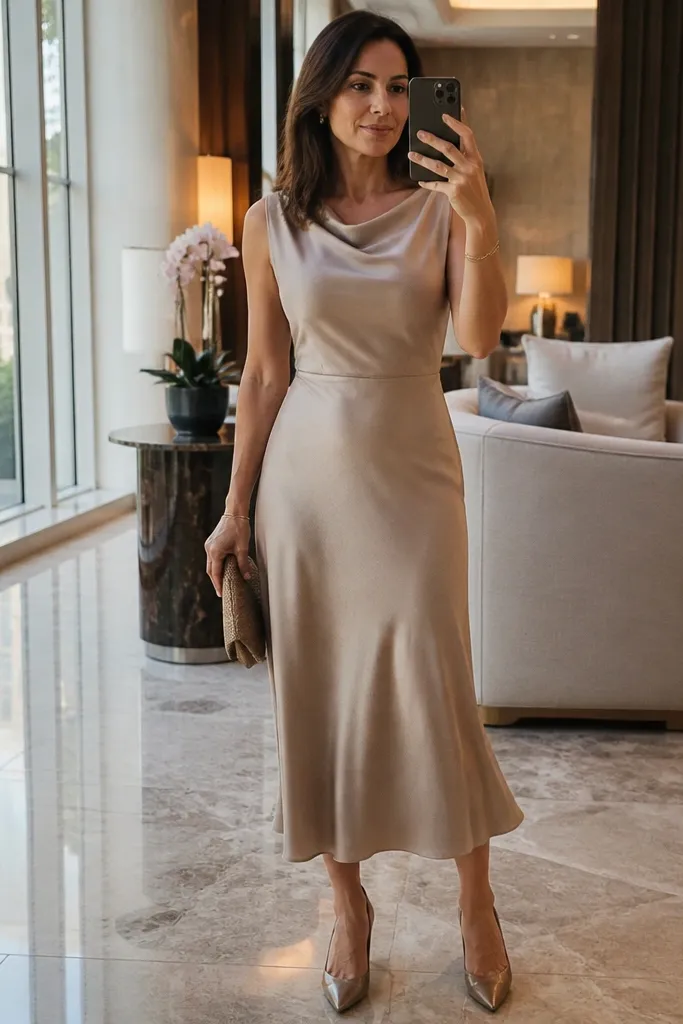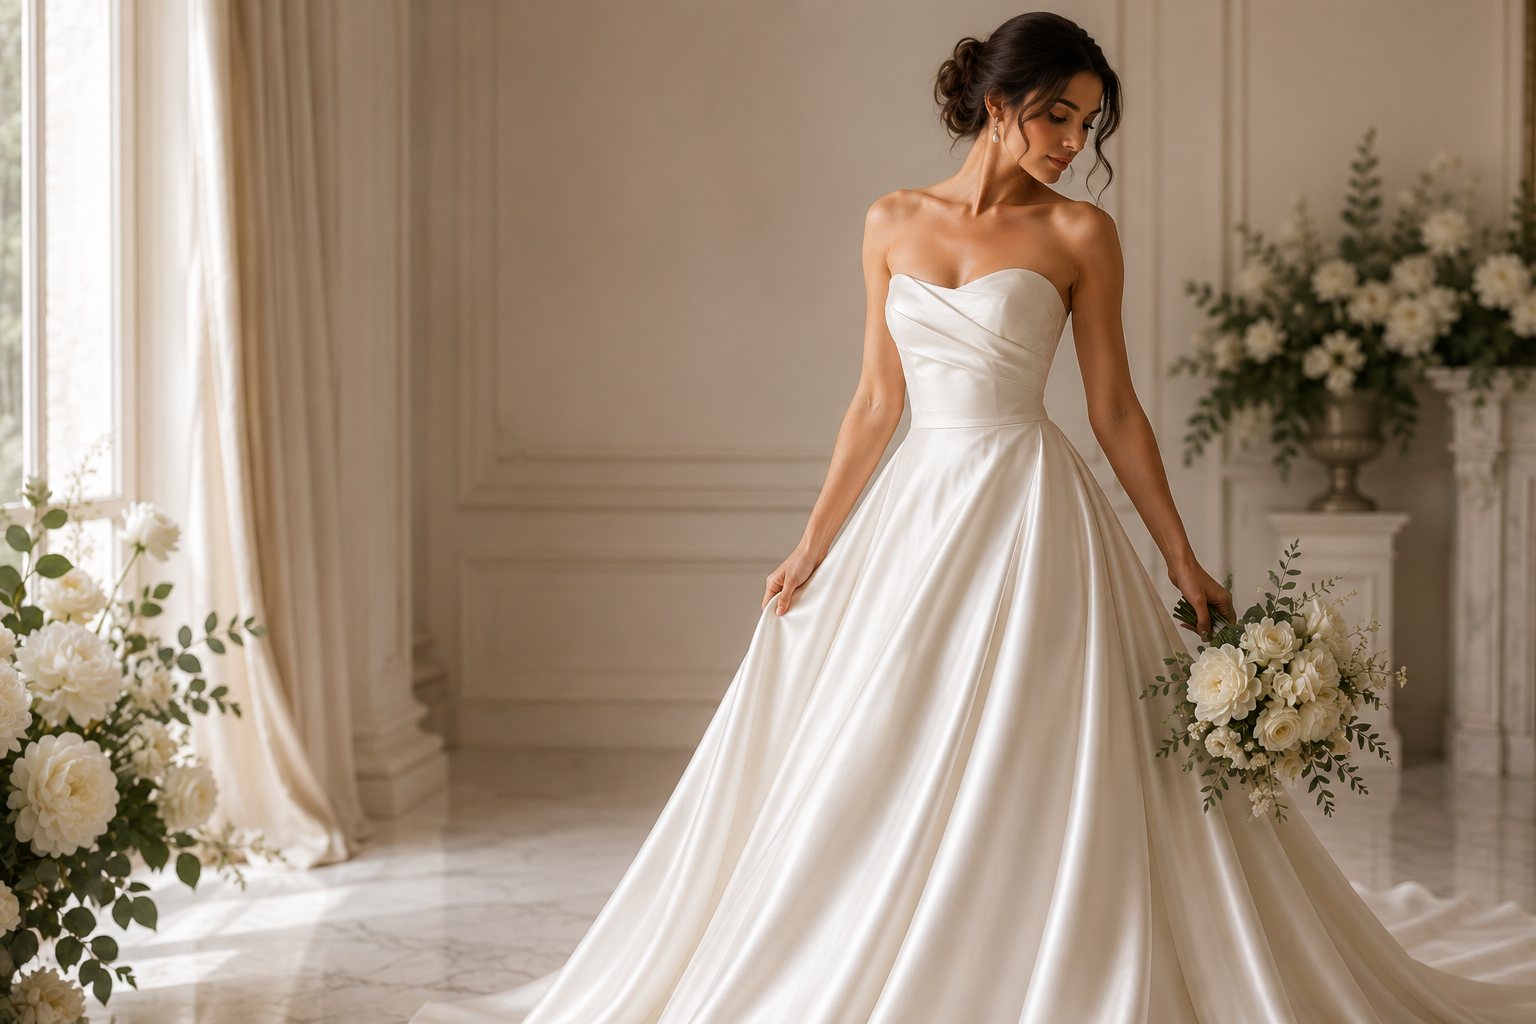
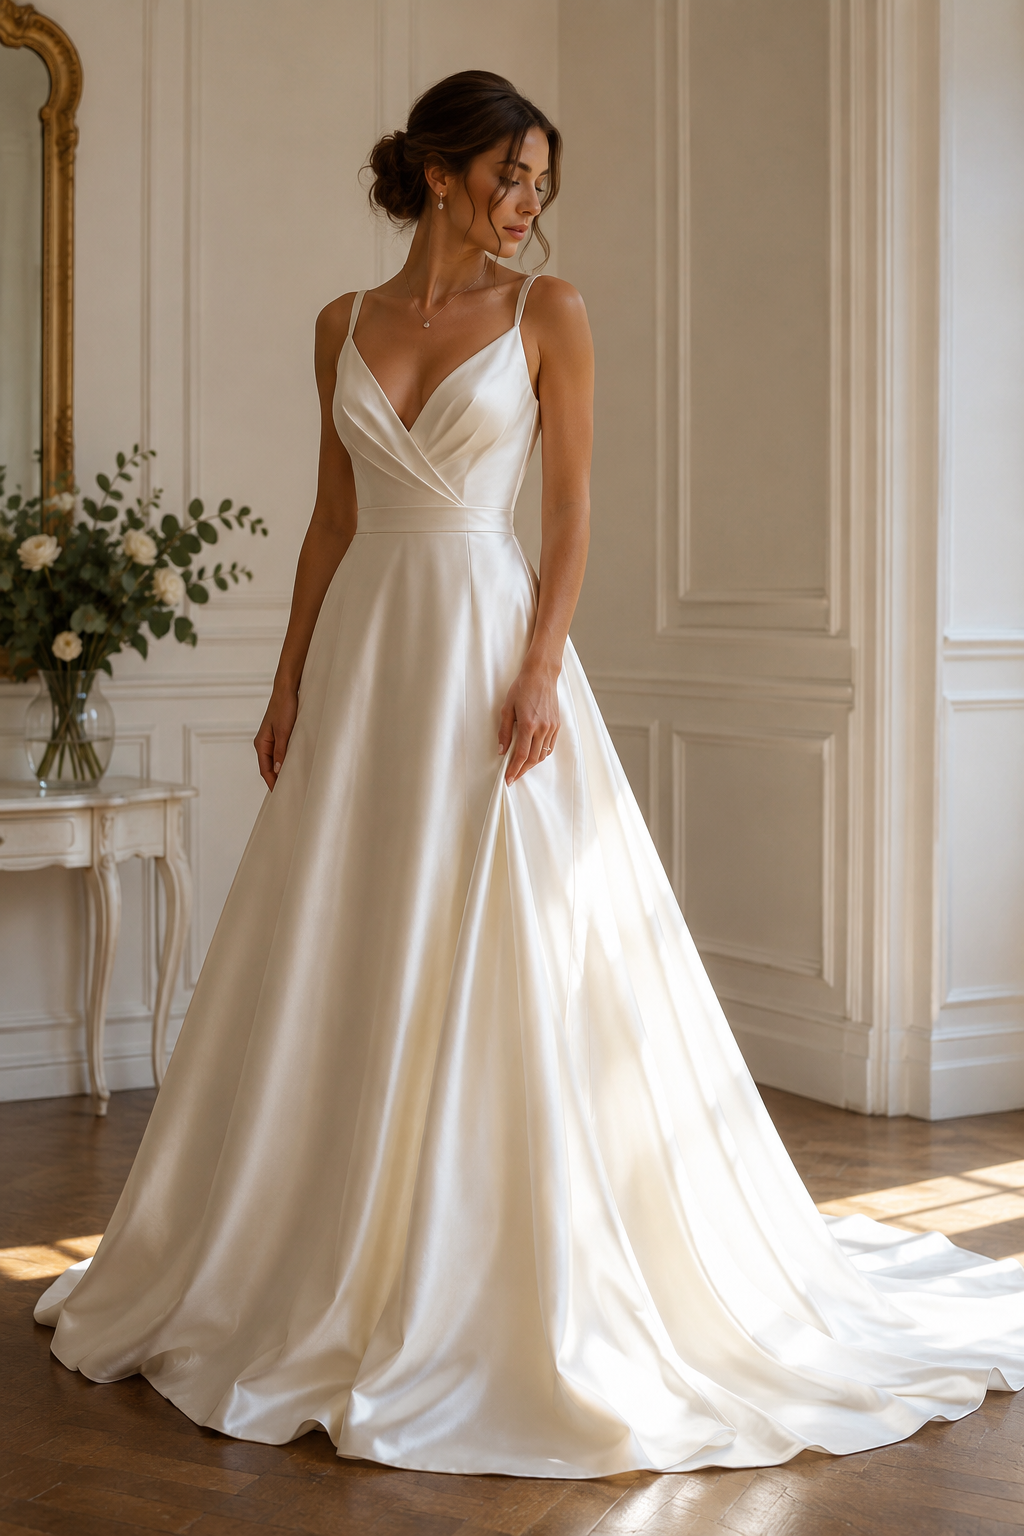
1. Charmeuse Bias-Cut Slip with Low Scoop Neck
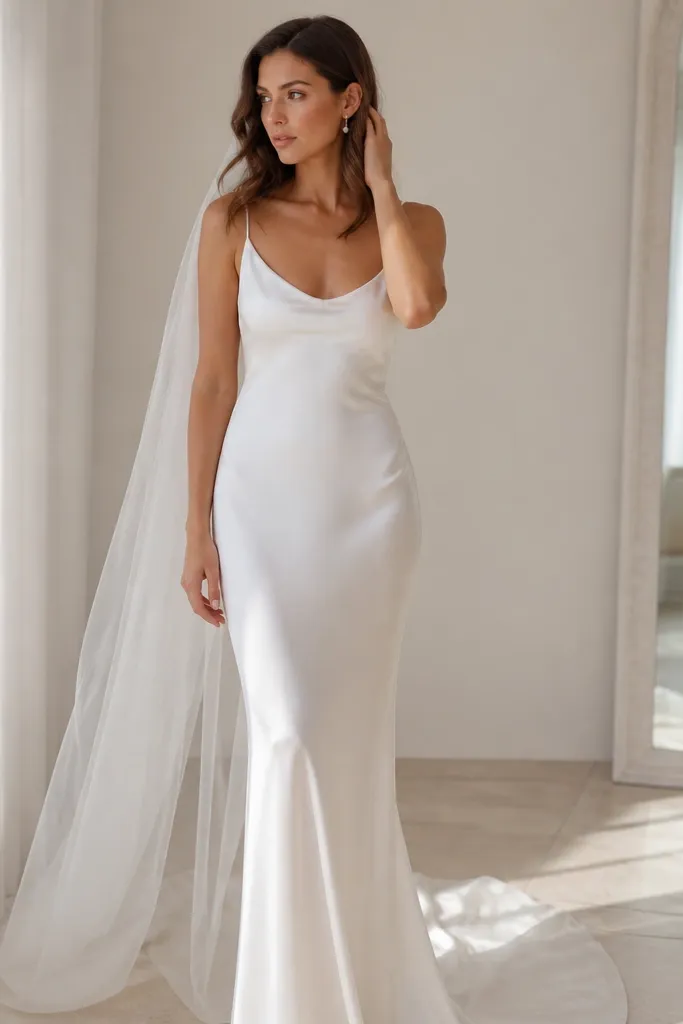
Start your try-on with a strap or bra fit check by pinning the neckline lightly so the silk doesn’t pull. Then step under a window and take a photo from chest-up and from knee-up to see how the bias cut falls. Finally, ask the shop to check how the side seams sit on your hips, because charmeuse can emphasize uneven tension if it’s not aligned. Budget tip: request a plain lining option first; you can add sleeves or a topper later instead of paying for heavy embellishment up front.
Choose this if you want silk to look like it belongs to your body, not on top of it. Charmeuse bias-cut fabric hugs lightly at the bust and then falls with a smooth diagonal drape, which photographs as clean lines. The low scoop neck is also forgiving — it frames the collarbone without the stiffness of a high lace collar. In a wedding weekend setting, this style shines under daylight because the fabric catches light in soft streaks instead of harsh sparkles. It’s a smart pick for courthouse ceremonies, beach weddings, and city halls where you want “effortless” instead of “overdone.”
Skip thisAvoid choosing this cut if you hate how diagonal seams move — it will reveal every shift when you walk.
Quick tipBring a nude strapless bra even if you think you won’t wear one — silk slip necklines show strap lines fast.
2. Silk Crepe Column Dress with Square Neck
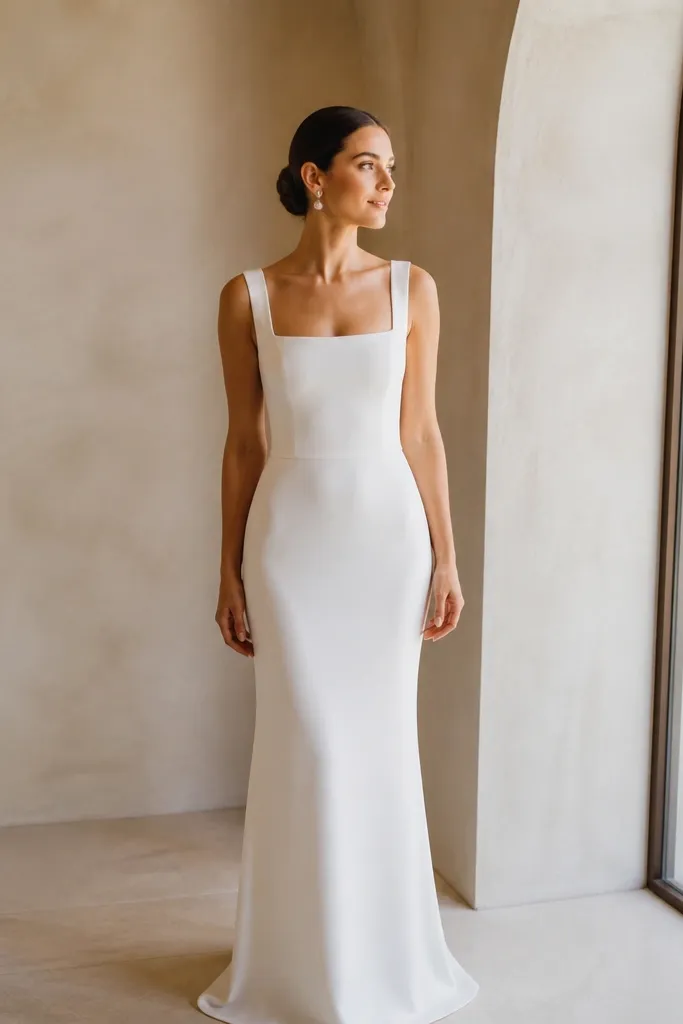
Silk crepe is the practical silk — it looks refined while staying structured enough to hide minor fit bumps. A square neck gives support and keeps the silhouette flat and photo-ready from every angle. This dress is a great “first appointment” option because it doesn’t rely on heavy lace to look good; the fabric and seam lines do the work. Under flash, crepe stays matte enough that it doesn’t reflect light in distracting patches. If your wedding weekend includes both daytime photos and evening dinners, crepe is a safe bet that still looks special.
Start by checking shoulder placement: the straps or seam should sit where your shoulder actually ends, not where it “should” end. Then stand sideways and take a photo at hip level to confirm the skirt stays straight without pulling. Finally, ask about a small waist shaping panel or internal corset — crepe column dresses look best when they’re smoothed at the midsection. Plan this as your anchor look in your itinerary, then compare it to a shinier silk so you can feel the difference.
If you’re between sizes, pick the size that lets you zip without tugging at the square corners.
Skip this silhouette if you want a lot of volume — it won’t give you that ballgown look.
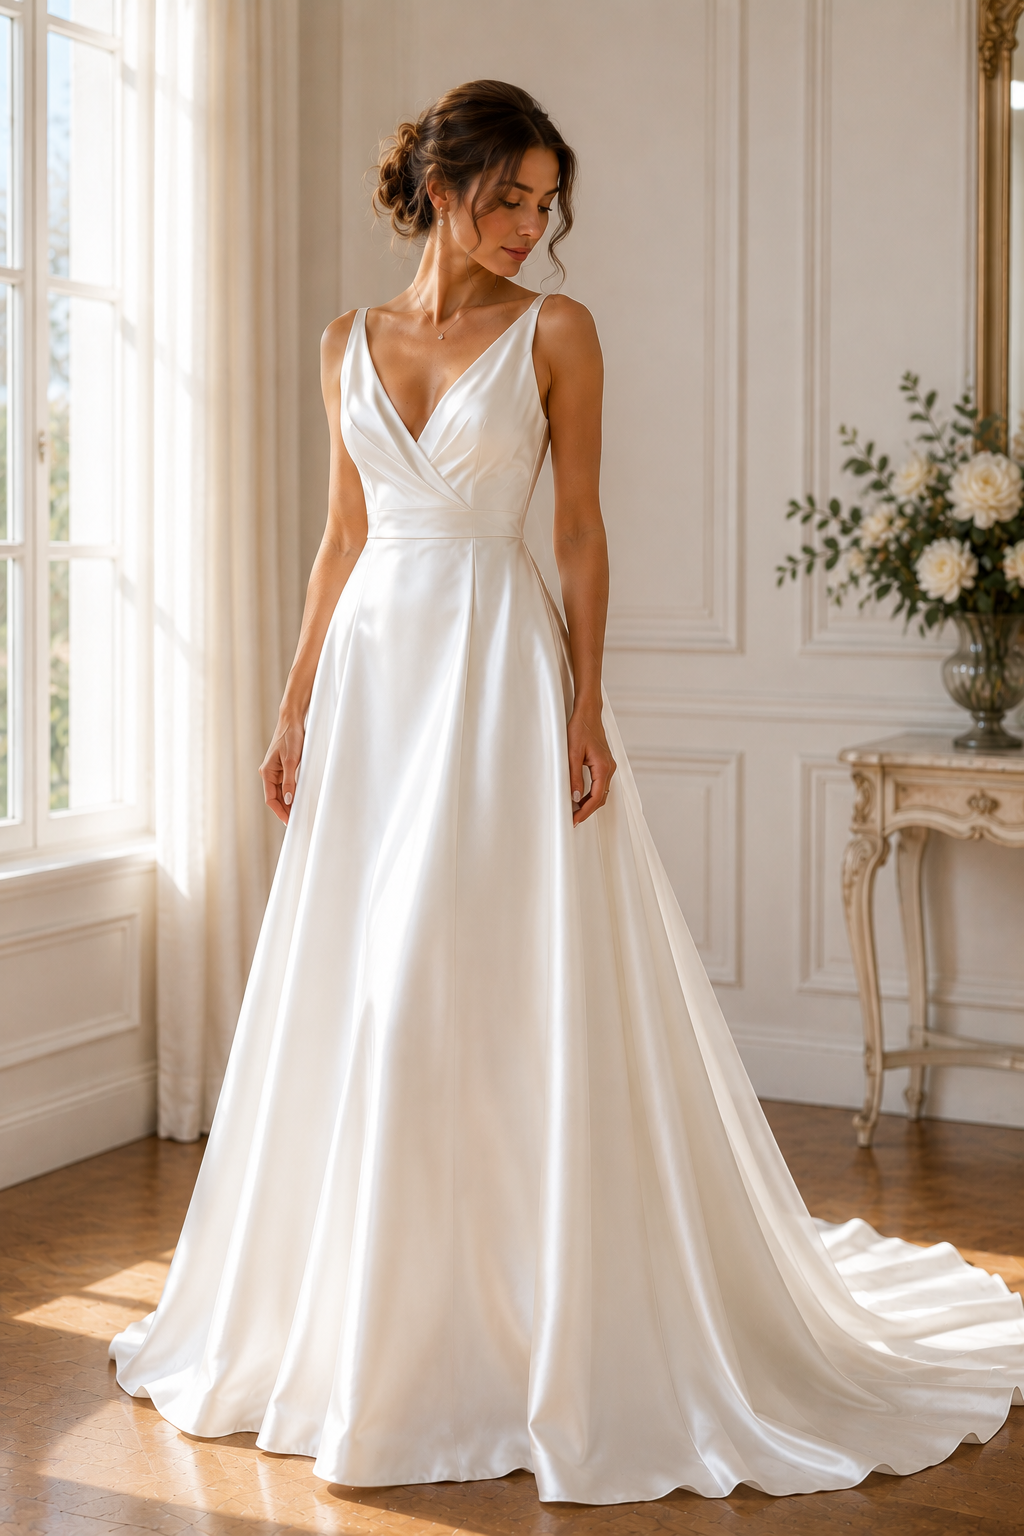
3. Silk Satin A-Line with Soft Pleated Skirt
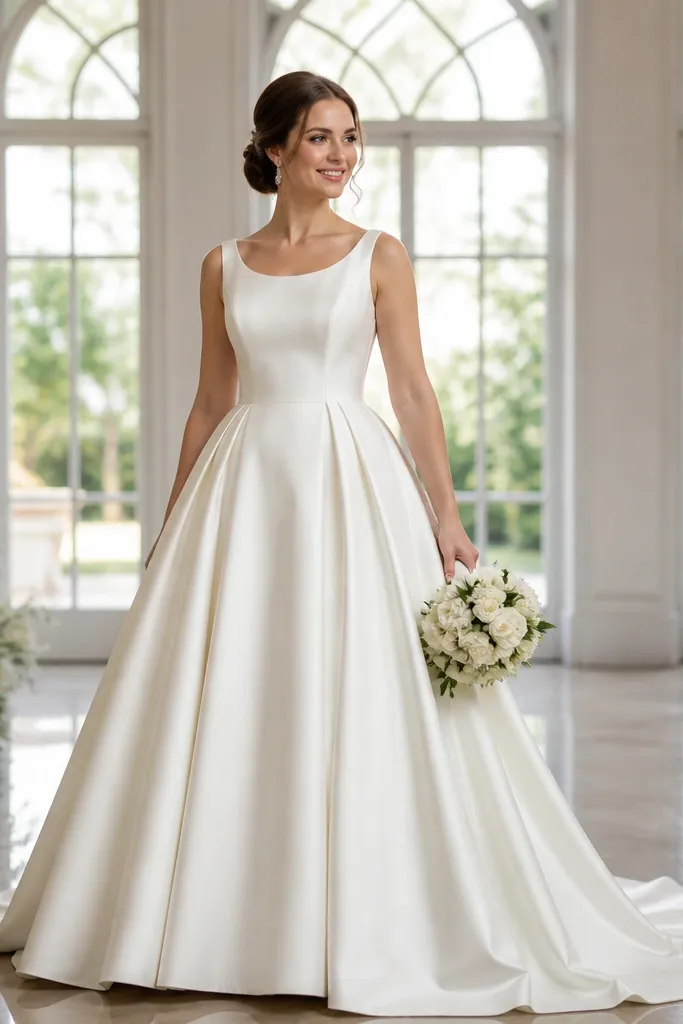
Start by checking that the pleats begin exactly at the waist seam, not below it, so you don’t lose definition. Then do the “walk test” inside the store — turn slightly and watch how the pleats separate instead of clumping. Finally, photograph the dress in full length and from the side, since A-lines can look different from straight-on vs angled shots. For budget planning, ask whether the skirt can be hemmed without changing the pleat shape.
A-line silk satin is the “yes dress” for people who want movement without the drama of a full ballgown. Satin reflects light more than crepe, but a soft pleated skirt controls shine so it doesn’t look flat. The waist pleats also create a flattering shape because they start close to your natural waist and then fan out. This style photographs beautifully in outdoor settings where the skirt can catch a breeze. It’s also forgiving for wedding weekends with unpredictable weather — a satin skirt still looks polished when it sways.
Skip thisAvoid satin that feels slippery and thin — it will cling where you want smoothness.
Quick tipChoose a slightly heavier satin if you’re buying off the rack; lighter satin shows tension lines when you sit.
4. Chiffon-Silk Overlay Over Charmeuse Slip
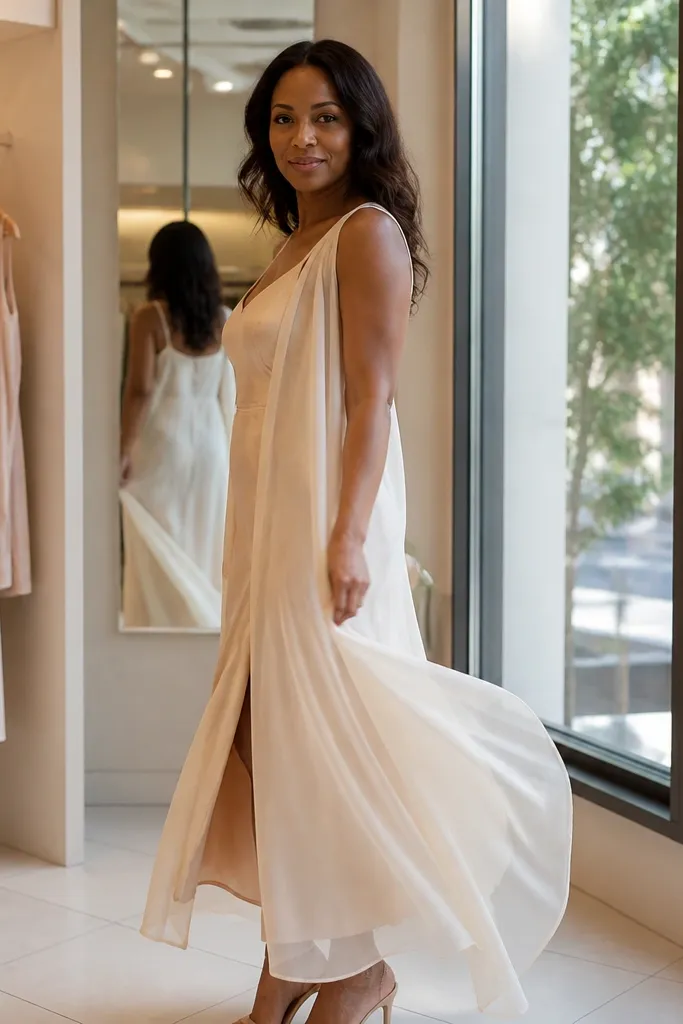
This combo gives you the best of both worlds: the clean base of charmeuse and the romantic airy look of an overlay. The overlay creates dimension in photos, especially when someone moves — the fabric catches light and makes the dress feel alive. It also solves a common problem: if you love silk sheen but want more coverage around the arms or shoulders, the overlay does it without turning the whole dress into heavy lace. Under flash, the overlay layers add depth instead of looking like flat fabric. It’s ideal for evening receptions, indoor ceremonies, and anyone who wants “romance” without bulk.
Start by lifting your arms carefully while you’re wearing it; the overlay should stay in place and not pull across the neckline. Then take a photo with flash from chest-up and from waist-up to see if the overlay creates a flattering highlight line. Finally, ask about lining coverage under the overlay, especially if your wedding has strong lighting — you want no visible seams or thin spots. Group this try-on right after a plain slip dress so you can compare look and comfort back-to-back.
Look for overlay edges that are rolled or neatly finished; cheap finishing makes the overlay flare in photos.
Don’t pick this if the overlay is too sheer for your comfort — you’ll end up adjusting all day.
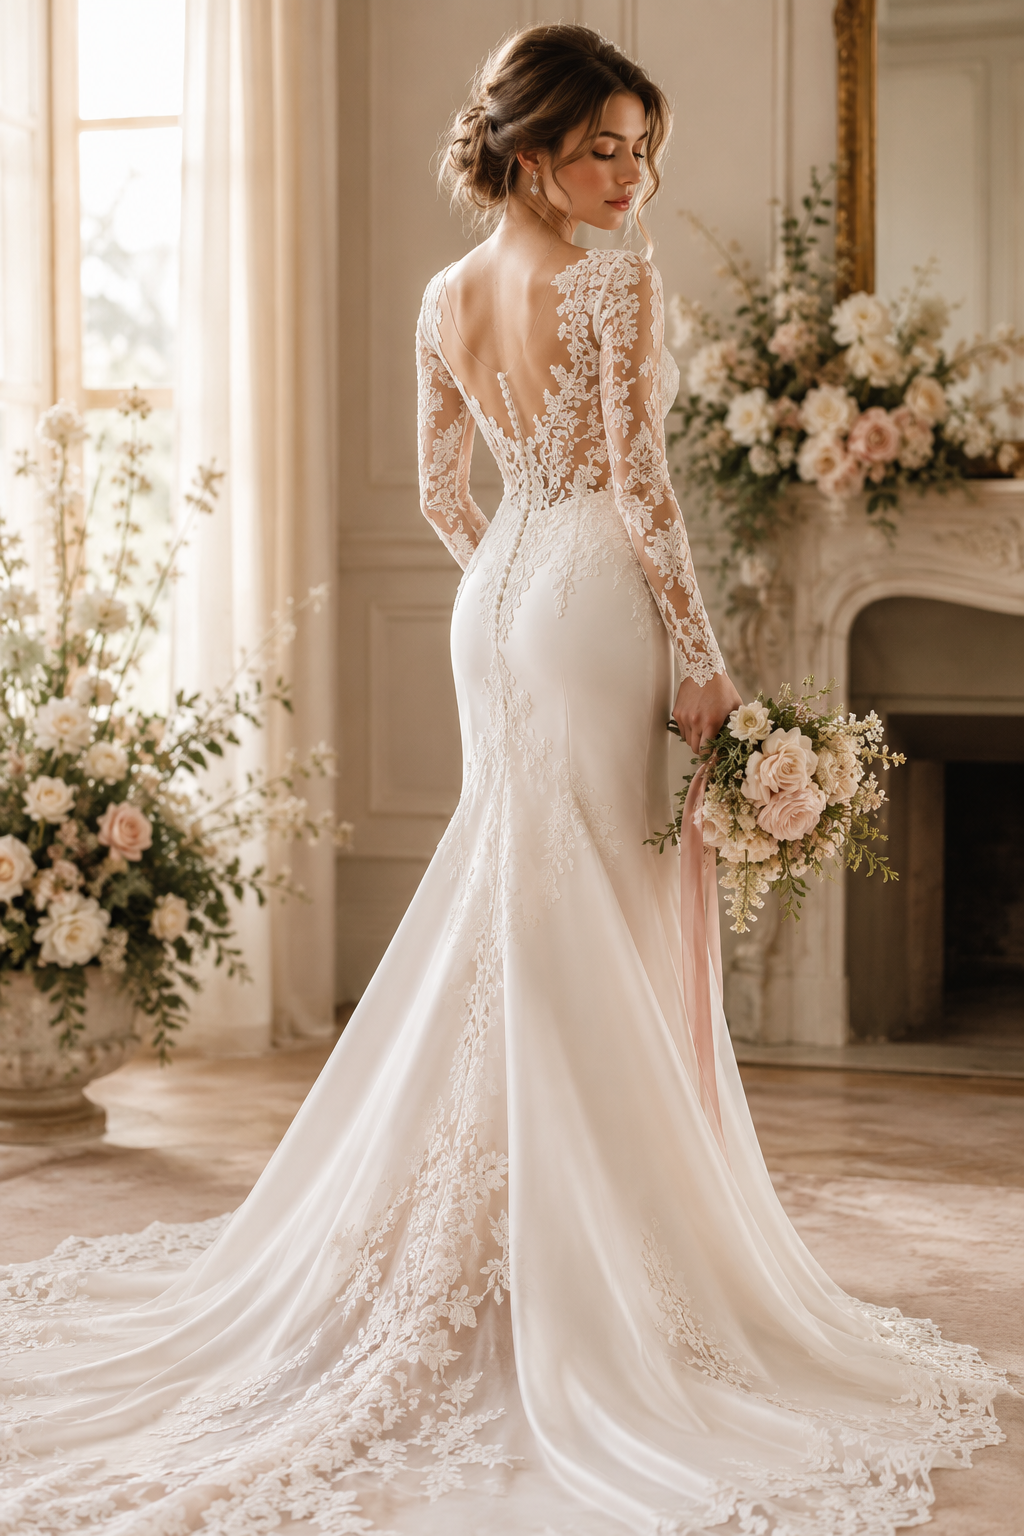
5. Silk Crepe Mermaid with Structured Bust
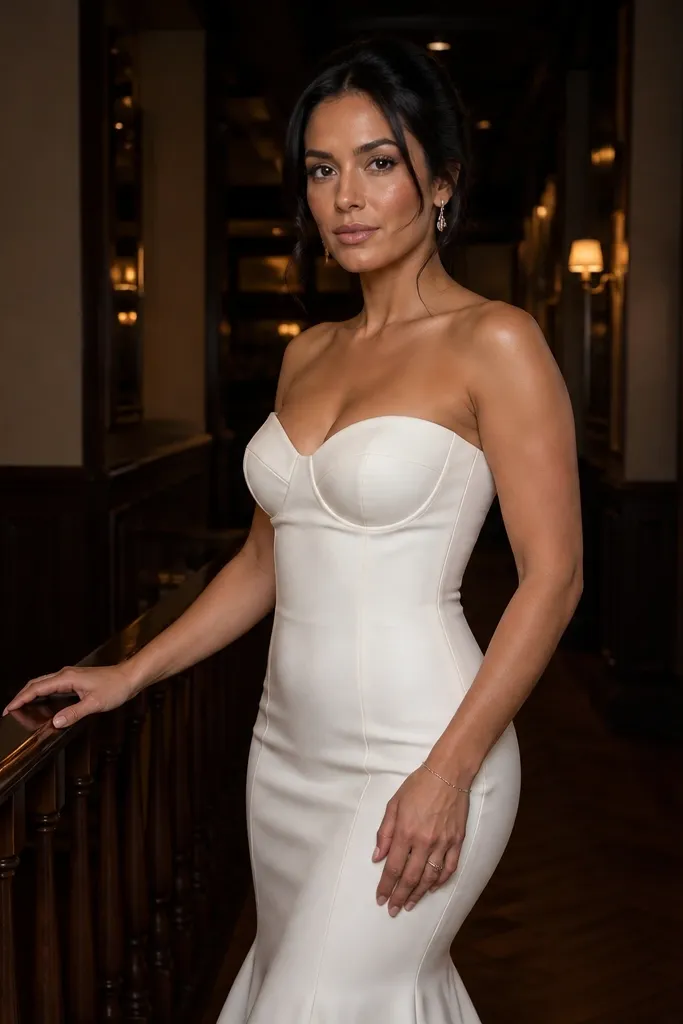
Start by checking the bust support: you should be able to raise your arms slightly without the neckline collapsing. Then ask the shop to pin the waist and take a photo from the side to confirm the flare begins right at your preferred point. Finally, do a “sit test” on a chair — mermaid crepe should not pull at the hips or twist at the hem. For a budget-friendly plan, bring shapewear that matches your wedding-day underwear so the fit check is accurate.
Mermaid silhouettes look stunning in silk because the fabric can be pressed smooth and still move with your steps. Silk crepe keeps the shape controlled, especially around the bust where fit must be exact. A structured bust — with boning or a reinforced panel — makes the dress feel secure, which matters when you’re walking, hugging guests, and taking photos. This style is a strong choice for wedding weekends where you want one dramatic dress that still looks classy in daytime photos. Flash photos also look better because crepe’s matte finish reduces glare on curves.
Skip thisSkip mermaid crepe if you dislike alterations; this silhouette needs careful hemming and seam alignment.
Quick tipIf the flare starts too high, it will feel tight in photos — adjust before you fall in love with the bodice.
6. Charmeuse Wrap Dress with Tie Waist and Hidden Buttons
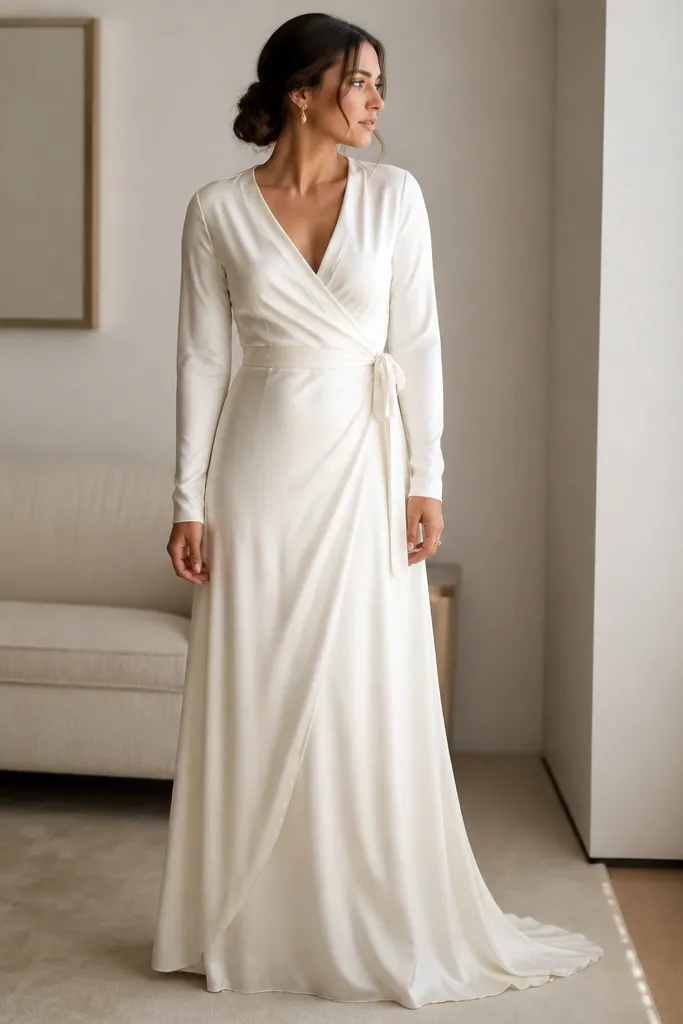
Start by wrapping it and tightening the tie while you stand — then check the front seam line with a mirror. Then take a photo straight-on to confirm the V shape sits where you want it, not higher or lower. Finally, ask the tailor to reinforce the inside so the wrap doesn’t shift when you sit. Plan this after a fitted dress so you can compare which neckline and waist placement makes you feel most confident.
A wrap dress in charmeuse is one of the most flattering silk options because it adjusts to your body in real time. The tie waist lets you fine-tune definition without relying on heavy embroidery. Clean hidden buttons keep the wrap secure and keep the front looking smooth on camera. Under bright indoor lighting, charmeuse shows a gentle sheen that makes the wrap line look intentional rather than accidental. This style suits wedding weekends where you’re dealing with travel bloating or a changing fit schedule — it’s forgiving, but still looks intentional.
Skip thisDon’t pick a wrap that uses only ties — it will move too much for a full wedding day.
Quick tipChoose a wrap with a deeper overlap if you’re self-conscious about coverage in flash photos.
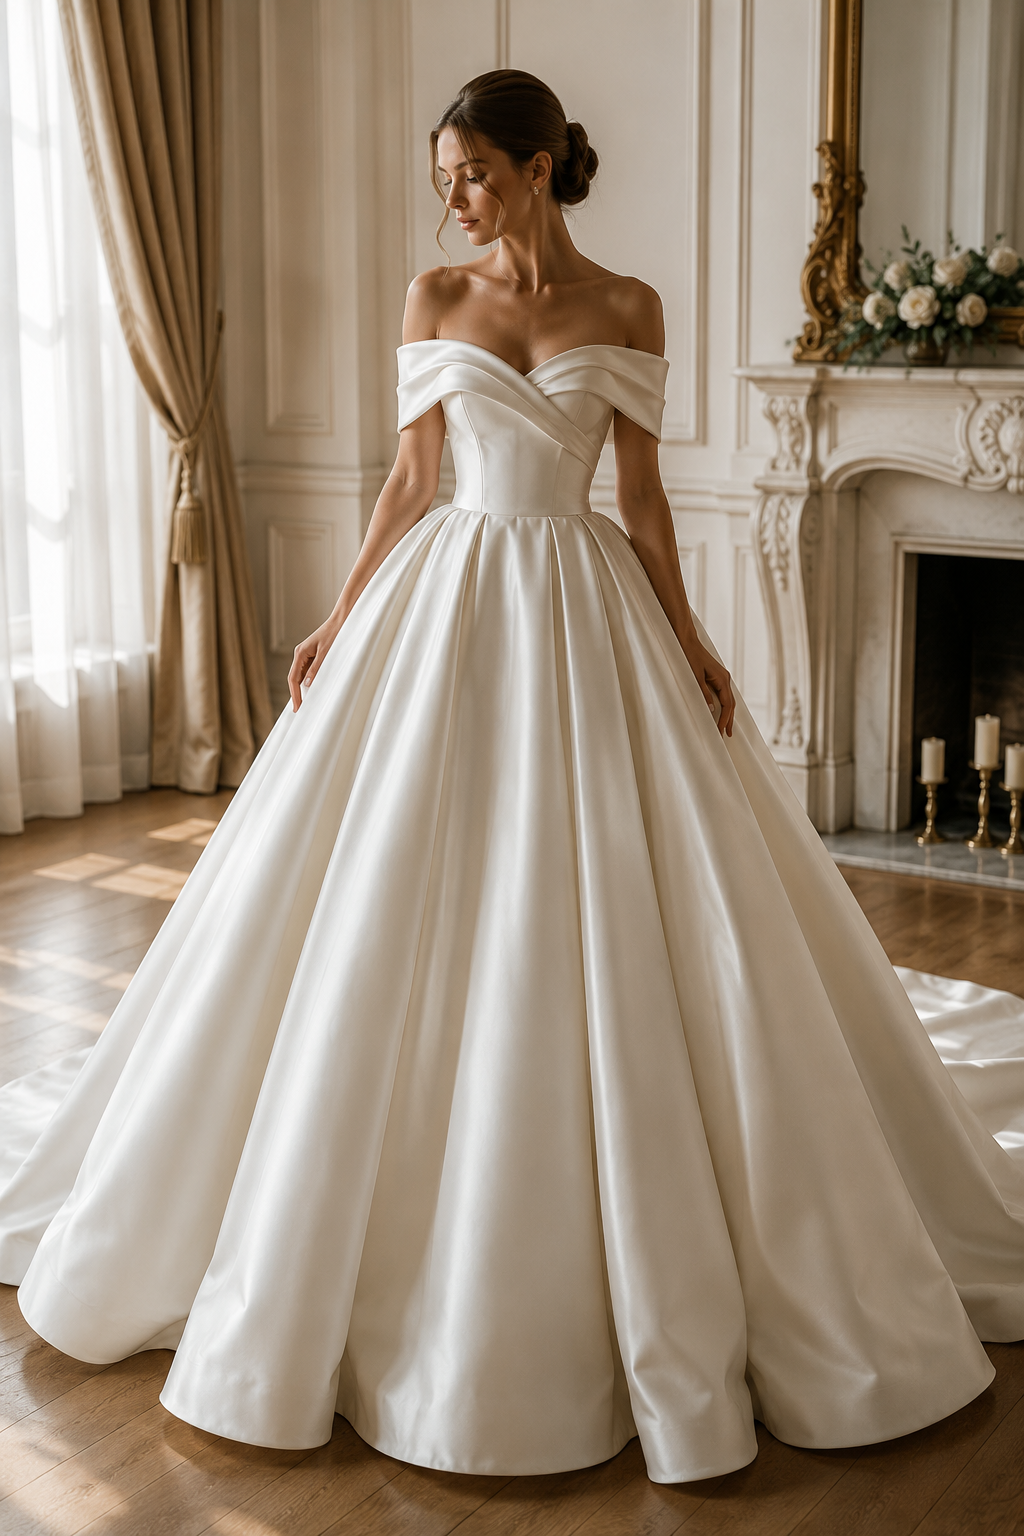
7. Silk Satin Off-Shoulder with Straight Neckline
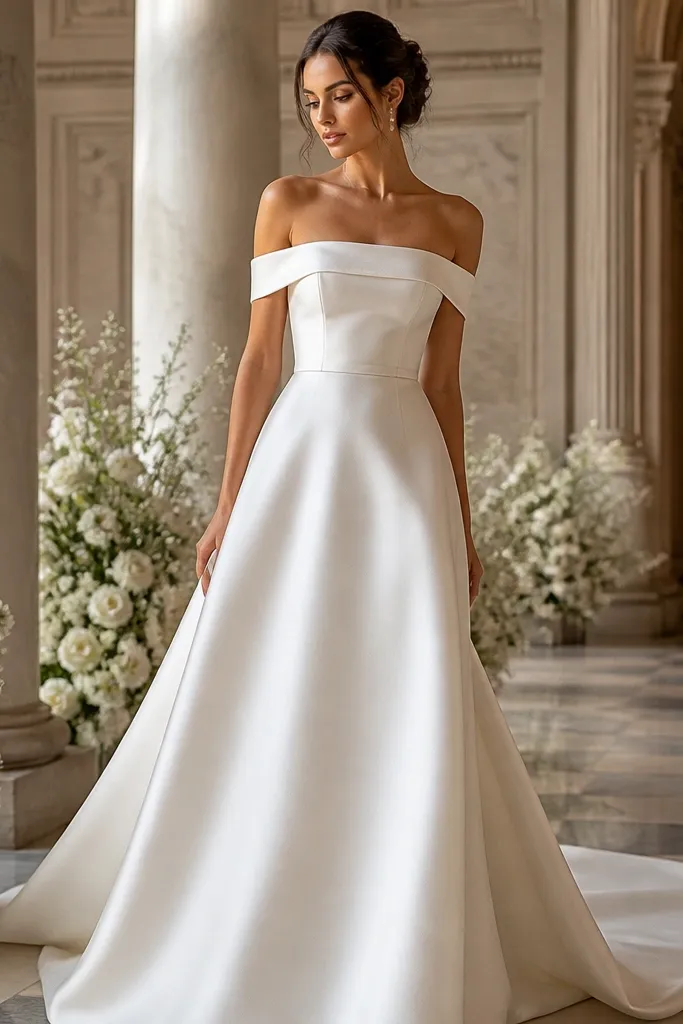
Start by checking that the off-shoulder band sits flat without sliding — use the mirror to see if it bunches at the upper arm. Then take two photos: one with your arms relaxed, one with hands by your sides, because off-shoulder bands shift during posing. Finally, ask about bra compatibility; you want no visible strap lines under the band. For budget planning, prioritize the neckline fit first, then decide on adding a removable train later.
Off-shoulder satin looks polished because the neckline is simple and silk does the rest. The straight neckline creates a crisp frame for photos, and satin’s sheen adds a glow without needing heavy embellishment. This style works especially well for people who want their shoulders and collarbone visible but still want a more formal shape than a slip dress. In evening lighting, satin reflects in a way that looks smooth and expensive. It’s also a good choice if your wedding weekend has a lot of indoor portrait time — the neckline stays sharp in flash.
Skip thisSkip thin satin with a loose band — it will sag and look messy in photos.
Quick tipIf you can, test in the store’s brightest lights — satin shows fit issues quickly under harsh bulbs.
8. Silk Crepe Top with Long Lace-Look Sleeves
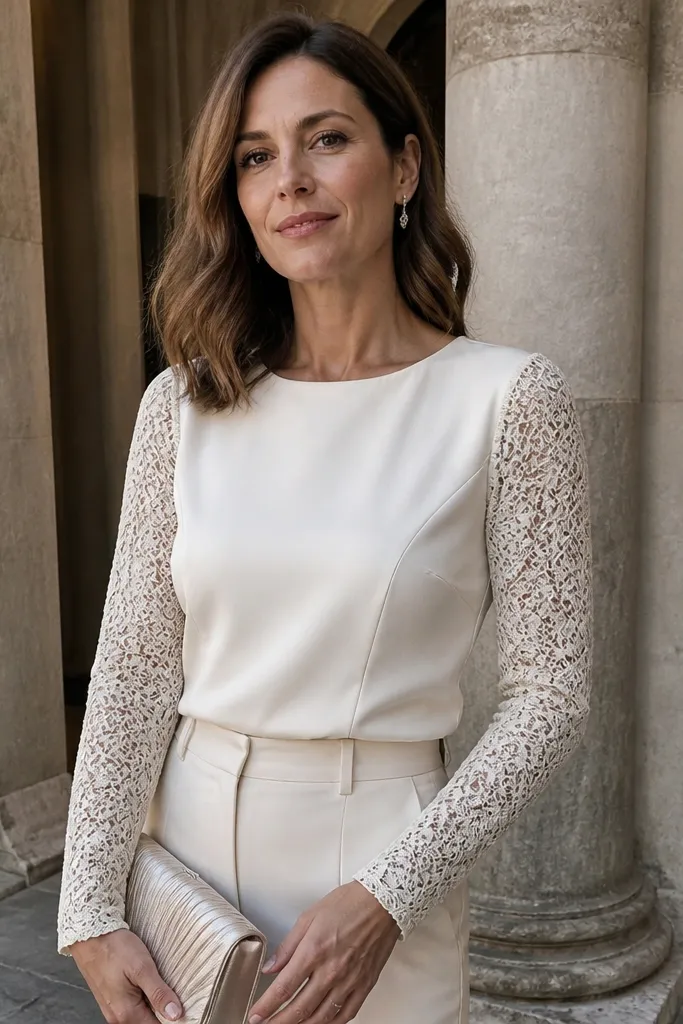
Start by checking sleeve tension — you should be able to lift your arms and still have the sleeve sit flat. Then photograph your arm length and wrist coverage in full length, because sleeves can look shorter in flash than in daylight. Finally, ask whether the bodice is lined with a breathable layer; crepe can feel warmer in indoor ceremonies. If you’re budgeting, choose this bodice and pair it with a simpler skirt so alterations don’t balloon.
This is a smart “coverage without clutter” option. Crepe keeps the body smooth, and long sleeves add romance and modesty without turning the dress into a heavy lace costume. The sleeve design matters: you want a sleeve that hugs lightly and ends cleanly at the wrist, because sloppy sleeve length ruins photos. This style is ideal for a wedding weekend with a church ceremony or a venue with strict dress expectations. Under flash, the sleeve texture can add depth while the crepe body stays matte and flattering.
Skip thisAvoid sleeves that are see-through at the elbow — you’ll notice it in every candid photo.
Quick tipWear nude or matching undergarments so the sleeve texture doesn’t reveal contrast in flash.
9. Bias-Cut Silk Satin Skirt with Simple Crepe Bodice
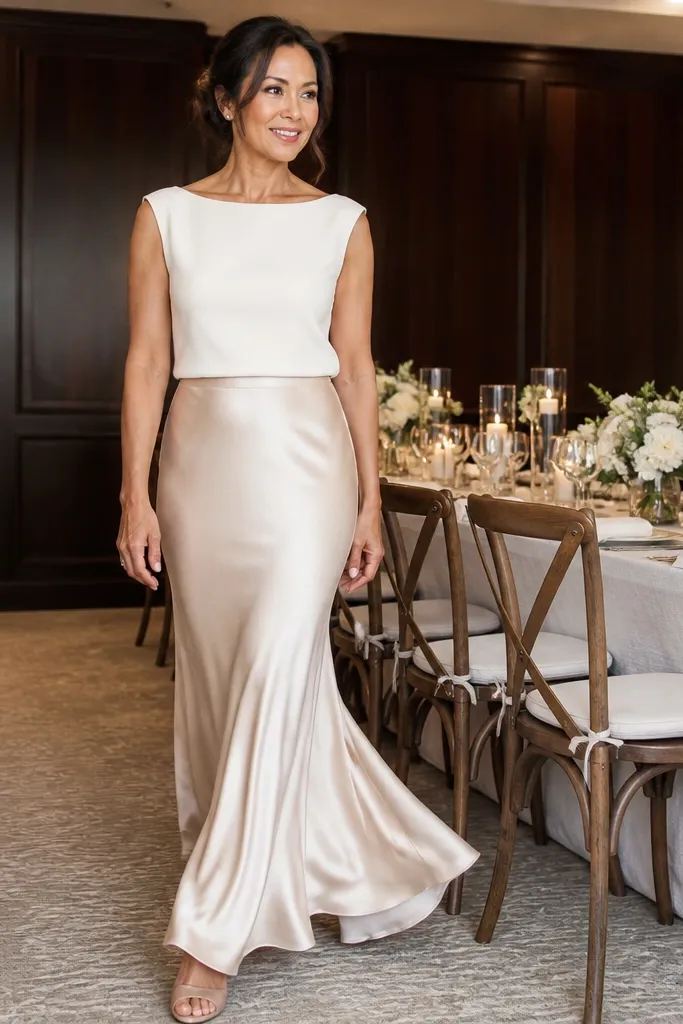
Start by checking the waist seam line where the bodice meets the skirt; it should sit exactly at your natural waist. Then take side photos while walking slowly in the shop, because bias skirts reveal their drape as you move. Finally, ask about hemming — bias-cut hems need careful finishing so the hem doesn’t twist. Budget tip: choose a simpler bodice and spend on skirt finishing since that’s what will show in your ceremony photos.
This hybrid look is for people who love movement but don’t want a fully slip-style dress. The bias-cut skirt drapes in a way that looks cinematic in photos, while the crepe bodice keeps the top structured and hides small fit issues. The result looks intentional even when it’s minimal. It’s also a great choice for wedding weekends because you can swap the “look” with accessories — a veil, a belt, or a fitted jacket changes the vibe without changing the dress. If you want your photos to show elegance more than decoration, this one wins.
Skip thisDon’t buy this if you hate the feeling of fabric sliding against your legs — it’s part of the look.
Quick tipIf the skirt hem looks wavy in the mirror, ask for a lining or stabilization so it hangs true.
10. Silk Charmeuse Corset Bodice with Full Tulle Skirt
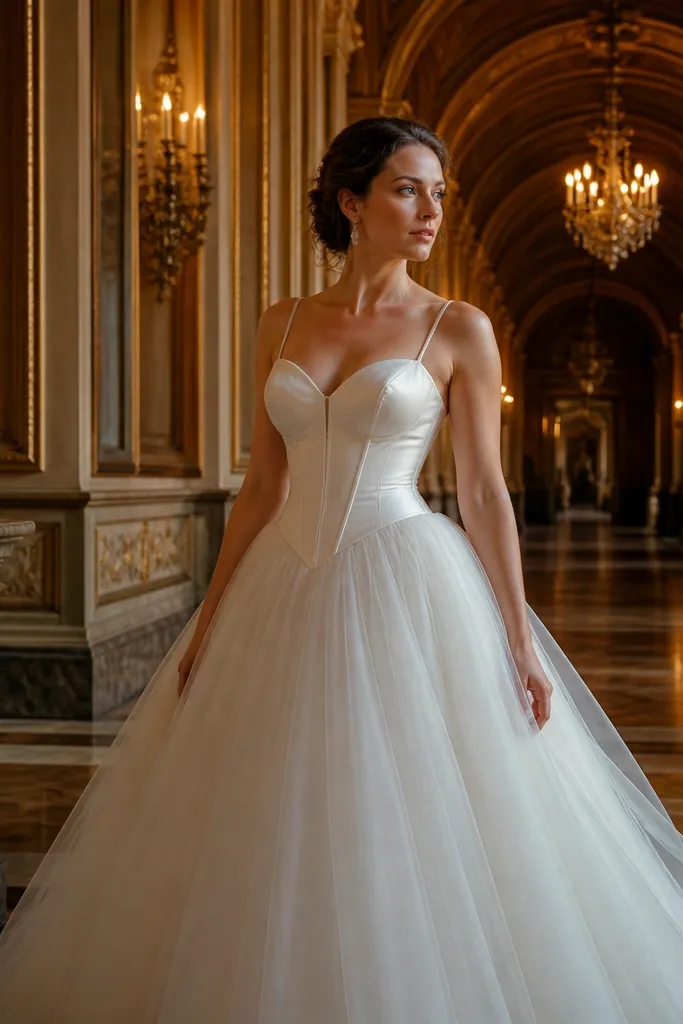
This dress balances structure and softness. The charmeuse corset gives you a smooth, flattering center front, while the full tulle skirt creates volume that reads clearly in photos from a distance. The contrast is what makes it photogenic — you get a clean sheen on top and a cloud of movement below. This style is ideal for a wedding weekend where you want one classic “bridal moment” in formal portraits. In daylight, the tulle holds shape; in evening lighting, the charmeuse top stays elegant without glare.
Start by checking boning placement — the corset should lift without digging, and the front seam should sit straight. Then photograph from waist-up and from full length to see how the volume reads. Finally, test movement by walking a few steps and turning; the tulle should swirl without snagging. For cost control, ask whether the tulle skirt can be simplified in layers without affecting the silhouette.
Choose a corset with a modesty panel so the center front stays smooth in flash photos.
Avoid corsets with thin lining — they can crease and show lines under the tulle’s bright highlights.
11. Silk Satin Column with Front Slit and Square Back
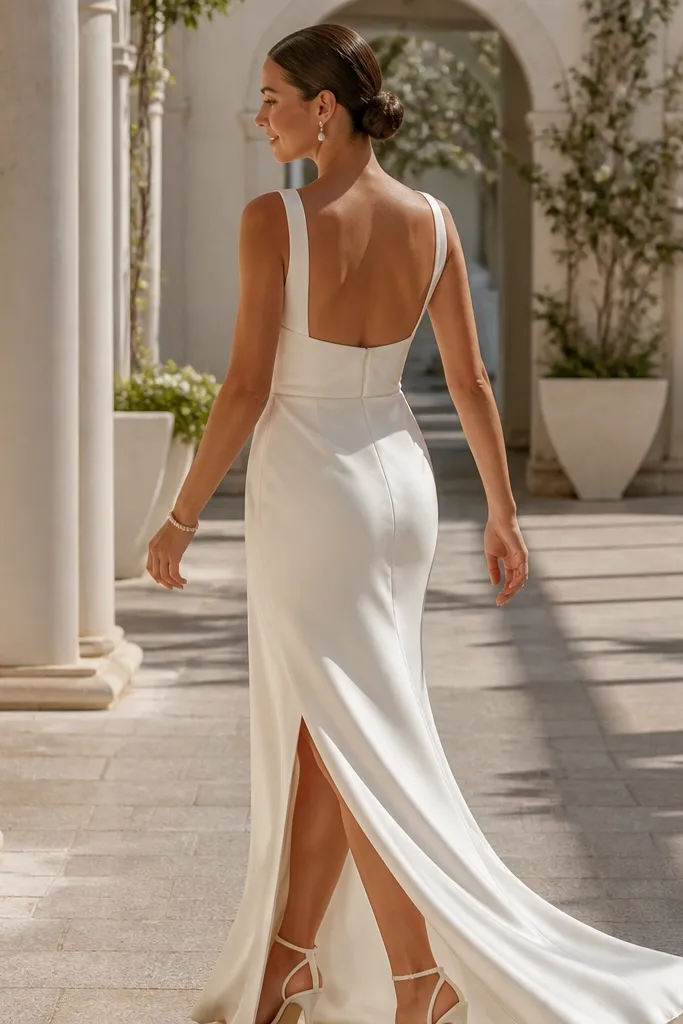
Start by checking the slit height while you stand and sit — the slit should not pull open too much when seated. Then take a photo from the back while you’re standing straight, because square backs show fit instantly. Finally, ask about lining thickness near the slit so it doesn’t cling when you walk. Plan this as a late-day try-on after you’ve already tested your “comfort” needs — you’ll know what shoes you’re wearing and can judge movement properly.
A satin column with a front slit is sleek, modern, and photo-friendly because it shows leg lines without looking accidental. The square back adds a clean geometry that looks great in portraits, especially when you turn for group photos. Satin’s sheen makes the silhouette feel dressed up, and the slit helps you move comfortably across a wedding weekend schedule. This is a strong pick for city weddings, rooftop ceremonies, and after-party dinners where you want to look good from every angle. Flash photos also look sharp because the square back holds shape.
Skip thisSkip a slit that’s too high — it will read like a casual dress in daylight photos.
Quick tipWear the shoes you plan to buy with during the final fitting check, not during the first try-on.
12. Silk Crepe Tea-Length with Flutter Sleeves
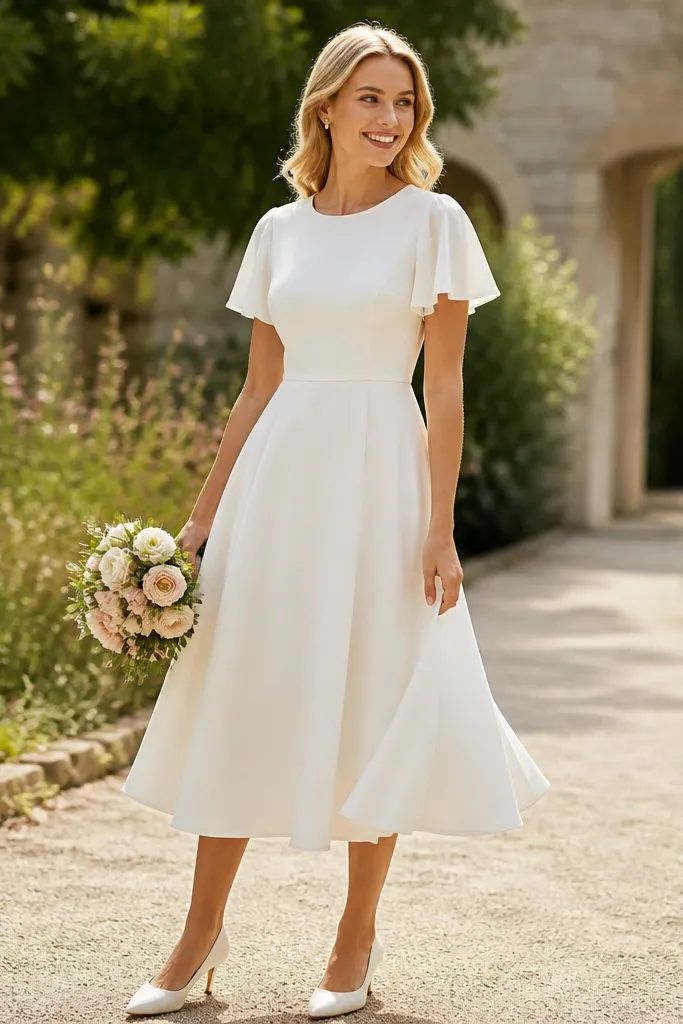
Start by measuring the hem against your shoes; tea-length needs the right drop so it doesn’t hit in an unflattering spot on your calf. Then take a photo sitting down and standing up to see how the flutter sleeve drapes. Finally, ask whether the skirt is lined — unlined crepe can show texture in flash. For budget planning, focus on hem and sleeve fit since those are the parts alterations change the most.
Tea-length silk crepe is underrated for wedding weekends because it photographs beautifully at eye level and feels comfortable all day. Flutter sleeves soften the look around the upper arms and photograph well in motion. Crepe keeps it from looking too shiny or too costume-like. This is a great choice for rehearsal dinners, ceremonies with a casual dress code, or destination weddings where you don’t want a long hem to fuss with. Under warm indoor lighting, tea-length crepe looks polished, not dull.
Skip thisAvoid flutter sleeves that are too thin — they cling and show every arm movement.
Quick tipBring a small handheld steamer so you can remove wrinkles before your photos in the hotel room.
13. Silk Charmeuse Halter with Backless Keyhole
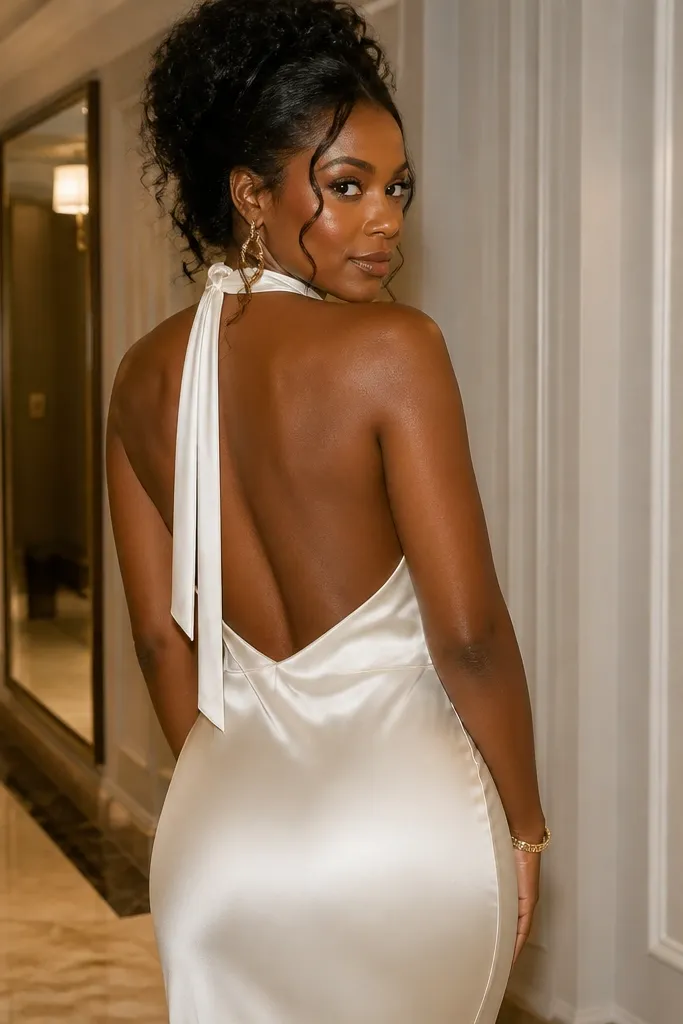
If your wedding weekend includes a photographer who loves back shots, this style delivers. A halter neckline frames the shoulders and draws attention upward, while a keyhole back keeps it classy rather than fully bare. Charmeuse makes the back look smooth and glossy, which holds up in both natural light and flash. This dress is best for people who want a modern silhouette and clean lines more than lace. It also works well for destination weddings where you’ll be walking on photos and need a dress that looks good from every direction.
Start by checking neck comfort: halter straps should not cut into the back of your neck when you stand still for photos. Then take a back photo in bright light and flash to see how the keyhole edges look. Finally, ask about support — you need secure fit without pulling at the front. Budget tip: choose a simple skirt and spend on strap and back finishing since those are hardest to alter later.
Use a stick-on bra or a low-profile backless solution in the fitting so you can see the neckline and back cleanly.
Don’t choose this if your backless shape doesn’t feel secure — you’ll end up adjusting constantly.
14. Silk Satin Wrap Skirt with Plunging V Neck
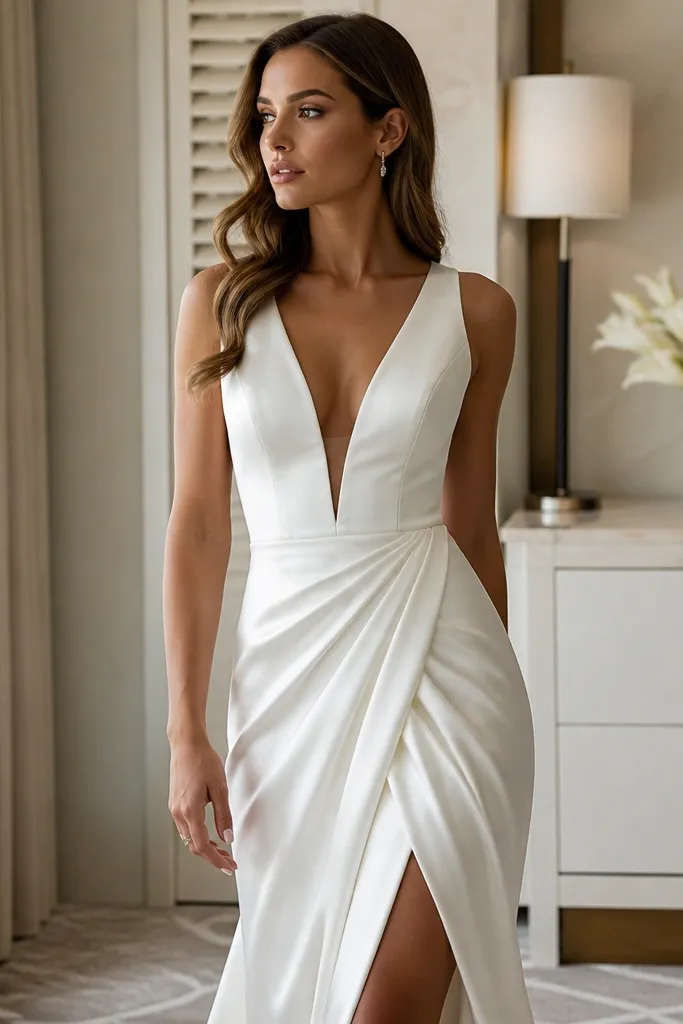
This is a bold, photogenic choice that looks intentional when the V is balanced. Satin adds a glow, and the wrap skirt gives movement that reads well in candid shots. The trick is keeping the V from looking too harsh — you want a neckline depth that flatters without pulling fabric tight at the bust. It’s ideal for wedding weekends where you want a statement dress for portraits and you’re comfortable with a more dramatic silhouette. Under flash, satin glow can look luxe if the fabric is well-lined and the overlap is secure.
Start by checking the bust overlap; the wrap should close smoothly with no gapping. Then photograph from front and slightly angled to confirm the V shape stays even across both sides. Finally, ask about a safety stitch or internal attachment so the wrap doesn’t shift during dancing. If you’re budgeting, pick this style when you’re already sure about your neckline — that reduces wasted try-ons.
Bring fashion tape for the fitting — it helps you see the neckline line without adjusting straps.
Avoid a plunging V on thin satin that shows tension lines across the bust.
15. Silk Crepe Halter with Scalloped Hemline
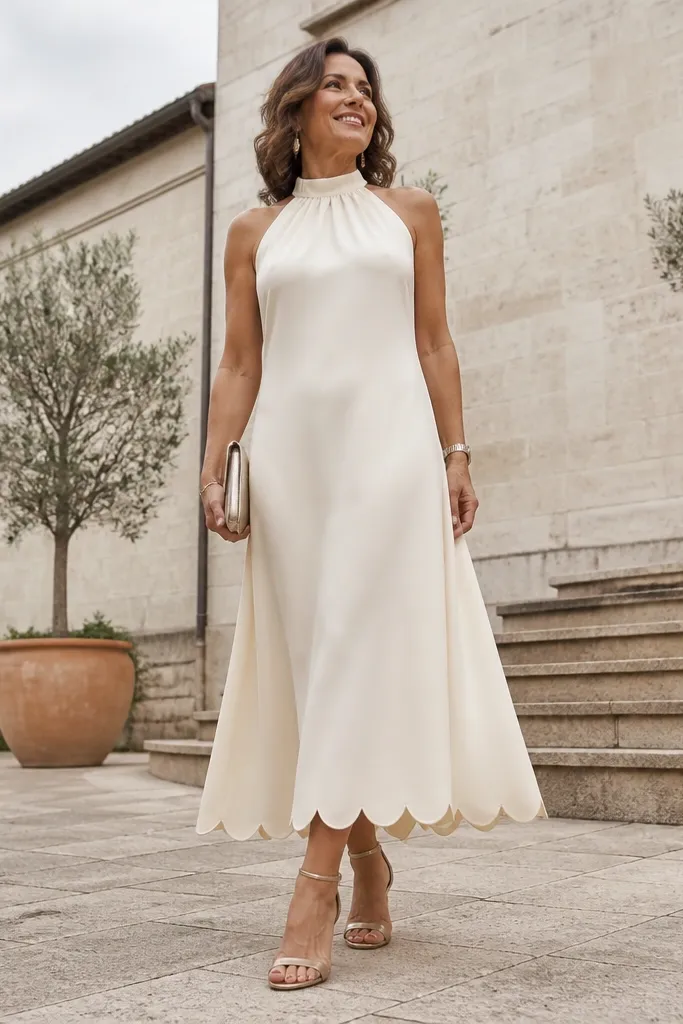
Scalloped hems add a soft, bridal detail that still feels grown-up when the base fabric is crepe. A halter neckline emphasizes posture and photographs well because it creates a clean line from collarbone to shoulders. Crepe keeps the scallops crisp instead of fraying into shine. This is a great pick for people who want something different from standard straight hems, especially if they want a dress that looks good in close-ups. It’s also practical for a wedding weekend because scalloped edges can hide minor hem imperfections after alterations.
Start by examining the scallop spacing — it should be consistent and not uneven around the perimeter. Then take a close photo of the hem from a standing angle and from a seated angle to see if it flips. Finally, ask whether the hem edge is finished with a stabilizing stitch so it doesn’t stretch. Budget tip: scalloped hems can be alteration-friendly, but confirm the shop’s ability before you commit.
Stand near a window and check the scallops in daylight — they look different under warm indoor bulbs.
Skip scallops that look wavy in the mirror — that usually means weak finishing.
16. Silk Satin Straight-Neck with Lace-Trimmed Waistband
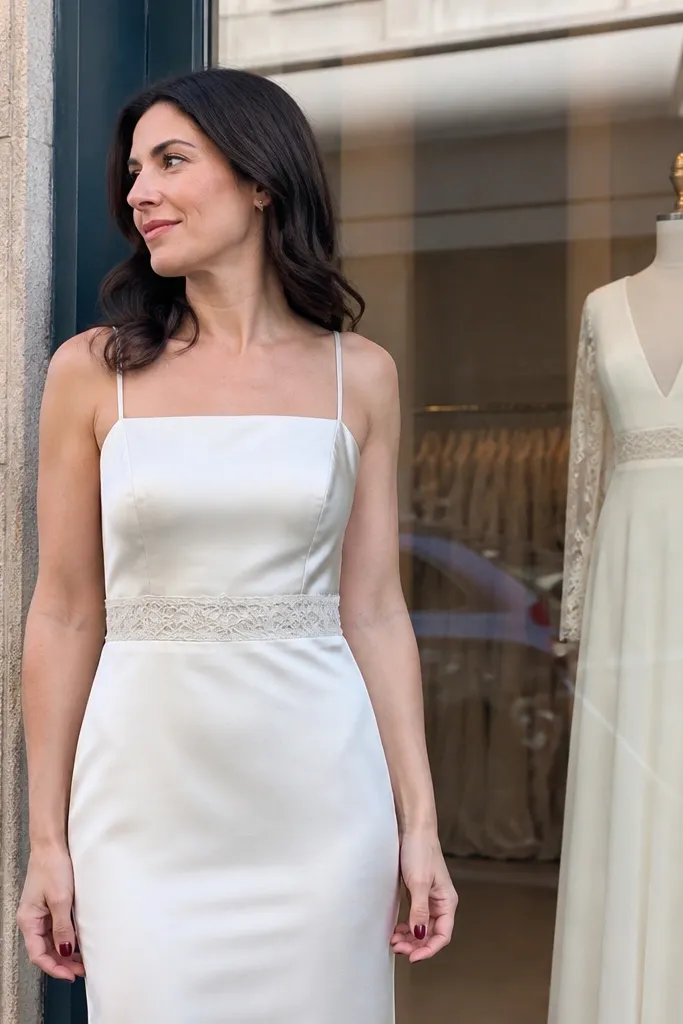
Start by checking that the lace trim sits flat — if it puckers, it will show in flash. Then take a photo straight-on at waist level and another from slightly above to see how the waistband line reads. Finally, ask whether the satin is lined at the bodice so the lace trim doesn’t create shadows you don’t want. For cost control, choose a simpler skirt and use the waistband detail as your main focal point.
This look keeps the silhouette clean and adds one focused detail: the lace-trimmed waistband. That detail photographs well because it creates a clear horizontal line that defines the waist without covering the whole dress in lace. A straight neck keeps the upper body structured, and satin’s sheen makes the dress feel bridal even if the design is simple. This is a good choice for wedding weekends when you want a timeless look but don’t want to deal with heavy lace all over. It also pairs well with minimal jewelry, so you don’t have to over-accessorize.
Skip thisAvoid lace trim that’s too thick — it can make the waist look bulky in photos.
Quick tipIf you’re wearing a veil, test the veil’s edge against the lace trim so the layers don’t clash visually.
17. Silk Crepe with Detachable Long-Sleeve Overlay
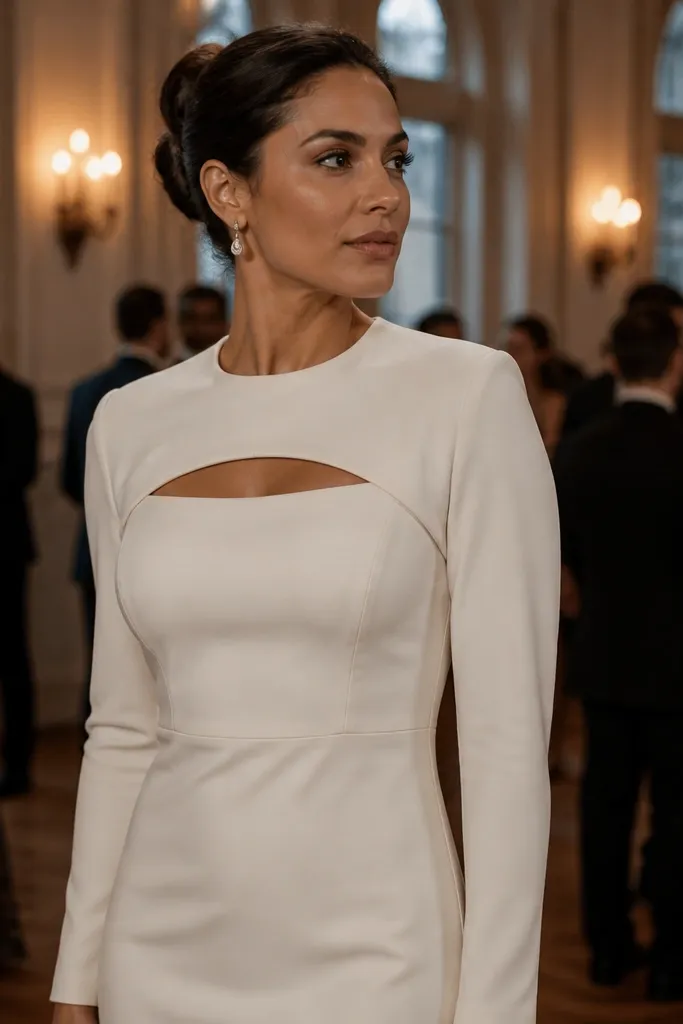
Detachable sleeves are a smart way to get two looks without buying two dresses. The crepe base keeps the dress smooth and modern, and the detachable long sleeves let you switch from ceremony coverage to reception ease. In photos, the change reads clearly: you get a more open neckline for portraits and a framed look for the vows. This is ideal if your wedding weekend includes different venues or if you want to feel comfortable during a long day. Silk crepe stays matte, so the focus stays on shape and fit rather than shine.
Start by trying the dress without sleeves first so you can judge the base fit at bust and waist. Then attach the sleeves and photograph both versions in the same lighting so you can compare honestly. Finally, ask about attachment method — hooks and hidden buttons should feel secure, not flimsy. Budget tip: this choice can reduce alteration costs because you’re altering one base dress rather than two separate garments.
Photograph the sleeve attach points — you want them invisible in flash.
Skip detachable sleeves with visible seams at the upper arm.
18. Silk Charmeuse with Ruched Bodice and Straight Skirt
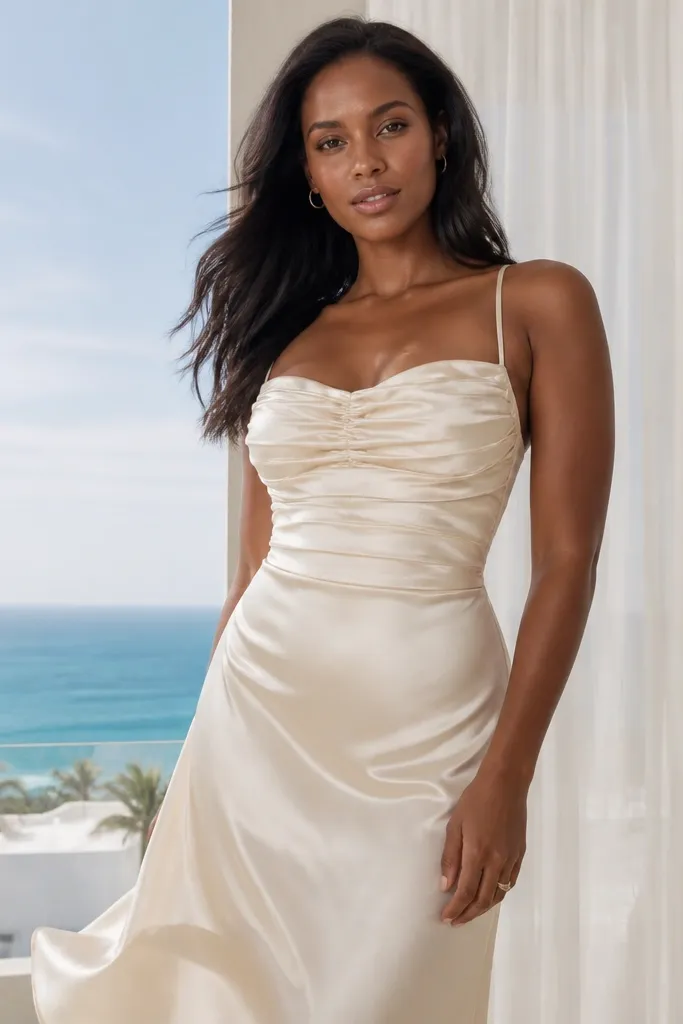
Ruching on charmeuse is flattering because it adds texture and soft volume where you want it, without heavy embellishment. A straight skirt keeps the silhouette clean, so the ruched bodice stays the focal point. Under flash, charmeuse ruche catches light in gentle waves, which looks good in both close-ups and full-body photos. This style suits wedding weekends where you want a flattering fit while keeping the overall look simple. It also works well for people who are between sizes, since ruching can smooth transitions.
Start by checking the ruche placement across the bust — it should not pull fabric tight across the nipples or create wrinkles at the center. Then take photos front-on and angled at 45 degrees to see how the ruche catches light. Finally, ask whether the skirt has enough ease at the hips so it doesn’t tug when you walk. Plan this after a fitted crepe dress so you can compare how ruche vs smooth bodice feels over the day.
If ruching looks bumpy in the mirror, it will look worse in flash — pick smoother ruche panels.
Avoid ruched bodices that feel too stretchy — they can sag after a few hours.
19. Silk Satin with Feather-Light Layered Skirt
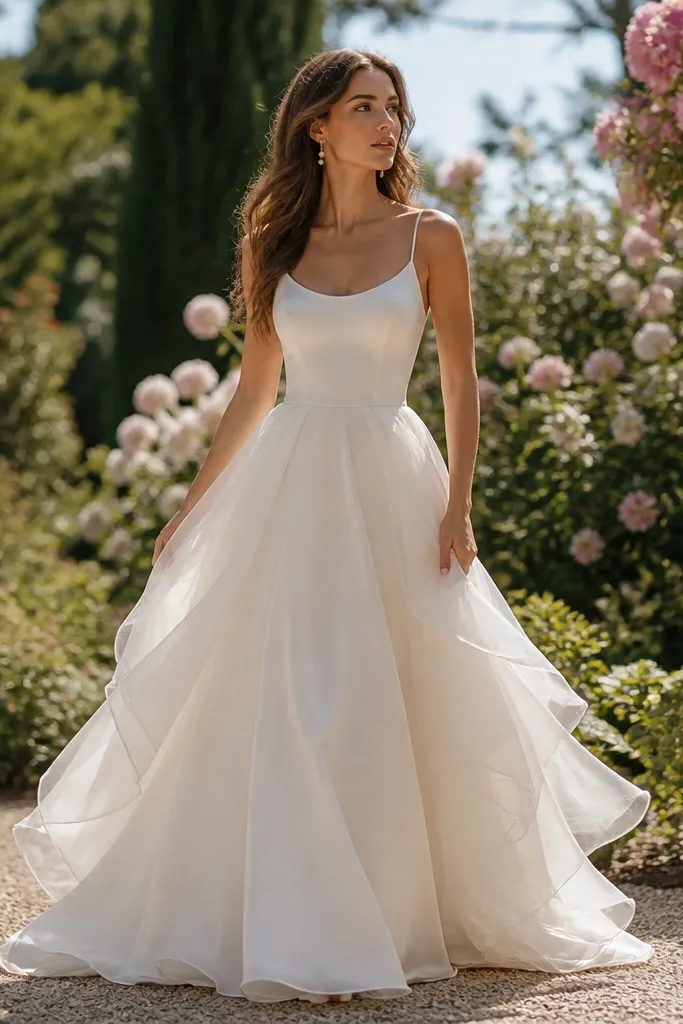
Layering is what makes this style look airy and expensive without going full tulle. The satin layers move separately, so in photos you see depth instead of a single flat skirt. This is a strong choice if you want “soft glam” for an evening ceremony or reception line. Under natural light, the layers create a subtle shimmer that reads bridal. Under flash, the thin layers can glow if they’re properly lined and not too sheer.
Start by checking whether the layers are attached at the waist or floating — floating layers can twist in photos. Then photograph the skirt while you take two steps forward, because layered movement shows the look best. Finally, ask about lining and underlayer thickness so the skirt doesn’t cling. Budget tip: choose a dress with fewer layers if you’re short on time for alterations; complicated layering takes longer to hem.
Bring a lint roller — layered satin picks up lint and it shows in close-up photos.
Skip this if the layers are too sheer — you’ll see under-skirt lines in flash.
20. Silk Crepe Tea-Length with Tie-Back Bow
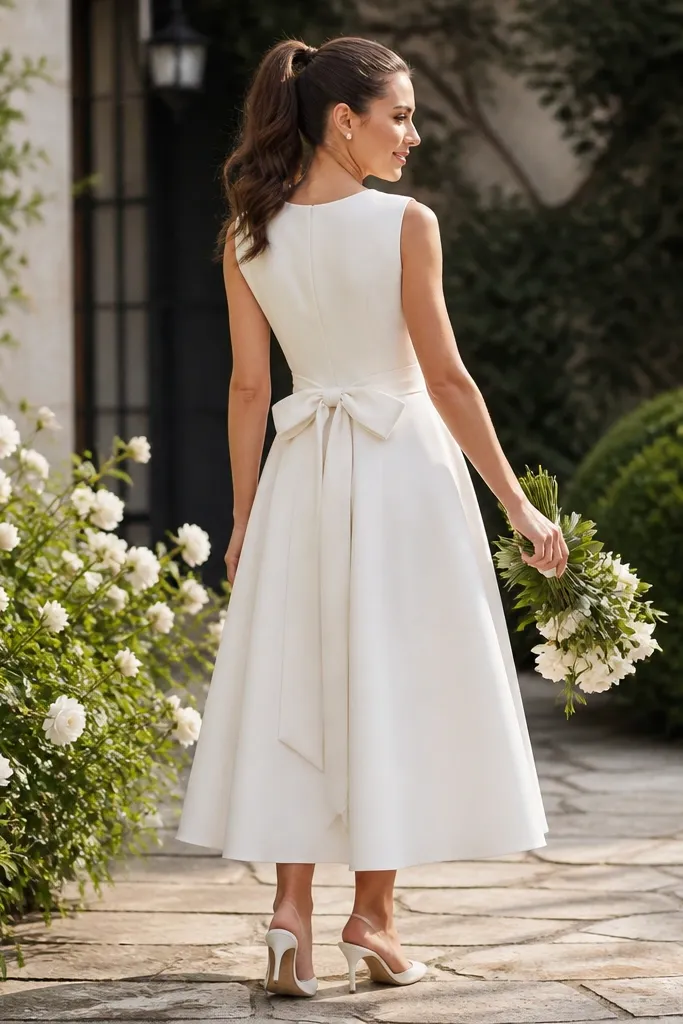
Start by checking the bow size — it should be proportionate to your back, not so big it overwhelms your silhouette. Then take back photos in window light and flash to confirm the bow edges stay smooth. Finally, ask whether the tie-back can be adjusted enough for wedding-day swelling. Budget tip: prioritize back fit, because altering a tea-length bow area is time-consuming.
A tie-back bow is a photo detail that reads clearly from behind and feels playful without turning casual. Tea-length crepe keeps the front clean and flattering, while the bow adds personality for ceremony exits and candid moments. Crepe’s matte finish helps the bow look crisp in photos instead of looking glossy or shiny. This style is a great choice for destination wedding weekends where you want something comfortable for dinner and easy to pack. It also works well for micro-weddings where the dress is the main visual focus.
Skip thisAvoid tie-backs that leave too much slack — they can shift during walking.
Quick tipPractice tying the bow once at the fitting so you know you can do it quickly later.
21. Silk Satin Column with Hand-Finished Button Back
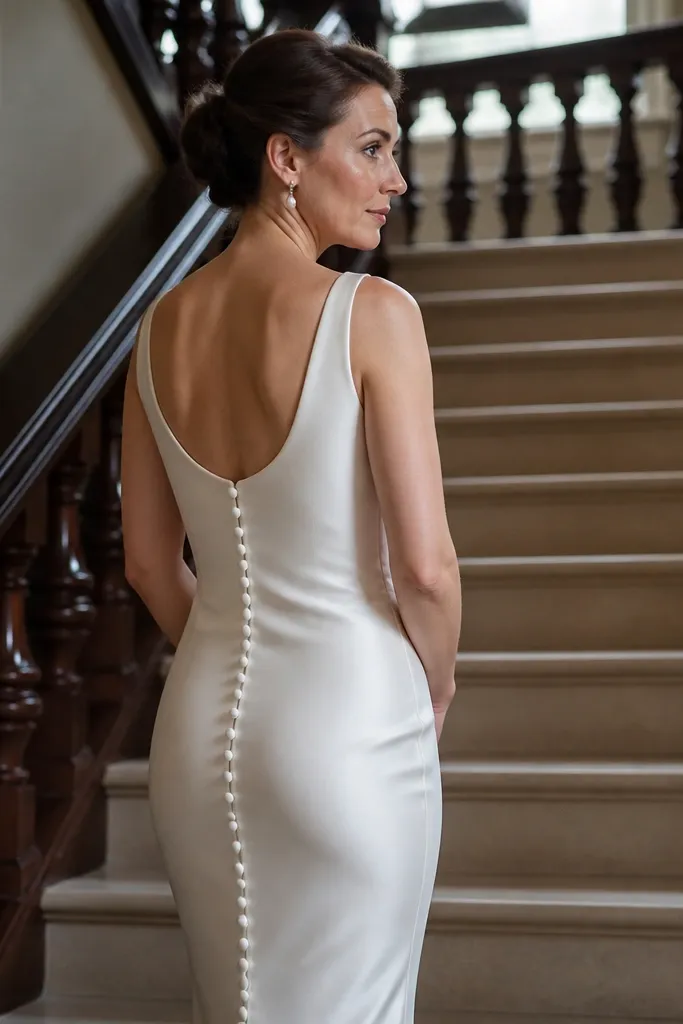
Button backs make a dress feel special in a way that’s obvious in photos. A satin column with a button back gives you a clean front while the back detail becomes the focal point during portraits. This is a strong option if you want something timeless but not plain. Satin’s sheen gives the column a smooth, bridal glow, and the buttons add texture that looks good under flash. It’s also practical for wedding weekends because button backs allow fine fit adjustments before alterations are finalized.
Start by checking how the buttons align at the center back — the line should be straight, not angled. Then photograph from behind at two distances so you see both the button detail and the column shape. Finally, ask if the dress has a hidden inner closure so it stays secure when you move. Budget tip: if you’re buying off the rack, ask whether buttons can be re-seated after hemming.
Bring a small white cloth and gently press the fabric before photos if the satin shows fold lines.
Skip button backs with bulky seams — they can create visible ridges in flash.
22. Silk Charmeuse Sheath with Embroidered V Neck
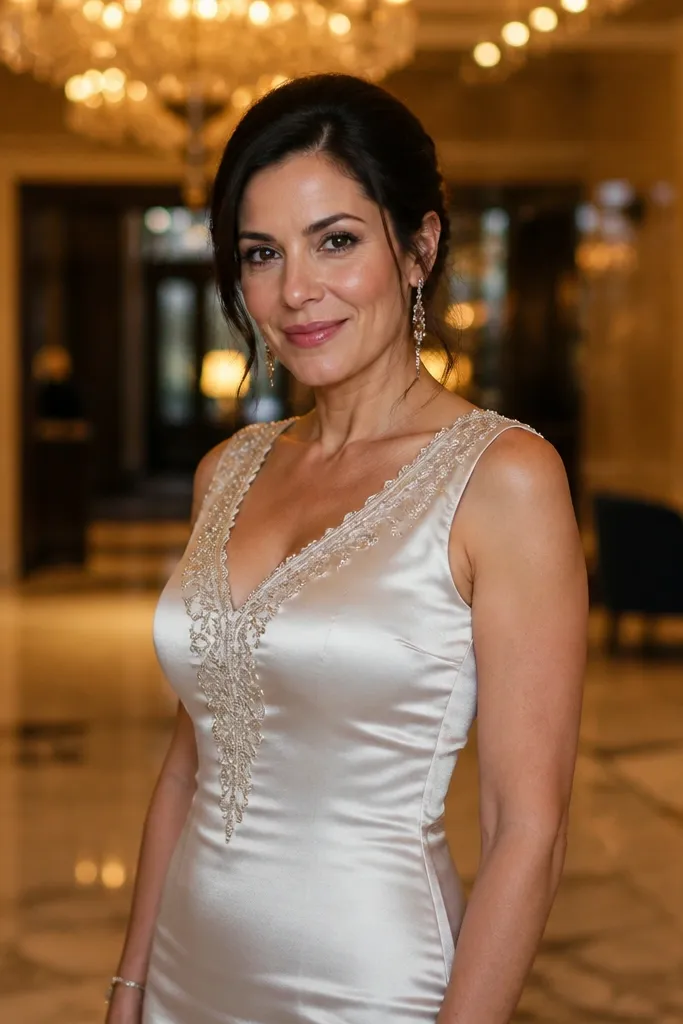
Start by checking embroidery placement: it should follow the neckline line and not twist on the bust. Then take close photos of the V neck and a full-length photo to confirm the sheath silhouette stays smooth. Finally, ask about lining so the embroidery doesn’t cast dark shadows through the fabric. Budget tip: if embroidery is concentrated on the neckline, alterations are usually simpler than dresses with heavy all-over beadwork.
A charmeuse sheath with embroidered V neck is a clean way to add bridal detail without turning the whole dress into lace. The embroidery catches light in a controlled way, while the charmeuse keeps the body sleek. This style suits wedding weekends when you want a dress that looks good in portraits up close and still reads elegant in full-length shots. It also works for people who don’t want a big skirt but want a little “wow” at the neckline. Under flash, the embroidery adds dimension so the dress doesn’t look flat.
Skip thisDon’t choose embroidery that puckers the fabric — it will show every wrinkle in flash.
Quick tipAvoid thick thread embroidery that feels scratchy — you’ll feel it all day during hugs and photos.
23. Silk Crepe with Fitted Bodice and Draped Overlay Skirt
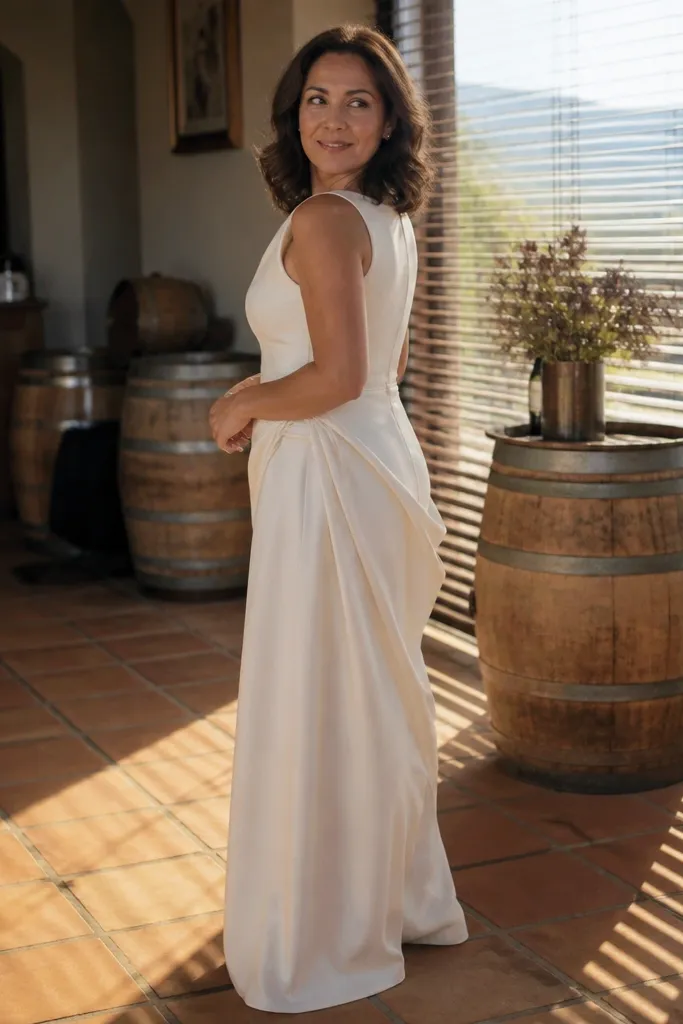
Start by checking drape weight: the overlay should fall smoothly, not stick out away from your body. Then photograph from the side and from a slight front angle to see how the folds read on camera. Finally, ask whether the drape is attached securely at the waist; loose overlays shift and can look messy in candid shots. Budget tip: choose this when you want a single statement piece instead of multiple decorative elements.
Draped overlays add drama without adding bulk, and crepe keeps everything looking sharp. The fitted bodice pulls focus upward, while the draped skirt creates soft folds that photograph with depth. This style is great for wedding weekends when you want a dress that looks different as you turn — portraits will have variety without needing extra accessories. In indoor lighting, crepe’s matte finish keeps the folds from looking shiny or greasy. It’s a good pick for ceremony-to-reception transitions because it photographs well from both front and side angles.
Skip thisSkip drapes that look beautiful only when standing still — they’ll shift when you walk.
Quick tipIf the overlay has a tendency to slip, ask for a small inner tack point at the waist.
24. Silk Satin Mermaid with Off-Center Waist Seam
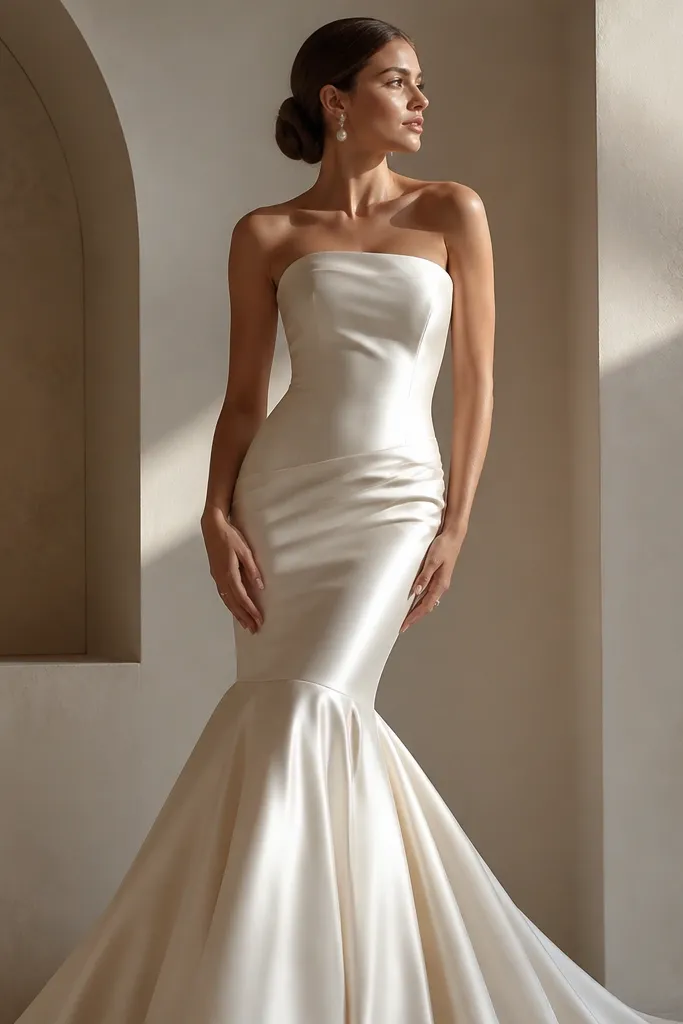
Start by looking at the seam alignment in a mirror — the off-center line should create a gentle diagonal curve, not a weird kink. Then take a side photo and a back photo to confirm the mermaid flare starts at your ideal spot. Finally, ask whether the satin has enough lining so the seam doesn’t telegraph through. Budget tip: mermaids need hemming precision, so plan this as one of your later try-ons after you’ve picked your shoes.
An off-center waist seam is an aesthetic trick that makes the silhouette look sculpted in photos. In satin, the seam line catches light subtly, which helps define shape without adding lace or heavy beading. The mermaid cut shows off legs, and the seam placement can help create a flattering visual curve. This dress is best for wedding weekends where you’re doing formal portraits and you want one strong, camera-ready silhouette. Under flash, the seam line adds structure so the dress reads clean even in high-contrast lighting.
Skip thisAvoid satin mermaid seams that pull tight at the waist — it will look wrinkled in photos.
Quick tipChoose a seam placement that looks good even when you relax — don’t rely on a posed posture.
25. Silk Crepe with High Neck and Keyhole Back
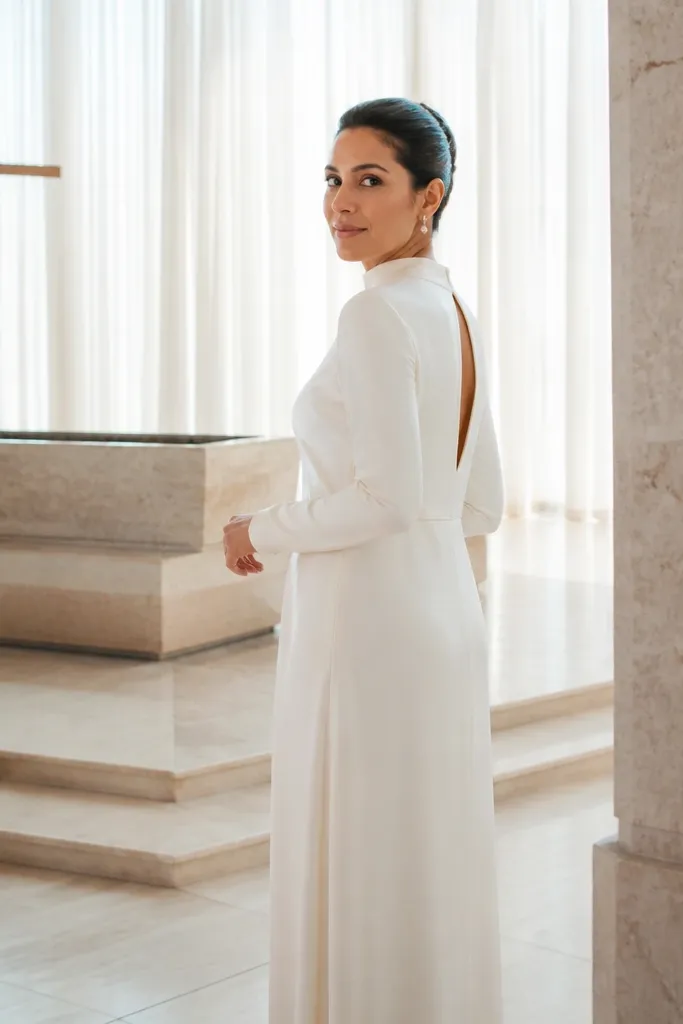
High neck crepe gives you a timeless silhouette that photographs well in both close-ups and wider shots. The keyhole back adds a modern detail without opening up the whole back. Crepe’s matte finish keeps the dress from reflecting too much light, which is helpful in venues with bright overhead fixtures. This style suits wedding weekends where the ceremony is more formal or you want coverage but still want a sleek, clean look. It also reads beautifully in evening portraits because the neckline stays crisp in flash.
Start by checking the neck fit: the high neck should not gap at the collar or sit too tight across the throat. Then take a photo from the front and from the back so you can see how the keyhole aligns with your spine. Finally, ask about back closure — the keyhole should look neat without twisting. Budget tip: crepe high neck dresses can be alteration-friendly if the bodice is lined and the neck band is stable.
If your venue has strong lights, test under them — high neck crepe is forgiving, but gapping is not.
Skip a high neck that collapses when you move — it will look off in candid photos.